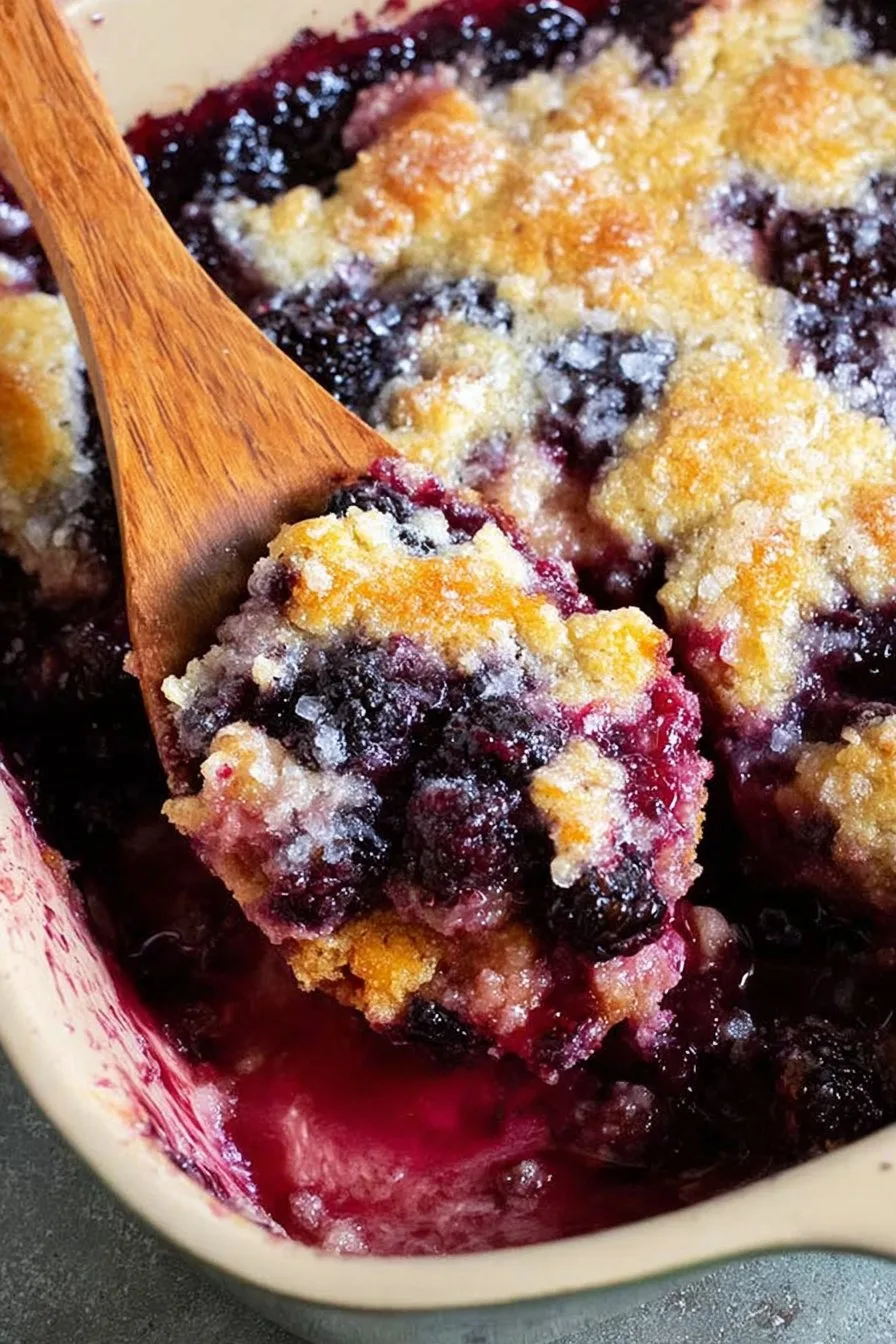
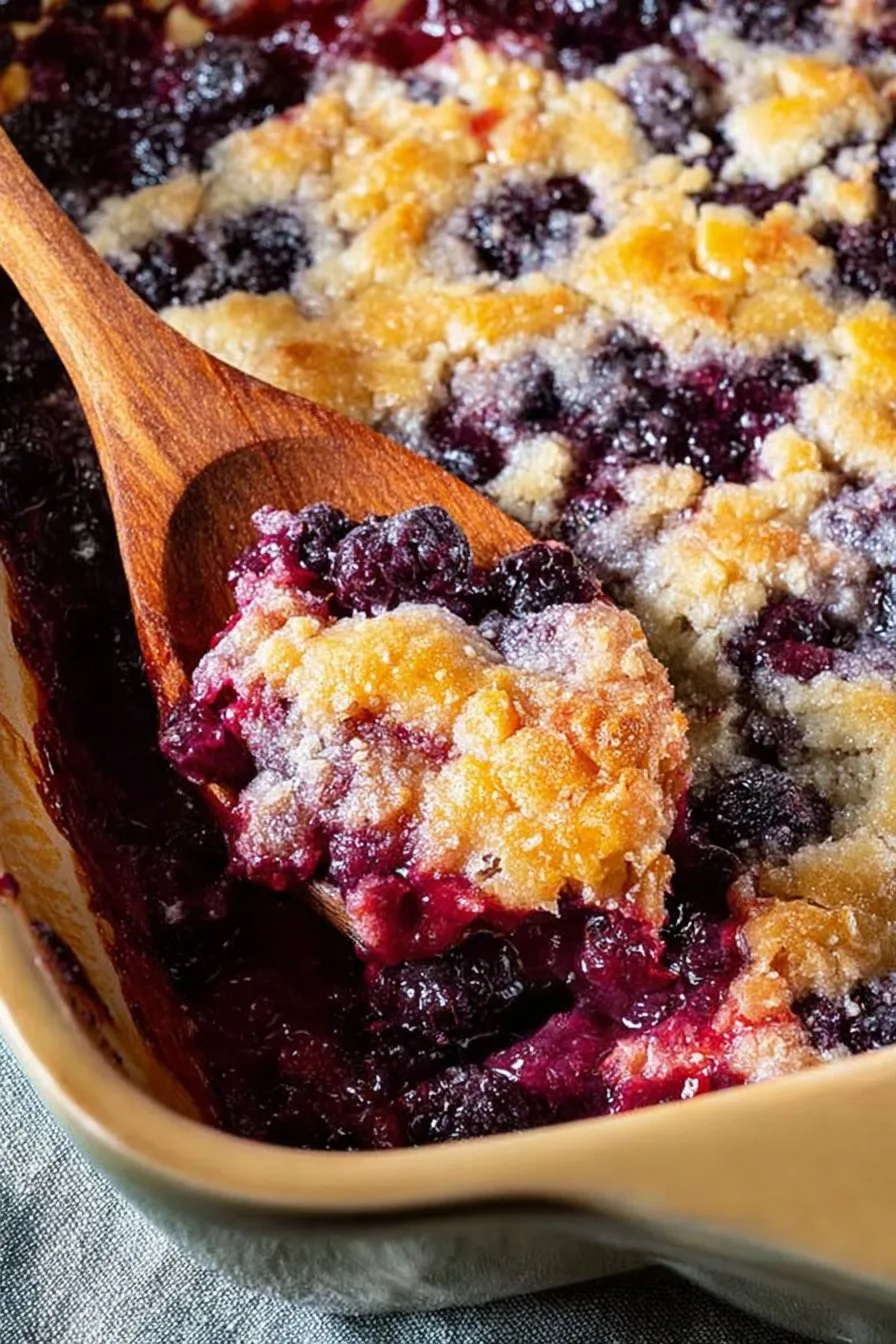
Honestly, This Cobbler Means Summer To Me
You ever taste something and it just zaps you straight back to a hot, sticky July at your grandma’s? That’s this blackberry cobbler. The Pioneer Woman’s recipe is hands-down my favorite, even if my first attempt was a bit of a… let’s call it learning experience. But hey, we ate every crumb, weird shape and all. I still remember plopping down on the porch steps, bowl warm in my lap, trying to keep the ice cream from turning my cobbler into soup in the Oklahoma heat. If you’ve never made this, you’re in for a treat (trust me, even the blackberry skeptics in my house love it now).
Why I Keep Coming Back To This Cobbler
I make this when I want to impress my in-laws, or honestly, just when I’ve had a long week and need something simple but magical. My family goes nuts for it—my oldest claims she can smell it baking from the backyard (not sure if I believe her, but she’s got a nose for dessert). I love that it’s pretty much foolproof, even if you haven’t been blessed by the baking gods. And listen, if you forget to buy fresh berries? Frozen ones work fine. Once, I even used half raspberries by accident—nobody noticed. One thing though: you’ll want to grab vanilla ice cream. I tried whipped cream once, and it was… fine, but not the same! (And, if your oven runs hot like mine, you’ll want to keep an eye on those edges!)
What You’ll Need (and a Few Lazy Swaps)
- 1 cup self-rising flour (if you only have all-purpose, just add 1 1/2 tsp baking powder and a pinch of salt—I’ve done this in a pinch, no shame)
- 1 cup sugar, plus extra for sprinkling (granulated is fine; sometimes I use a mix of brown and white for a hint of caramel)
- 1 cup milk (whole is best, but I’ve used 2% and even oat milk—works in a pinch)
- 1/2 cup (1 stick) unsalted butter, melted (salted butter adds a lil extra flavor, so don’t sweat it)
- 2 cups fresh blackberries (or frozen if that’s what you’ve got—just don’t thaw them first)
- Optional: lemon zest or a squeeze of juice for brightness. My grandmother swore by it, but sometimes I forget and it’s still great.
How I Make It (With a Few Tangents)
- Preheat your oven to 350°F (or whatever temp your oven claims is 350—it’s a suggestion, not a command, right?).
- Pour the melted butter into a 9×13 baking dish. I used to carefully grease the pan first; honestly, it doesn’t make a lick of difference.
- In a medium bowl, whisk together the flour and 1 cup sugar. Pour in milk and mix until mostly smooth—don’t go wild here, lumps are totally fine. This is usually when I sneak a tiny taste (shh).
- Pour the batter right over the butter, but don’t stir! It’s supposed to look like a buttery mess at this stage.
- Tumble the blackberries evenly over the top. I try to resist pressing them in, but sometimes they bounce around like they’ve got a mind of their own. Sprinkle a little extra sugar on top, and if you’re feeling wild, a dust of lemon zest.
- Bake for 45 minutes to an hour. It’s done when the top is golden and a toothpick in the center comes out clean-ish. If the edges get a little brown, that’s flavor! (But cover them with foil if they’re getting too wild.)
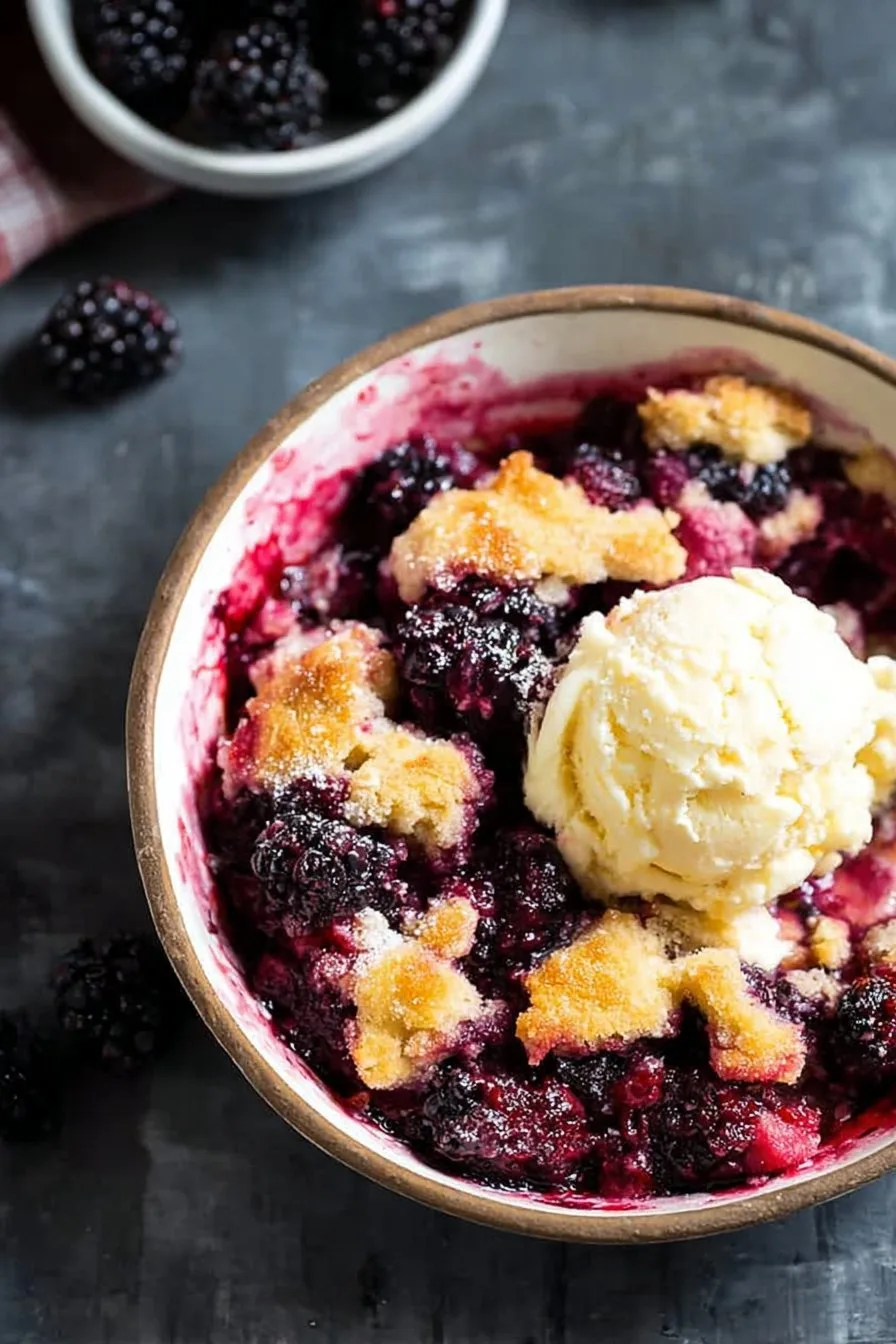
- Cool for 10-15 minutes. Or, if you’re like us, burn your tongue because you just can’t wait. Serve warm with ice cream—my cousin swears by vanilla bean, and honestly, she’s not wrong.
A Few Notes I Learned The Hard Way
- I once tried doubling the fruit. Don’t. It gets soggy, and the batter doesn’t bake right. More isn’t always better!
- If your blackberries are super tart, toss them in a spoonful of sugar first—otherwise, you might get a pucker face at first bite.
- Actually, I find it works better if you don’t stir the butter into the batter at all. It looks weird but trust the process.
Some Experiments (Not All Were Genius)
- I swapped in peaches once—delicious, though it’s more like a different dessert.
- Tried adding cinnamon. Would not recommend (the flavors just fight each other; maybe someone will prove me wrong?).
- I’ve also mixed blueberries and blackberries—big win. Go wild, but maybe don’t use apples. That was… strange.
What If You Don’t Have Every Gadget?
You don’t need fancy tools. Mixing bowl, whisk or fork, and a 9×13 baking dish. I once made this in a big cast iron skillet at a campout, worked fine—just watch the baking time, it was a smidge quicker. And if you only have a smaller pan, just don’t fill it to the brim (ask me how I know).
How Long Does It Keep? (Spoiler: Not Long!)
Store leftovers in the fridge, covered. They’re still good cold, but if you zap a slice in the microwave for 15-20 seconds, it perks right up. I think this tastes better the next day, but honestly, in my house it never lasts more than a day—maybe two if I hide a piece in the back (not that I’d ever do that…)
How We Serve It (And An Odd Tradition)
Scoop it up warm, pile on the vanilla ice cream, and—if you’re my uncle—pour a splash of cold milk over the whole thing. Supposedly it’s a Texas thing? I was skeptical, but hey, it’s oddly refreshing. Sometimes, if there’s any left for breakfast (rarely), I’ll eat it cold with coffee. Not exactly health food, but it’s happiness in a bowl.
Things I Wish I’d Known (So You Don’t Learn The Hard Way)
- Don’t rush the cooling time. I tried serving it straight from the oven and the insides ran everywhere. Patience is a virtue, apparently.
- Also, don’t skimp on butter. I once tried using less to be “healthy” and it just wasn’t the same—go for the real thing here.
- One last thing: clean-up is easier if you soak the dish right away. Otherwise that golden crust is like glue.
FAQ—Real Questions From Friends (And a Few Neighbors)
- Can I use other berries? Absolutely! Blueberries or raspberries work great. Strawberries go a bit mushy but still tasty. I have a friend who swears by a cherry-blackberry mix, and now I’m curious.
- Is it gluten-free? Not as written, but I’ve had decent luck with King Arthur’s GF measure-for-measure flour. Turns out a little denser, but hey, still delicious.
- What if I don’t have self-rising flour? No worries—just use all-purpose and add 1 1/2 tsp baking powder and a pinch of salt. (I actually do this most of the time!)
- Can I prep it ahead? Sort of—mix the batter and melt the butter, then toss together just before baking. But fresh-baked is best.
- Why did my cobbler turn out soggy? Happens to the best of us! Usually too much fruit or the berries were extra juicy. Try draining them a bit next time. Or, just embrace the goo.
- If you want another take, here’s the original recipe on The Pioneer Woman (though mine’s a bit more lived-in).
- And, if you want more ways to use up summer fruit, I’ve leaned on Smitten Kitchen’s cobbler tips more times than I can count.
So there you have it. The Pioneer Woman’s Blackberry Cobbler, messy edges and all. Go ahead and make it yours—just watch out for that first bite, it’s hotter than a goat’s butt in a pepper patch!
Ingredients
- 2 cups fresh blackberries
- 1 cup granulated sugar, divided
- 1 cup all-purpose flour
- 1 cup whole milk
- 1/2 cup unsalted butter, melted
- 2 teaspoons baking powder
- 1/4 teaspoon salt
- 1 teaspoon vanilla extract
Instructions
-
1Preheat the oven to 350°F (175°C). Grease a 9×9-inch baking dish.
-
2In a mixing bowl, combine flour, 3/4 cup sugar, baking powder, and salt. Stir in milk and vanilla extract until smooth.
-
3Pour the melted butter into the prepared baking dish. Pour the batter over the butter without stirring.
-
4Sprinkle blackberries evenly over the batter. Top with the remaining 1/4 cup sugar.
-
5Bake for 45-50 minutes, or until the top is golden brown and the cobbler is set. Let cool slightly before serving.
CLICK FOR NUTRITION INFO
↑
Approximate Information for One Serving
Serving Size:
1 serving
Calories:
260 caloriescal
Protein:
3gg
Fat:
9gg
Saturated Fat:
0g
Trans Fat:
0g
Cholesterol:
0mg
Sodium:
0mg
Potassium:
0mg
Total Carbs:
43gg
Fiber:
0g
Sugar:
0g
Net Carbs:
0g
Vitamin A:
0
Vitamin C:
0mg
Calcium:
0mg
Iron:
0mg
Nutrition Disclaimers
Number of total servings shown is approximate. Actual number of servings will depend on your preferred portion sizes.
Nutritional values shown are general guidelines and reflect information for 1 serving using the ingredients listed, not including any optional ingredients. Actual macros may vary slightly depending on specific brands and types of ingredients used.
To determine the weight of one serving, prepare the recipe as instructed. Weigh the finished recipe, then divide the weight of the finished recipe (not including the weight of the container the food is in) by the desired number of servings. Result will be the weight of one serving.
Did you make this recipe?
Please consider Pinning it!!