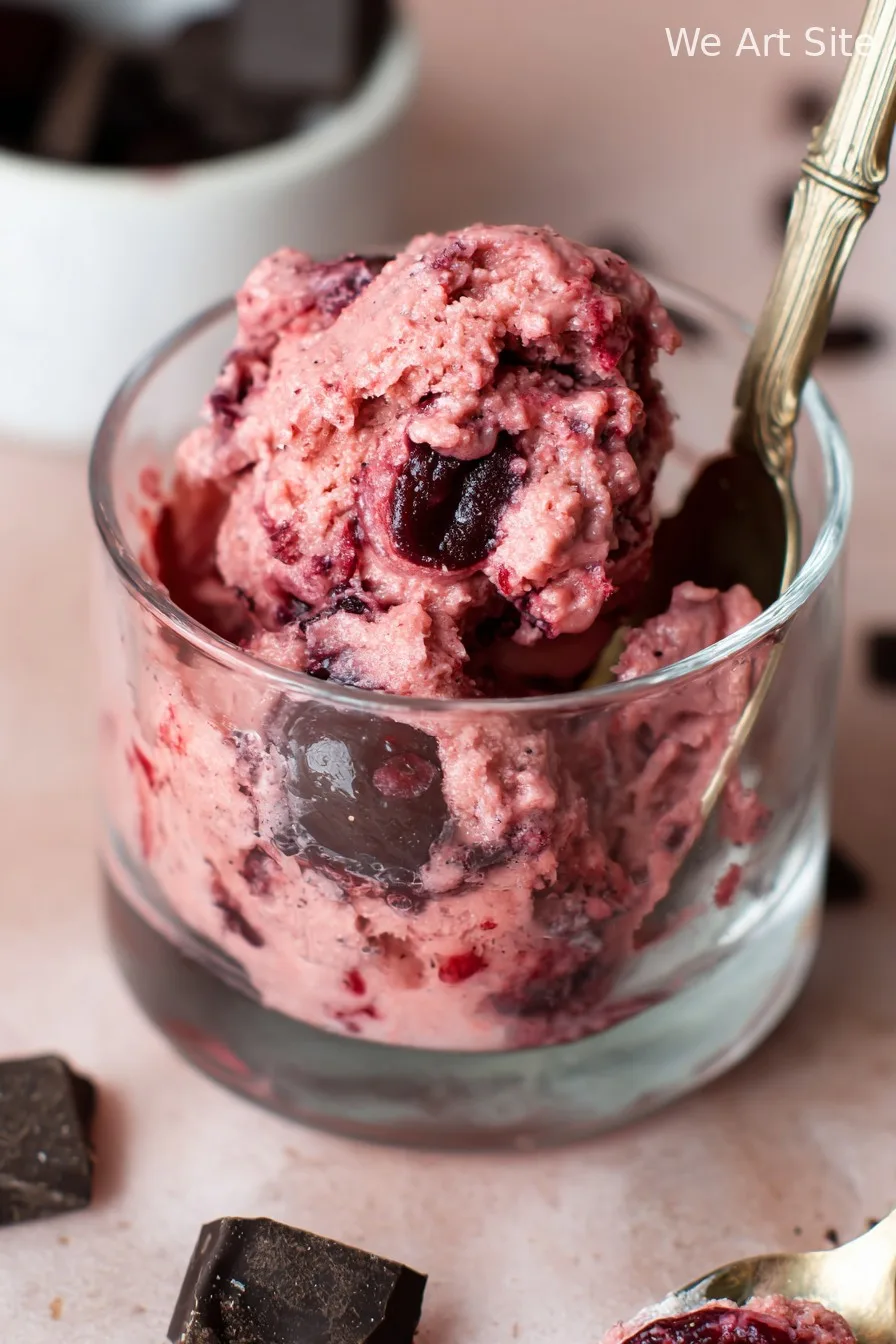
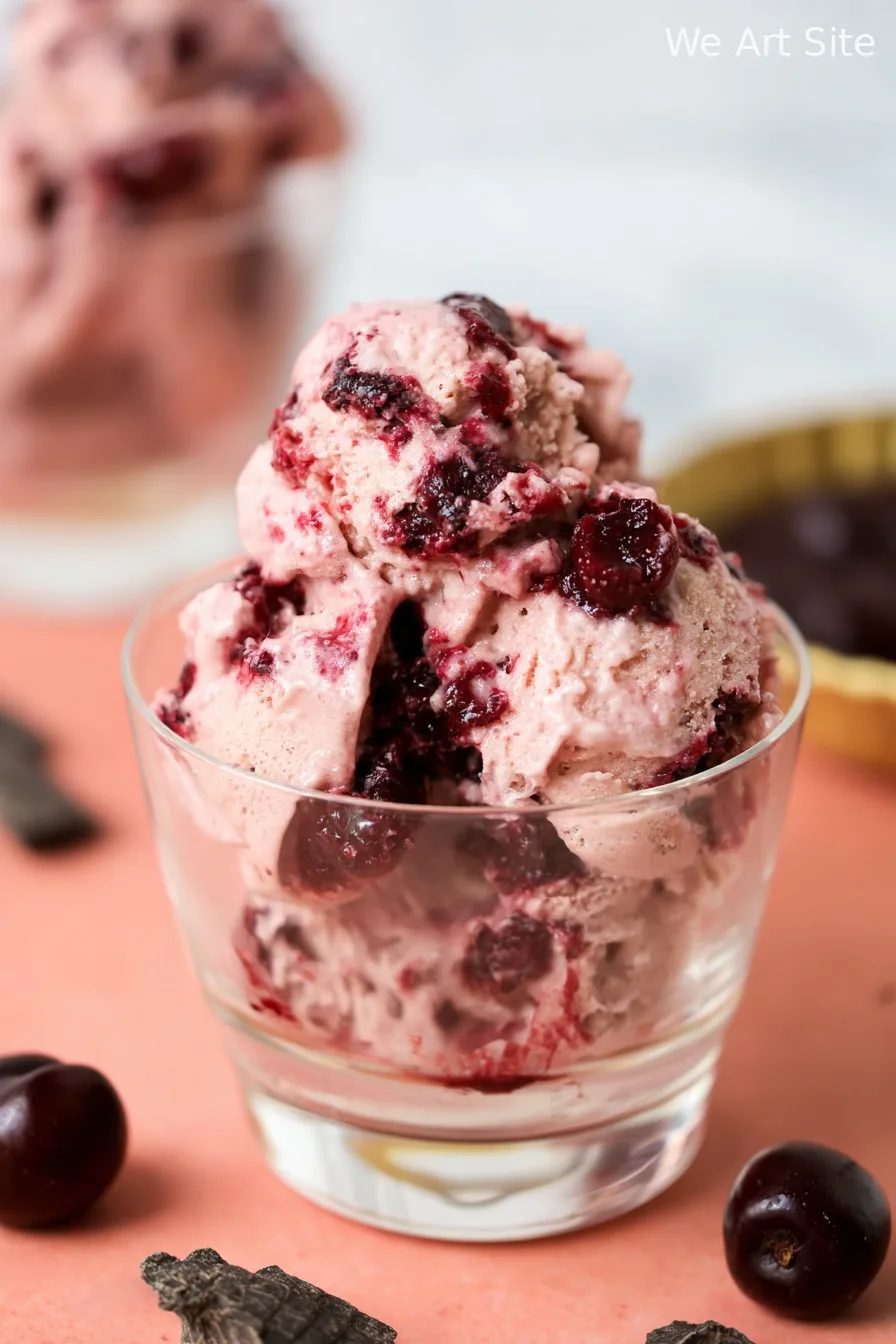
Hey y’all! If you’re searching for a sweet, dreamy treat that captures the flavors of your favorite ice cream—without the dairy—this Cherry Garcia Nice Cream (Vegan) is your go-to recipe. It’s irresistibly creamy, naturally sweet, and loaded with juicy cherries and chocolatey bits, making it perfect for summer nights or anytime you crave guilt-free indulgence. No ice cream maker needed, and you’ll be enjoying a scoop in no time. Let’s get cooking!
Why You’ll Love This
- It’s 100% vegan, gluten-free, and refined-sugar free—a healthy twist on a classic favorite.
- Naturally sweet and creamy with ripe bananas, delivering delicious texture and taste.
- Just five minutes of prep and a handful of easy-to-find ingredients.
- Customizable and perfect for cooling off on warm days or treating yourself to a late-night snack.
- No need for special equipment—just a blender or food processor!
Ingredients
- 4 large ripe bananas, sliced and frozen
- 1 cup frozen cherries (plus extra for garnish)
- 1/4 cup unsweetened almond milk (or non-dairy milk of choice)
- 1/3 cup dark chocolate chips or chopped vegan chocolate
- 1/2 teaspoon pure vanilla extract
- Pinch of sea salt
Directions
Step 1: Blitz the Bananas
Add the frozen banana slices to a high-speed blender or food processor. Pulse several times, scraping down the sides as needed, until the bananas become crumbly.
Step 2: Add Cherries & Blend
Add the frozen cherries, almond milk, vanilla extract, and a pinch of sea salt. Blend until the mixture is thick and creamy—about 1-2 minutes. Add more almond milk, 1 tablespoon at a time, if needed for smooth blending.
Step 3: Add Chocolate
Once the base is creamy, gently fold in the chocolate chips or chopped vegan chocolate. Pulse briefly so you get chocolate bits throughout, but don’t over-process.
Step 4: Serve or Freeze
Scoop the nice cream into bowls for a soft-serve texture, or transfer to a loaf pan, cover, and freeze for 1-2 hours for a firmer, scoopable treat.
Notes
- Use super-ripe bananas for maximum sweetness and the creamiest result.
- If your blender struggles, allow bananas to thaw for 5 minutes before processing.
- Chop cherries before adding if you prefer smaller bursts of fruit throughout.
Variations
- Mint Chip: Swap cherries for mint extract and add extra chocolate chips for a refreshing twist.
- Berry Bliss: Replace cherries with a mix of frozen berries for a tangy blend.
- Chunky Monkey: Add a spoonful of peanut butter and walnuts instead of cherries and chocolate.
Required Equipment
- High-speed blender or food processor
- Spatula
- Loaf pan (if freezing for firmer texture)
Storage Instructions
Transfer leftover nice cream to an airtight container and store in the freezer for up to 2 weeks. Let it sit at room temperature for 10-15 minutes before scooping for best texture.
Suggested Pairings & Serving Recommendations
- Top with extra fresh cherries and a sprinkle of chopped chocolate for a gourmet finish.
- Serve in a waffle cone or alongside vegan brownies for a decadent dessert.
- Pair with a refreshing glass of iced herbal tea or cold brew coffee.
Pro Tips
- Use a wide, shallow container for freezing nice cream to make scooping easier.
- Blend in short bursts to avoid melting and maintain a creamy, frozen texture.
- Garnish with cherry halves and chocolate shavings just before serving for visual appeal.
FAQ
- Can I use fresh cherries instead of frozen?
- Absolutely! Use pitted, halved fresh cherries and add a few extra ice cubes to keep the mixture cold and thick.
- How long does it take to make this nice cream?
- Prepping takes just 5 minutes, and total time is 10 minutes for soft-serve or 1-2 hours if you want it firmer.
- Is it necessary to use almond milk?
- Nope! Any non-dairy milk like oat, soy, or cashew works fine—just choose your favorite.
Prep time: 5 minutes
Total time: 10 minutes (soft-serve), 1-2 hours (firmer)
Ingredients
- 4 large ripe bananas, sliced and frozen
- 1 cup frozen cherries (plus extra for garnish)
- 1/4 cup unsweetened almond milk (or non-dairy milk of choice)
- 1/3 cup dark chocolate chips or chopped vegan chocolate
- 1/2 teaspoon pure vanilla extract
- Pinch of sea salt
Instructions
-
1Add the frozen banana slices to a high-speed blender or food processor. Pulse several times, scraping down the sides as needed, until the bananas become crumbly.
-
2Add the frozen cherries, almond milk, vanilla extract, and a pinch of sea salt. Blend until the mixture is thick and creamy—about 1-2 minutes. Add more almond milk, 1 tablespoon at a time, if needed for smooth blending.
-
3Once the base is creamy, gently fold in the chocolate chips or chopped vegan chocolate. Pulse briefly so you get chocolate bits throughout, but don’t over-process.
-
4Scoop the nice cream into bowls for a soft-serve texture, or transfer to a loaf pan, cover, and freeze for 1-2 hours for a firmer, scoopable treat.
CLICK FOR NUTRITION INFO
↑
Approximate Information for One Serving
Serving Size:
1 serving
Calories:
205cal
Protein:
3 gg
Fat:
7 gg
Saturated Fat:
0g
Trans Fat:
0g
Cholesterol:
0mg
Sodium:
0mg
Potassium:
0mg
Total Carbs:
38 gg
Fiber:
0g
Sugar:
0g
Net Carbs:
0g
Vitamin A:
0
Vitamin C:
0mg
Calcium:
0mg
Iron:
0mg
Nutrition Disclaimers
Number of total servings shown is approximate. Actual number of servings will depend on your preferred portion sizes.
Nutritional values shown are general guidelines and reflect information for 1 serving using the ingredients listed, not including any optional ingredients. Actual macros may vary slightly depending on specific brands and types of ingredients used.
To determine the weight of one serving, prepare the recipe as instructed. Weigh the finished recipe, then divide the weight of the finished recipe (not including the weight of the container the food is in) by the desired number of servings. Result will be the weight of one serving.
Did you make this recipe?
Please consider Pinning it!