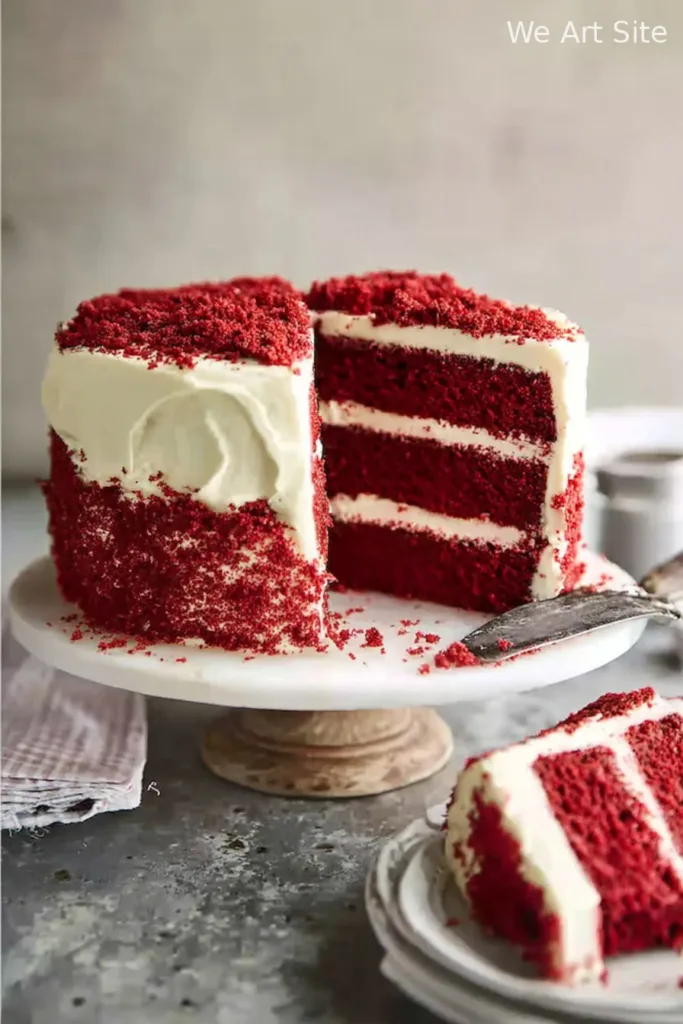
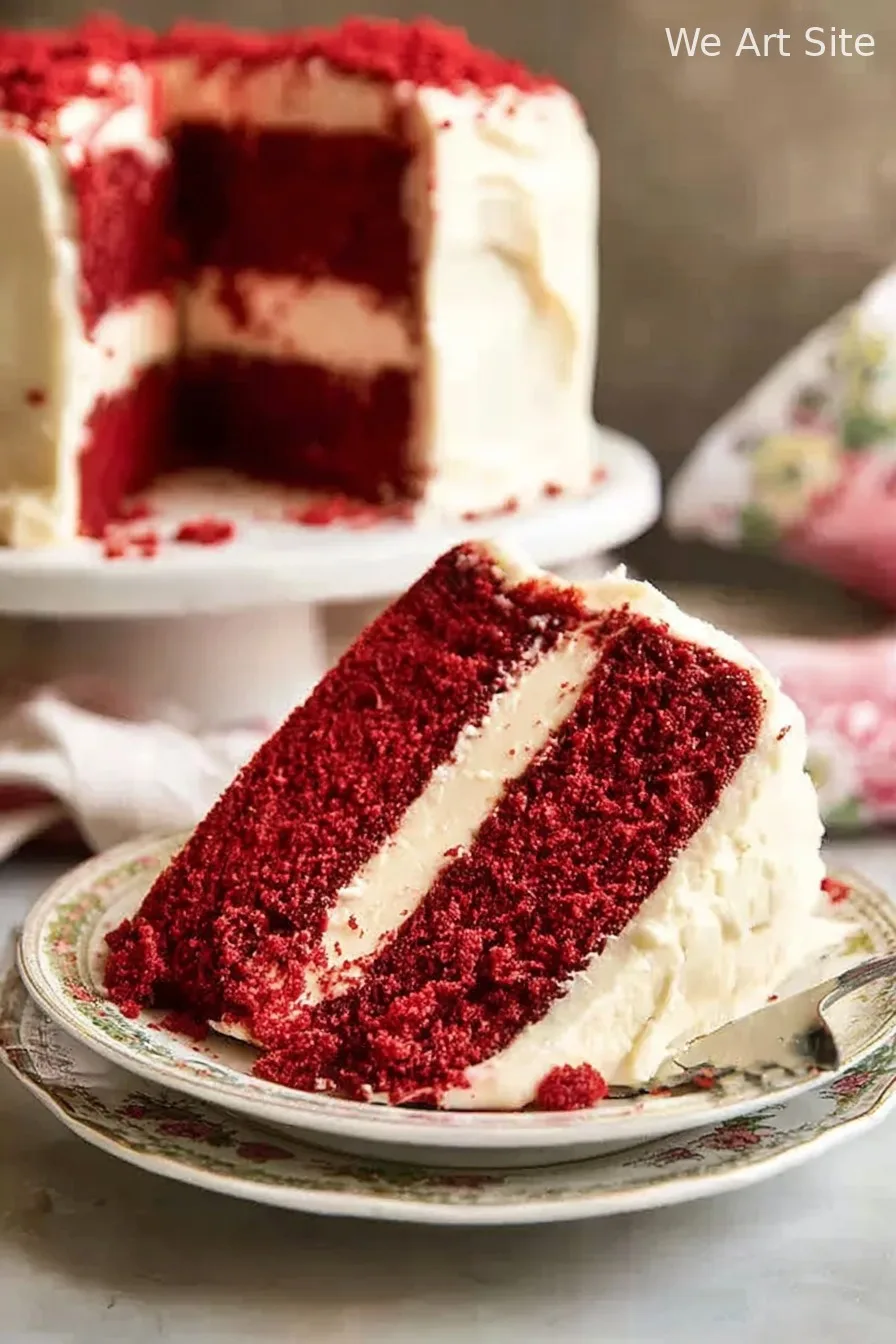
Hey y’all! If you’re in the mood for something truly indulgent that’s sure to impress at birthdays, holidays, or any celebration, this Red Velvet Cake is your dream come true. With its signature velvety crumb, hint of cocoa, and dreamy cream cheese frosting, each bite is pure comfort. Let’s get cooking!

Why You’ll Love This
- Rich, tender, and moist with a subtle cocoa flavor.
- Vibrant red color makes it a showstopper for any party or gathering.
- Cream cheese frosting pairs perfectly with the soft Cake layers.
- Easy-to-follow steps for bakery-worthy results at home.
- Keeps well for days—taste delicious even as leftovers!
Ingredients
- 2 1/2 cups (315g) all-purpose flour
- 1 1/2 cups (300g) granulated sugar
- 1 teaspoon baking soda
- 1 teaspoon fine salt
- 2 tablespoons unsweetened cocoa powder
- 1 1/2 cups (360ml) vegetable oil
- 1 cup (240ml) buttermilk, at room temperature
- 2 large eggs, at room temperature
- 2 tablespoons (30ml) red liquid food coloring
- 1 teaspoon vanilla extract
- 1 teaspoon white vinegar
- For the Cream Cheese Frosting:
- 8 oz (225g) cream cheese, softened
- 1/2 cup (115g) unsalted butter, softened
- 3 to 3 1/2 cups (360-420g) powdered sugar, sifted
- 1 teaspoon vanilla extract
- Pinch of salt
Directions
Prep the Oven and Pans
- Preheat your oven to 350°F (175°C). Grease and flour two 9-inch round Cake pans, and line the bottoms with parchment paper for easy removal.
Mix the Dry Ingredients
- In a large bowl, whisk together the flour, sugar, baking soda, salt, and cocoa powder until well mixed.
Combine the Wet Ingredients
- In another large bowl, whisk the oil, buttermilk, eggs, food coloring, vanilla, and vinegar until smooth and fully combined.
Make the Batter
- Add the dry ingredients to the wet ingredients in two parts, mixing with a spatula until just combined. Do not overmix.
Bake the Cake
- Divide batter evenly between prepared pans. Bake for 28-32 minutes, or until a toothpick inserted in the center comes out clean.
- Let cakes cool in pans for 10 minutes, then transfer to wire racks to cool completely.
Prepare the Cream Cheese Frosting
- Beat cream cheese and butter together on medium speed until creamy and smooth.
- Add the powdered sugar, vanilla, and salt; beat until fluffy, 2-3 minutes.
Assemble and Frost
- Place one cake layer on a serving plate. Spread a generous layer of frosting on top.
- Add the second layer, and frost the top and sides of the cake until covered and smooth. Decorate as desired.
Notes
- Make sure all ingredients are at room temperature for the smoothest batter and frosting.
- If you prefer, gel food coloring can be used—start with less and add to reach your desired shade.
- Overmixing the batter can make the cake dense; mix just until combined.
Variations
- Cupcakes: Divide batter among muffin tins and bake for 18-20 minutes for portable treats.
- Gluten-Free: Substitute your favorite cup-for-cup gluten-free flour blend for the all-purpose flour.
- Chocolate-Chip Red Velvet: Fold in 1 cup mini chocolate chips before baking for an extra indulgent touch.
Required Equipment
- Stand mixer or hand mixer
- Mixing bowls
- Measuring cups and spoons
- Two 9-inch round cake pans
- Rubber spatula and offset spatula
- Wire cooling rack
Storage Instructions
Store leftover cake, covered, in the refrigerator for up to 4 days. Bring slices to room temperature for the best flavor and texture before serving. You can also freeze unfrosted cake layers tightly wrapped for up to 2 months; thaw and frost before serving.
Suggested Pairings & Serving Recommendations
- Serve with fresh berries or a sprinkle of white chocolate curls for extra elegance.
- Pair with coffee, milk, or a cold glass of bubbly for a festive touch.
- Add a drizzle of chocolate sauce or whipped cream for an over-the-top treat.
Pro Tips for Best Results
- Let cakes cool completely before frosting to prevent the frosting from melting.
- Level your cakes before stacking for a polished, professional look.
- For extra moistness, use cake strips around your pans to keep layers flat and even.
Frequently Asked Questions
Can I make Red Velvet Cake in advance?
Absolutely! Bake cake layers ahead, wrap in plastic wrap, and refrigerate up to 2 days or freeze up to 2 months before frosting.
What can I use instead of buttermilk?
Mix 1 cup milk with 1 tablespoon lemon juice or vinegar, stir, and let sit for 5 minutes. Use as a buttermilk substitute.
Is the food coloring necessary?
While optional, the red coloring gives Red Velvet Cake its iconic look. Without it, the cake will taste the same but have a natural cocoa hue.
Prep time: 25 minutes | Bake time: 30 minutes | Total time: 1 hour 15 minutes
Ingredients
- 2 1/2 cups all-purpose flour
- 1 1/2 cups granulated sugar
- 1 teaspoon baking soda
- 1 teaspoon cocoa powder
- 1 teaspoon salt
- 2 large eggs
- 1 1/2 cups vegetable oil
- 1 cup buttermilk
- 2 tablespoons red food coloring
- 1 teaspoon vanilla extract
- 1 teaspoon white vinegar
- 8 oz cream cheese (for frosting)
- 1/2 cup unsalted butter (for frosting)
- 4 cups powdered sugar (for frosting)
Instructions
-
1Preheat oven to 350°F (175°C). Grease and flour two 9-inch round cake pans.
-
2In a large bowl, whisk together flour, granulated sugar, baking soda, cocoa powder, and salt.
-
3In another bowl, beat eggs, then add vegetable oil, buttermilk, red food coloring, vanilla extract, and white vinegar. Mix well.
-
4Gradually add the wet ingredients to the dry ingredients, mixing until just combined. Divide batter evenly between the prepared pans.
-
5Bake for 30-35 minutes, or until a toothpick inserted into the center comes out clean. Cool cakes in pans for 10 minutes, then transfer to wire racks to cool completely.
-
6For the frosting, beat cream cheese and butter until smooth. Gradually add powdered sugar and mix until fluffy. Frost cooled cake layers and serve.
CLICK FOR NUTRITION INFO
↑
Approximate Information for One Serving
Serving Size:
1 serving
Calories:
420 caloriescal
Protein:
4 gg
Fat:
22 gg
Saturated Fat:
0g
Trans Fat:
0g
Cholesterol:
0mg
Sodium:
0mg
Potassium:
0mg
Total Carbs:
55 gg
Fiber:
0g
Sugar:
0g
Net Carbs:
0g
Vitamin A:
0
Vitamin C:
0mg
Calcium:
0mg
Iron:
0mg
Nutrition Disclaimers
Number of total servings shown is approximate. Actual number of servings will depend on your preferred portion sizes.
Nutritional values shown are general guidelines and reflect information for 1 serving using the ingredients listed, not including any optional ingredients. Actual macros may vary slightly depending on specific brands and types of ingredients used.
To determine the weight of one serving, prepare the recipe as instructed. Weigh the finished recipe, then divide the weight of the finished recipe (not including the weight of the container the food is in) by the desired number of servings. Result will be the weight of one serving.
Did you make this recipe?
Please consider Pinning it!!