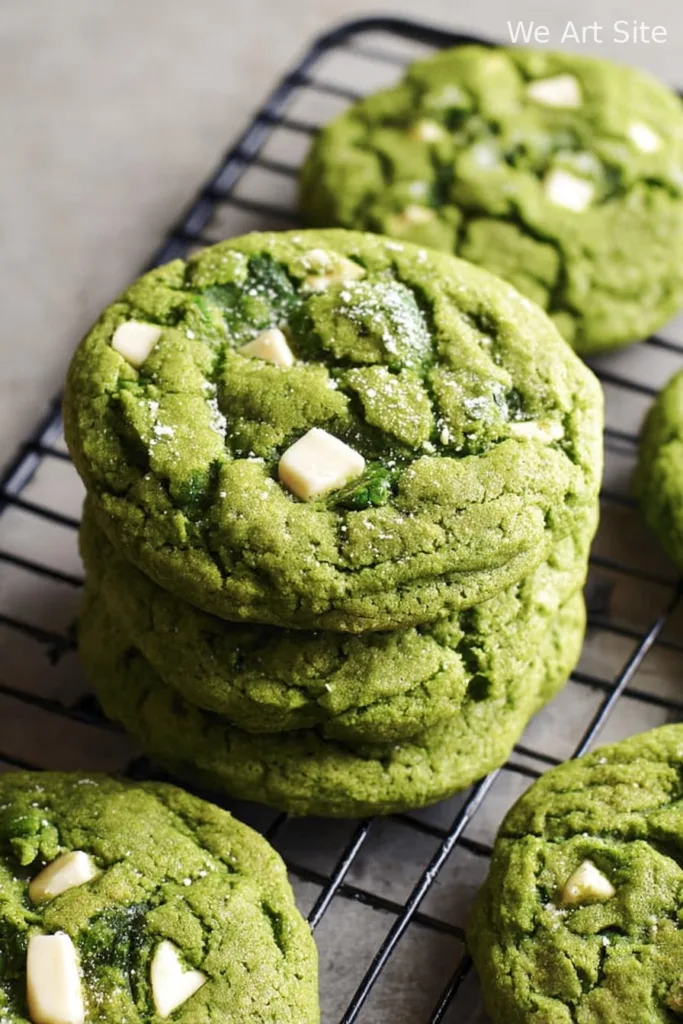
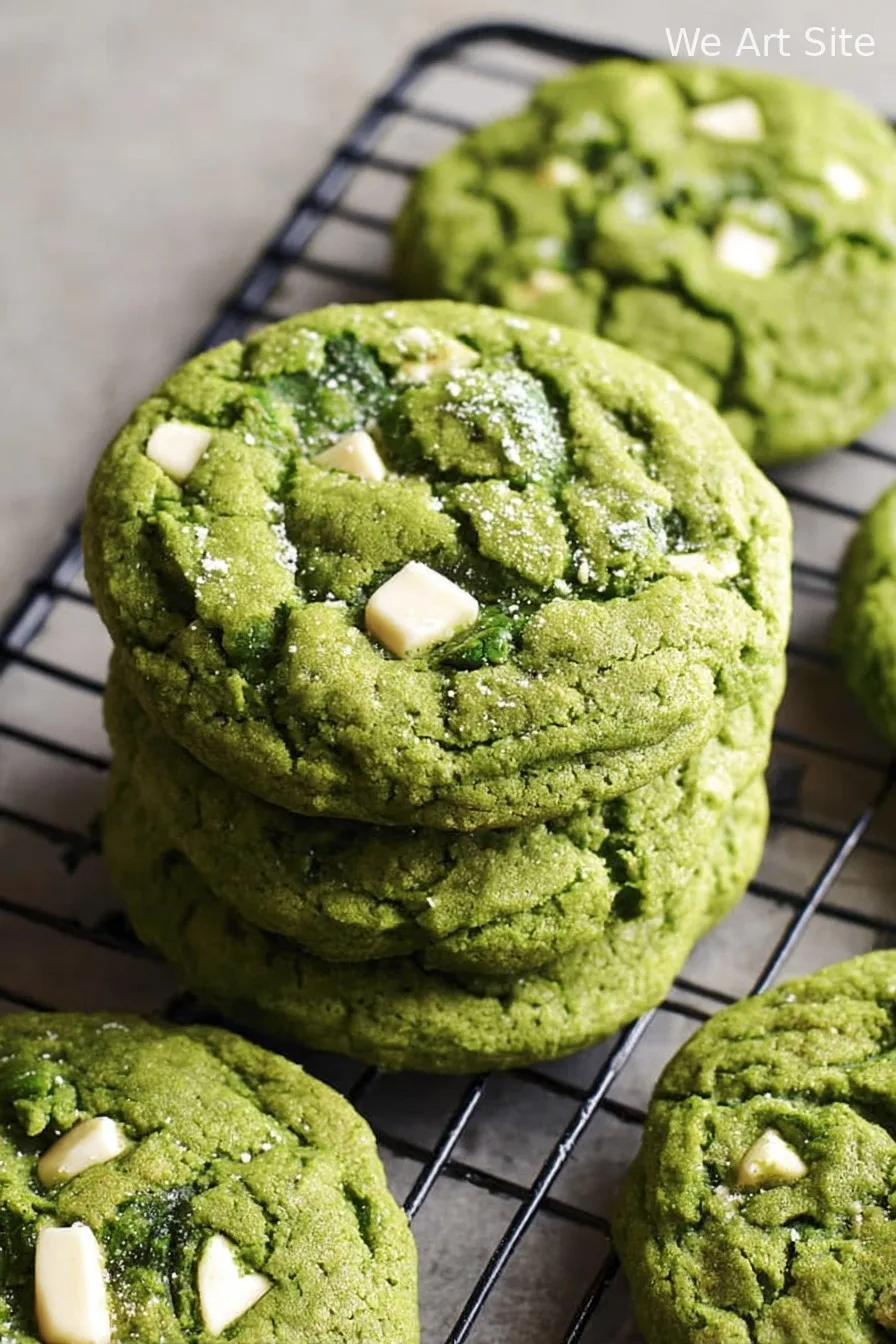
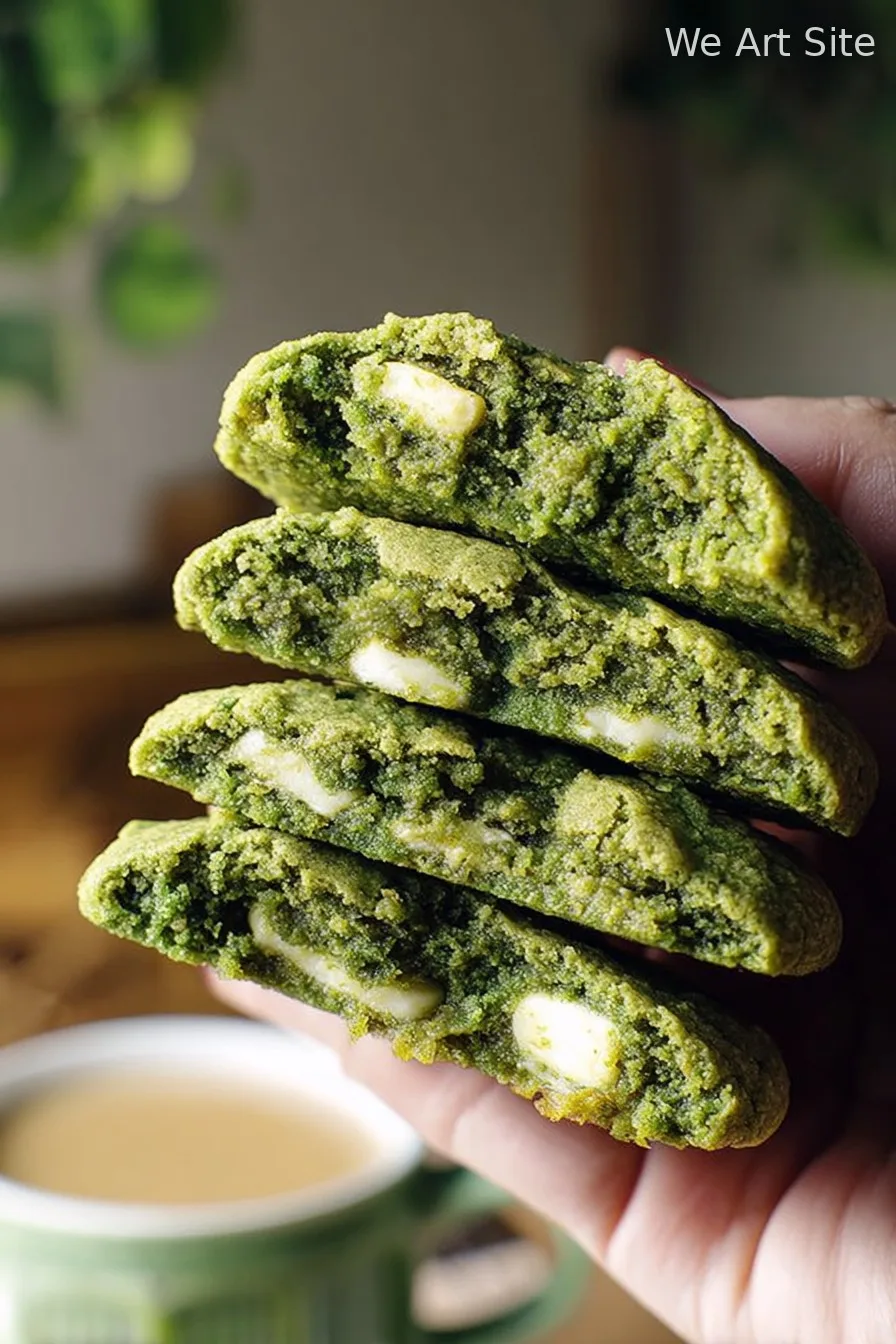
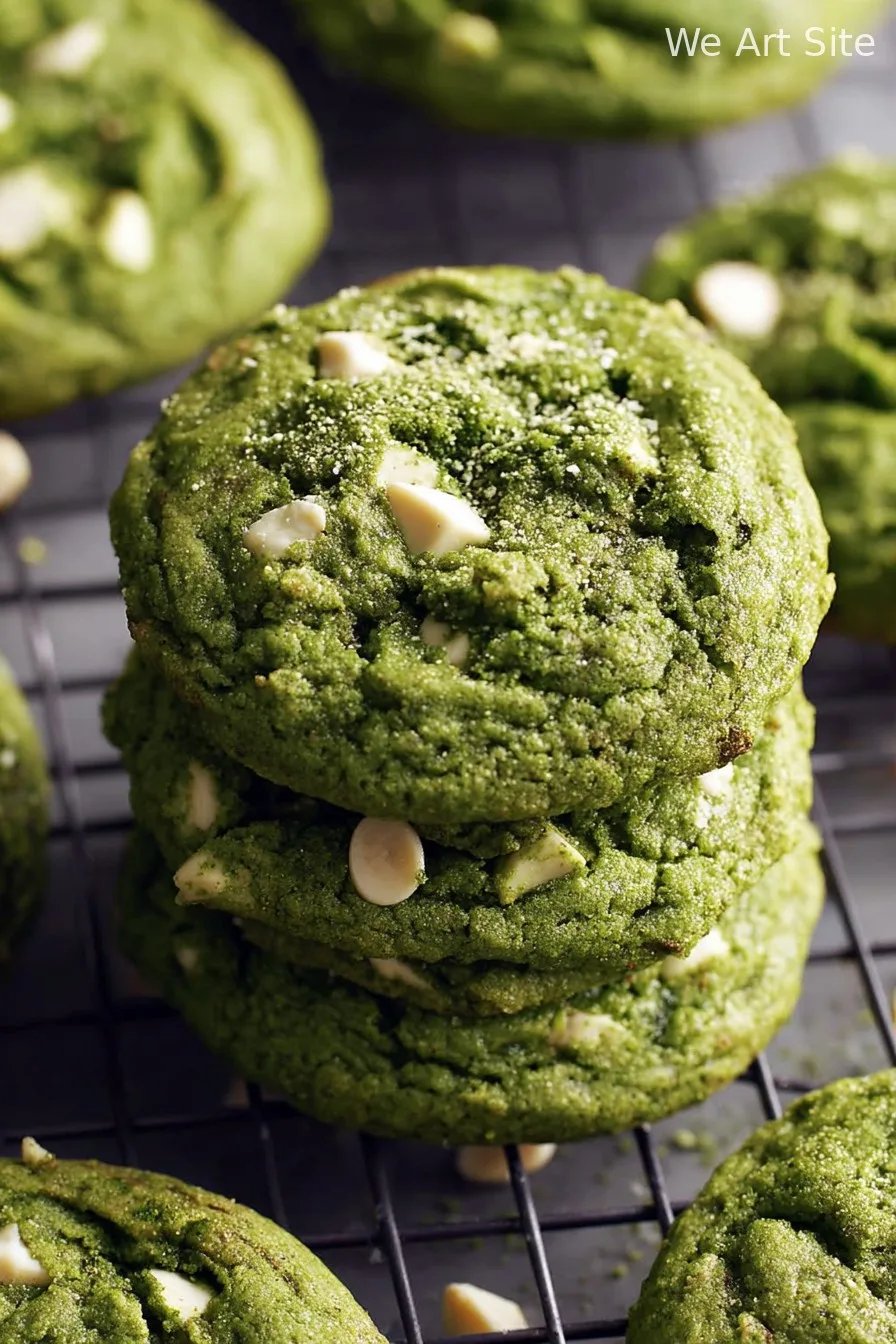
Hey y’all! Ready to treat your taste buds to something truly special? These Matcha White Chocolate Cookies are the ultimate blend of earthy matcha and sweet, creamy white chocolate. With their vibrant green color, chewy texture, and buttery goodness, they’re the perfect cookie for holidays, parties, or just because you deserve something unique! Let’s get cooking!
Why You’ll Love This
- Stunning green color and eye-catching presentation.
- Crispy edges and irresistibly chewy centers.
- The perfect balance of earthy matcha and rich white chocolate flavor.
- Super simple to make with just one bowl and basic pantry staples.
- Great for gifting, bake sales, or as a sweet pick-me-up with your afternoon tea.
Ingredients
- 1 3/4 cups (220g) all-purpose flour
- 2 tbsp culinary-grade matcha powder
- 1/2 tsp baking soda
- 1/2 tsp salt
- 3/4 cup (170g) unsalted butter, softened
- 3/4 cup (150g) granulated sugar
- 1/2 cup (100g) light brown sugar, packed
- 1 large egg, room temperature
- 1 tsp pure vanilla extract
- 1 cup (175g) white chocolate chips or chunks
Directions
Prep Your Ingredients
- Preheat your oven to 350°F (175°C). Line two baking sheets with parchment paper.
Mix the Dry Ingredients
- In a medium bowl, whisk together the flour, matcha powder, baking soda, and salt until evenly combined. Set aside.
Cream Butter and Sugars
- In a large bowl, beat the softened butter, granulated sugar, and brown sugar with an electric mixer on medium speed for 2-3 minutes, until light and fluffy.
Add Wet Ingredients
- Add the egg and vanilla extract to the creamed butter mixture. Beat until well combined.
Combine Wet and Dry
- Add the dry ingredients to the wet ingredients and mix on low speed until just combined, being careful not to overmix.
Fold in White Chocolate
- Gently fold in the white chocolate chips or chunks using a spatula.
Scoop and Bake
- Scoop heaping tablespoons of dough (about 1.5 inches wide) onto the prepared baking sheets, spacing them at least 2 inches apart.
- Bake for 10-12 minutes, or until the edges are set but the centers look slightly underbaked.
Cool and Enjoy
- Allow the Cookies to cool on the baking sheet for 3-5 minutes, then transfer to a wire rack to cool completely. Enjoy!
Notes
- Always use culinary-grade matcha for the best flavor and vibrant color.
- If your butter is too cold, your Cookies may not spread well—make sure it’s properly softened.
- You can chill the dough for 30 minutes before baking for thicker Cookies.
Variations
- Matcha Macadamia Cookies: Add 1/2 cup chopped macadamia nuts for extra crunch.
- Vegan Matcha White Chocolate Cookies: Substitute vegan butter, flax egg, and dairy-free white chocolate chips.
- Dark Chocolate Twist: Swap white chocolate for chopped dark chocolate for a more intense flavor contrast.
Required Equipment
- Electric mixer or stand mixer
- Mixing bowls
- Whisk
- Baking sheets
- Parchment paper
- Cookie scoop or tablespoon
- Wire cooling rack
Storage Instructions
- Store cooled cookies in an airtight container at room temperature for up to 4 days.
- For longer storage, freeze cookies in a zip-top bag for up to 2 months. Thaw at room temperature before serving.
Suggested Pairings & Serving Recommendations
- Serve with a hot mug of green tea or matcha latte for an extra boost of flavor.
- These cookies pair wonderfully with a cold glass of milk or almond milk.
- Stack them up as a colorful addition to dessert platters or gift boxes!
Pro Tips for Perfect Matcha White Chocolate Cookies
- Don’t overbake—the cookies continue to cook as they cool and will stay perfectly chewy.
- For the brightest color, sift your matcha powder before adding to the flour mix.
- Use high-quality white chocolate for the creamiest, richest flavor.
FAQ
Can I use regular green tea powder instead of matcha?
No, use culinary-grade matcha for the best flavor, color, and texture—regular green tea won’t provide the same results.
My cookies turned out flat. What happened?
Flat cookies usually mean your butter was too soft or melted—stick to softened (not melted) butter and chill the dough if needed.
Can I double this recipe?
Absolutely! Just be sure to mix the dough thoroughly and bake in batches for best results.
Prep Time: 15 minutes
Cook Time: 10-12 minutes
Total Time: 25-27 minutes
Yield: 20-22 cookies
Ingredients
- 1 3/4 cups (220g) all-purpose flour
- 2 tbsp culinary-grade matcha powder
- 1/2 tsp baking soda
- 1/2 tsp salt
- 3/4 cup (170g) unsalted butter, softened
- 3/4 cup (150g) granulated sugar
- 1/2 cup (100g) light brown sugar, packed
- 1 large egg, room temperature
- 1 tsp pure vanilla extract
- 1 cup (175g) white chocolate chips or chunks
Instructions
-
1Preheat your oven to 350°F (175°C). Line two baking sheets with parchment paper.
-
2In a medium bowl, whisk together the flour, matcha powder, baking soda, and salt until evenly combined. Set aside.
-
3In a large bowl, beat the softened butter, granulated sugar, and brown sugar with an electric mixer on medium speed for 2-3 minutes, until light and fluffy.
-
4Add the egg and vanilla extract to the creamed butter mixture. Beat until well combined.
-
5Add the dry ingredients to the wet ingredients and mix on low speed until just combined, being careful not to overmix.
-
6Gently fold in the white chocolate chips or chunks using a spatula.
-
7Scoop heaping tablespoons of dough (about 1.5 inches wide) onto the prepared baking sheets, spacing them at least 2 inches apart.
-
8Bake for 10-12 minutes, or until the edges are set but the centers look slightly underbaked.
-
9Allow the cookies to cool on the baking sheet for 3-5 minutes, then transfer to a wire rack to cool completely. Enjoy!
CLICK FOR NUTRITION INFO
↑
Approximate Information for One Serving
Serving Size:
1 serving
Calories:
160 caloriescal
Protein:
2gg
Fat:
8gg
Saturated Fat:
0g
Trans Fat:
0g
Cholesterol:
0mg
Sodium:
0mg
Potassium:
0mg
Total Carbs:
22gg
Fiber:
0g
Sugar:
0g
Net Carbs:
0g
Vitamin A:
0
Vitamin C:
0mg
Calcium:
0mg
Iron:
0mg
Nutrition Disclaimers
Number of total servings shown is approximate. Actual number of servings will depend on your preferred portion sizes.
Nutritional values shown are general guidelines and reflect information for 1 serving using the ingredients listed, not including any optional ingredients. Actual macros may vary slightly depending on specific brands and types of ingredients used.
To determine the weight of one serving, prepare the recipe as instructed. Weigh the finished recipe, then divide the weight of the finished recipe (not including the weight of the container the food is in) by the desired number of servings. Result will be the weight of one serving.
Did you make this recipe?
Please consider Pinning it!