Cake for the Dessert-Challenged (Or Let’s Just Say “Busy”)
Alright, friend. So I still remember the first time I tried whipping up this Easy Strawberry Dump Cake—mostly because I was in a mad dash to finish dinner for my in-laws who always seem to arrive exactly 11 minutes earlier than planned (is this a universal in-law thing?). Anyway, when I first dropped that boxed cake mix into a pan of canned strawberries and threw it in the oven, I was pretty sure I’d invented some crime against baking. But it came out golden, bubbling, and, shockingly, everyone loved it. Even had my brother-in-law ask for seconds, which—if you knew him—never happens unless gravy is involved. So here we go, flaws and all.
Why You’ll Love This (Or at Least, Why I Do!)
I make this dump cake whenever I need a dessert that looks (and, let’s be honest, smells) like I put in way more effort than I actually did. My family gets irrationally excited when they see that old rectangular Pyrex in the oven, probably because it reminds them of summers and, sometimes, me stress-baking during exam week. I’ve even tried fancier versions with fresh berries, but truthfully, there’s something about the sweet goo of canned strawberry filling that I just can’t quit. Also, if you don’t love washing dishes—who does?—there’s barely any cleanup. Except that one time I forgot to spray the pan, and, well, let’s just say it required a little elbow grease.
What You’ll Need (But Don’t Stress)
- 2 cans (about 21oz each) strawberry pie filling (Sometimes I mix in cherry or blueberry if I’m feeling rogue—my grandmother would’ve fainted at that.)
- 1 box yellow cake mix (Honestly, any brand is fine. I once grabbed white cake mix by accident, and, shocker, it still tasted great!)
- 1/2 cup butter, melted (That’s like one stick. I sometimes use a bit more if the cake looks dry. Margarine isn’t the same, but it’ll sort of work in a pinch.)
- Optional: A handful of chopped pecans or walnuts (if you’re not allergic, obviously)
- Optional: a pinch of cinnamon (or, if you’re my partner, way too much cinnamon)
Let’s Throw This Together (Almost Literally)
- Preheat your oven to about 350°F (175°C). Or, if it’s still warming up, just know that a few degrees off won’t ruin it. Don’t sweat it.
- Spray your 9×13-inch pan with cooking spray. If you forget (as I often do), soaking the pan later is your best friend. Trust me.
- Dump—yes, dump!—the strawberry pie filling into the pan. Spread it out just enough so the whole bottom’s covered. Sometimes I “steal” a spoonful here for quality control.
- Sprinkle the DRY cake mix evenly over the filling. Try to cover most of the berries, but if some peek out, it’s fine. Actually, it’s more than fine.
- Drizzle the melted butter over the top as evenly as you can manage. If there are dry spots, just nudge a bit more butter there; or ignore them—it still bakes up alright.
- If you’re adding nuts or cinnamon (I sometimes chuck in both), now’s your chance. Scatter them over like confetti.
- Bake for about 40-45 minutes until the top’s golden and you see some bubbling at the edges. (If it looks weird midway through, don’t panic. Dump cakes often look like a mess before they turn delicious.)
- Let it cool a tad, though if you’re like me, you’ll want to dig in while it’s still lava-hot. Regret that sometimes, but the smell is unreal.
Notes from the Trenches
- Once, I tried using fresh strawberries mixed with sugar and a bit of cornstarch. Tasted amazing, but the cake came out a bit runny. I’ll stick with canned for lazy days.
- If the top looks dry, just dot with extra butter—honestly, you can’t overdo it (said the person who once poured a whole extra tablespoon for “luck”).
- Oh, and don’t feel bad if your dump cake is still a little soft in the middle; sometimes it’s almost like a cobbler. I like it gooey.
How I’ve Messed With This Recipe (For Better or Worse)
- I swapped yellow cake mix for lemon—made it weirdly tangy. Not bad, just different.
- Once, I tossed in chocolate chips. Tasted… sort of like Neapolitan ice cream, but a bit unsettling. Not my fave.
- Tried sprinkling coconut on top once at a friend’s suggestion; was outvoted by my family, but, hey, maybe you’ll like it!
You Don’t Need a Fancy Kitchen
Ideally, a 9×13 baking pan. But if all you’ve got is a couple of smaller pans, just split the mixture—timing’s about the same but check them at 30 minutes. I borrowed my neighbor’s pan once (long story involving a burnt lasagna) and it worked. Cake turns out fine whatever pan you have, as long as it’s oven-safe! (If you’re looking to upgrade, these pan reviews at Serious Eats actually made me chuckle.)
Storing Leftovers—If You Have Any
Supposedly, this keeps in the fridge for up to three days, covered. (Though honestly, in my house we rarely get to day two. It sort of vanishes?) You can reheat a slice in the microwave for 30 seconds; it’s better than cold, if you ask me, but some people like it straight from the fridge. Not judging.
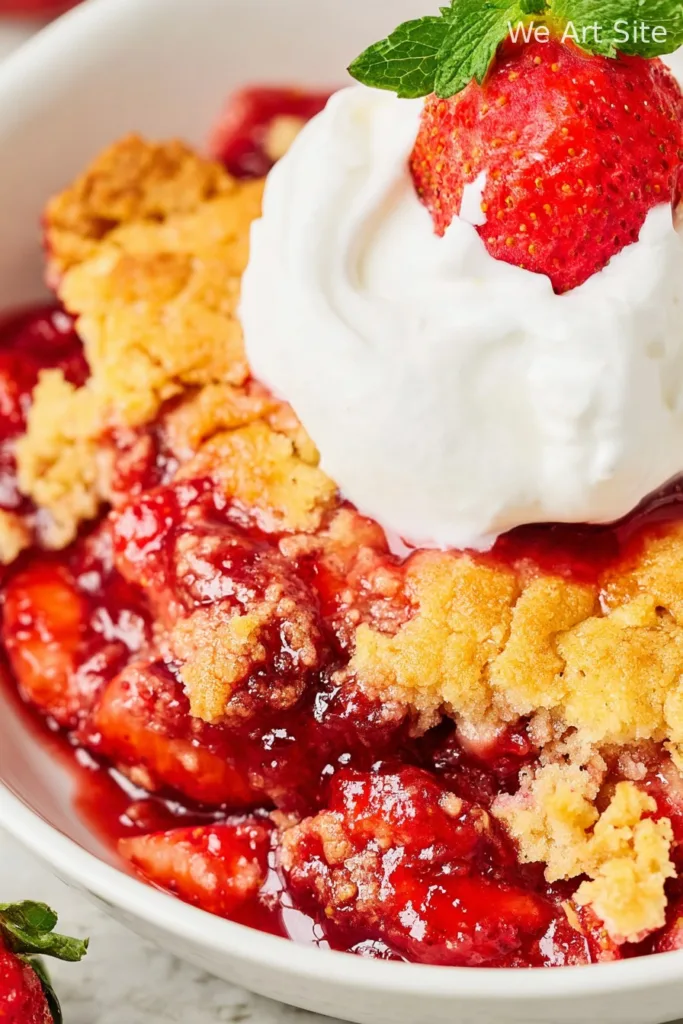
Serving This Beauty
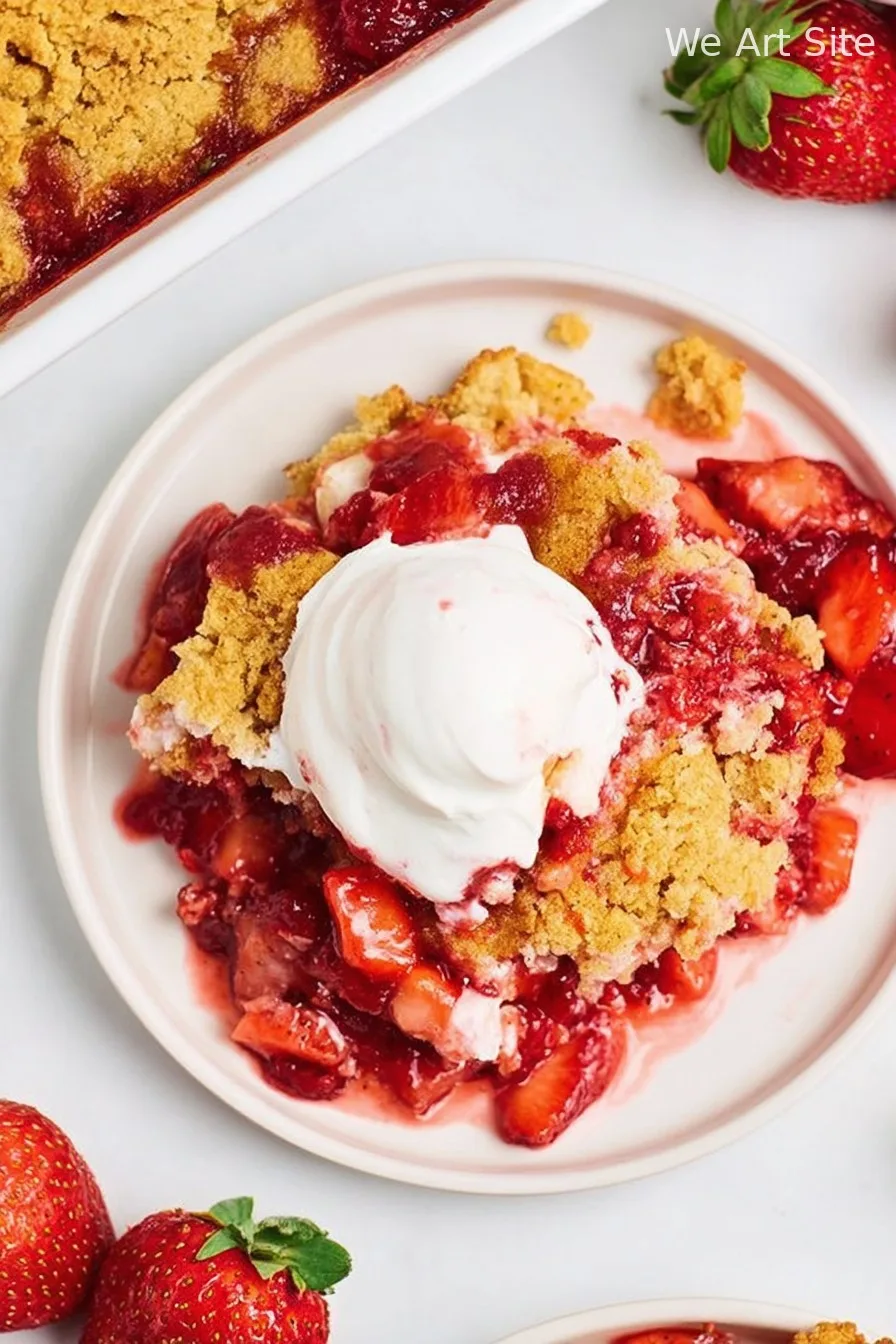
I’m partial to a big scoop of vanilla ice cream on top (or frozen yogurt if I’m kidding myself). Sometimes, if it’s a special occasion or I just want it to look fancier, I toss a few fresh strawberries on the side—half because it’s pretty, half because I need to pretend there’s fruit involved.
If I Could Give Just One Pro Tip…
I once tried to rush the cooling step because I was hungry (and a little impatient, to be honest). Ended up with a molten-hot mouthful and a slightly scorched tongue. So, let it cool a teeny bit before digging in: patience is not overrated here.
Your Questions Answered (No, Really)
- Can I use fresh strawberries instead of canned? You can! But you’ve got to add a bunch of sugar and some thickener (cornstarch does the trick). It turns out a tad soupier, but still delish.
- What if I only have white cake mix? Go for it. I actually prefer the white sometimes when I want the flavor a little less buttery. Or maybe that’s just me.
- Why is it called dump cake? You literally dump everything in the pan and bake. It’s as much about the process as the result—works every time (almost; don’t get me started on that lemon cake experiment…)
- Help, the top stayed powdery in some spots—did I ruin it? Not at all, friend! Just drizzle a bit more melted butter next time, or fluff the cake mix lightly with a fork before baking. Happens to everyone. Well, to me at least.
- How can I make this gluten-free? You can swap for a gluten-free cake mix. My cousin actually told me the King Arthur brand works well, though I’ve not tried it myself yet.
Now, if you’re still with me—thanks! If you want more easy bakes, you might like this strawberry shortcake cake recipe (much fancier, but worth a go). Good luck, happy baking, and may your dump cake always come out glorious (or at least totally edible).

Ingredients
- 2 cans (21 oz each) strawberry pie filling
- 1 box (15.25 oz) yellow cake mix
- 1/2 cup (1 stick) unsalted butter, melted
- 1 cup fresh strawberries, sliced
- 1/2 cup chopped pecans (optional)
- 1/2 teaspoon vanilla extract
- Whipped cream or vanilla ice cream, for serving (optional)
Instructions
-
1Preheat oven to 350°F (175°C). Lightly grease a 9×13-inch baking dish.
-
2Spread both cans of strawberry pie filling evenly on the bottom of the prepared baking dish. Layer with sliced fresh strawberries.
-
3Sprinkle the dry yellow cake mix evenly over the strawberry layer. Do not mix.
-
4Drizzle melted butter evenly over the entire surface of the cake mix. Sprinkle chopped pecans over the top if using.
-
5Bake for 45 minutes, or until the top is golden and the edges are bubbly.
-
6Remove from oven and let cool for 10 minutes. Serve warm with whipped cream or vanilla ice cream if desired.
CLICK FOR NUTRITION INFO
↑
Approximate Information for One Serving
Serving Size:
1 serving
Calories:
315 caloriescal
Protein:
2 gg
Fat:
11 gg
Saturated Fat:
0g
Trans Fat:
0g
Cholesterol:
0mg
Sodium:
0mg
Potassium:
0mg
Total Carbs:
52 gg
Fiber:
0g
Sugar:
0g
Net Carbs:
0g
Vitamin A:
0
Vitamin C:
0mg
Calcium:
0mg
Iron:
0mg
Nutrition Disclaimers
Number of total servings shown is approximate. Actual number of servings will depend on your preferred portion sizes.
Nutritional values shown are general guidelines and reflect information for 1 serving using the ingredients listed, not including any optional ingredients. Actual macros may vary slightly depending on specific brands and types of ingredients used.
To determine the weight of one serving, prepare the recipe as instructed. Weigh the finished recipe, then divide the weight of the finished recipe (not including the weight of the container the food is in) by the desired number of servings. Result will be the weight of one serving.
Did you make this recipe?
Please consider Pinning it!!