How These Canned Salmon Patties Ended Up in My Recipe Box
Okay, here’s the thing—I grew up in a house where salmon patties (some folks call ’em cakes, but I guess I’m stuck in my ways) were kind of like a Tuesday night handshake: reliable, maybe a little squishy, but always honest. My mom used to slap together a batch whenever the fridge looked just short of grim, and honestly, it made her a bit of a magician in my eyes. Plus, when I was 8, I once mistook the parsley for green confetti and snuck some onto a sibling’s birthday cupcake. Didn’t go over well—let’s just leave it at that. Still, these little patties remind me of home and slightly questionable culinary choices.
Why I Keep Making These (And Why You’ll Love ‘Em)
I make this when I’m almost out of time and inspiration—these patties save the day (or at least dinner) more than I’d like to admit. My family goes wild for them, mostly because they’re crispy on the outside, soft on the inside, and kind of taste like they belong at a fancy brunch if you close your eyes real tight. Oh, and I used to wrestle with the salmon bones but now I just mash ‘em up. They’re soft, won’t hurt you, plus apparently good for you? At least that’s what my uncle told me after he ate five in one go. Anyway, these come together quick and disappear faster.
What You’ll Need (But Honestly, Don’t Stress)
- 1 can (about 14 oz) salmon (I use whatever’s on sale; my grandma swore by Red Sockeye but I just grab what’s there—it all works, honestly)
- 1 large egg (sometimes I use two if I want extra binding, but usually one’s fine)
- Half a small onion, finely chopped (red onion works great too, or green onions if you’ve got a handful)
- About 1/2 cup breadcrumbs (panko if you wanna be fancy, but I’ve used crushed Ritz crackers and even cornflakes—told you I improvise)
- 1–2 tablespoons mayonnaise (yogurt works okay too but the tang is different)
- 1 teaspoon Dijon mustard (or yellow if that’s all you’ve got; heck, skip it if you’re not a mustard fan)
- Salt and pepper, just pinch by feel
- Fresh chopped parsley or dill (optional, but honestly, dried parsley is fine—I can never taste a difference)
- Juice from half a lemon (I confess, I’ve used a squirt of that bottled stuff in a pinch. No shame.)
- Oil for frying (vegetable, canola, or butter—a blend gives color and flavor, but I once used bacon grease and didn’t regret it)
Let’s Get Frying: How I Throw These Together
- Drain and mash. First, crack open that can of salmon, ditch the liquid (or keep a tablespoon if your mix seems dry later; up to you). Plop into a big bowl and flake up with a fork. If you see bones or skin, just mash those in—seriously, they disappear and they’re soft. Don’t overthink it, that’s what I tell myself.
- Add the fixings. Toss in your egg, chopped onion, breadcrumbs (or whatever crunchy thing you’re subbing in), mayo, mustard, salt, pepper, herbs, and lemon juice. Mix it up with a fork or your hands (honestly, hands work better, just wash them good).
- Form the patties. Scoop about a palmful and press gently—sort of like forming muddy snowballs (less messy though, I promise). Should give you 5-6 patties. If it feels too crumbly, add a touch more mayo or a sprinkle more breadcrumbs—play it by ear.
- Time to fry. Heat a generous slick of oil (I just eyeball it; enough to coat the base) in a big pan over medium—don’t crank it or you’ll burn ’em. When it glimmers (oil, not the patties), lay your patties in carefully. Fry each side 3–4 minutes, or until golden and crispy. This is my favorite part—a bit of sizzle, a whiff of nostalgia, and yes, this is where I usually sneak a taste.
- Drain & serve. Scoop onto a plate lined with kitchen roll. Don’t worry if your first patty looks a bit janky—mine always does! The rest improve as you go.
Stuff I’ve Learned Along the Way (Notes)
- If the mix is falling apart, just squish it more. The warmth from your hands helps it hold.
- I once tried skipping the mayo—bad idea. They ended up dry as cardboard, but at least the dog was happy.
- Patties brown faster than you think, so keep an eye (or nose) out.
Here’s Some Wild Pattie Experiments
- If I’m feeling bold, I stir in a pinch of smoked paprika or a squirt of sriracha. Adds a zip that’s unpredictable but good.
- One time, I swapped out the onions for diced bell pepper. The family noticed, but it wasn’t a mutiny.
- Tried making these in the oven once, and honestly? Just didn’t crisp up. Frying is the way to go, in my book.
Gear You’ll Need (But You Can Wing It Too)
- Frying pan (nonstick is less fussy but I’ve used cast iron, too)
- Mixing bowl (big enough to get your hands in there)
- Spatula (or, in a pinch, a butter knife and a big serving spoon—everyone’s done it at least once)

Storing ’Em (Assuming They Last)
If you’ve got leftovers (bold of you!), pop them in an airtight container. Fridge for up to three days, but honestly, in my house they rarely make it past the next lunchtime. Cold, straight from the fridge, is a vibe—just saying.
How I Like to Serve These Up
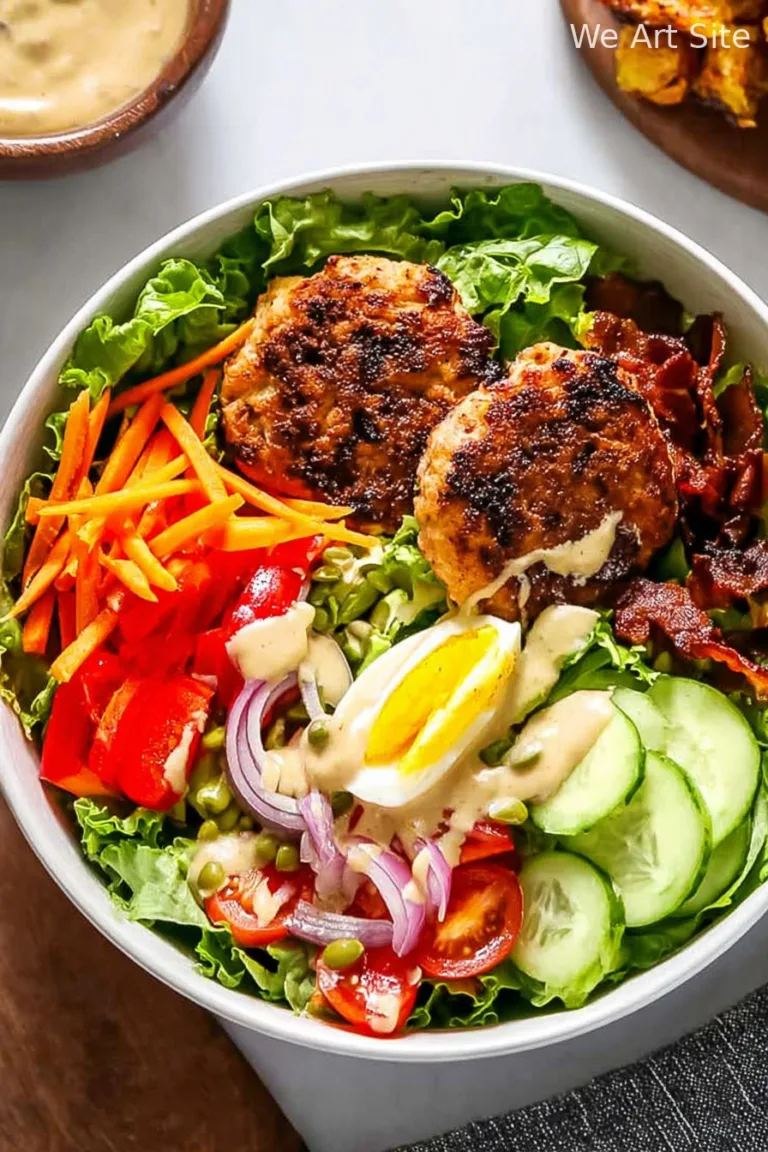
I love these with a squirt of lemon juice and a dollop of tartar sauce, maybe even a little sriracha if the mood strikes. Sometimes I sandwhich ’em in burger buns with lettuce—kids call it the “fishwich.” My neighbor swears by serving these on top of Caesar salad, which, to be fair, is pretty genius. Oh, and if you need tartar sauce, I swear by this homemade tartar sauce recipe—way better than store bought.
What I’d Tell My Past Self (Pro Tips…and Oopses)
- Don’t rush the patty forming—seriously, if you try and rush this, they’ll crumble and you’ll have hash, not patties (ask me how I know, ha!).
- Resist flipping too soon; wait for the brown edges to creep up before daring the spatula underneath. I learned this after more than a few jokes about my “salmon scramble.”
- Actually, if you make extras, they taste even better the next day. Don’t ask me why—magic, maybe.
Real Questions I’ve Gotten (FAQ)
- “What if I don’t have breadcrumbs?”
- I’ve used crushed crackers, cornflakes, stale bread—once even instant oats, and no one complained. But maybe steer clear of sugary cereals…
- “Can I use fresh salmon instead?”
- Sure, but you’ll want to cook and flake it first; I’ve done this and it tastes great, but it’s more work and doesn’t have that pantry magic.
- “Do I really need herbs?”
- Nah. Optional, honestly—you’re the boss of your own flavor destiny.
- “Why canned salmon?”
- Because it’s cheap, shelf stable, and full of protein—read more about why it’s a pantry staple at this Bon Appétit article. Plus, that slightly old-school taste is weirdly comforting.
- “How do you keep them from being dry?”
- Moisture’s key. More mayo, or a little extra lemon juice, and don’t over-fry. Experiment a bit—each batch is a little unique!
A Quick Side Note (Because Why Not?)
I once tried feeding these to a cousin who’d sworn off fish for “smell reasons”—ended up winning them over with a side of spicy mayo and a squeeze of lime. Goes to show: a little sauce sometimes solves a lot.
If you’re feeling curious, check out advice on making better fish cakes here—some good ideas, though I still say there’s no substitute for good old trial and error (and maybe a lucky break or two).

Ingredients
- 2 cans (6 oz each) salmon, drained and flaked
- 1/2 cup bread crumbs
- 1/4 cup finely chopped onion
- 2 large eggs, beaten
- 1/4 cup mayonnaise
- 2 tablespoons chopped fresh parsley
- 1 teaspoon Dijon mustard
- 1/2 teaspoon garlic powder
- Salt and black pepper, to taste
- 2 tablespoons vegetable oil, for frying
Instructions
-
1In a large bowl, combine the flaked salmon, bread crumbs, chopped onion, eggs, mayonnaise, parsley, Dijon mustard, garlic powder, salt, and pepper until well mixed.
-
2Shape the mixture into 8 small patties, pressing gently to hold their shape.
-
3Heat the vegetable oil in a large nonstick skillet over medium heat.
-
4Add the salmon patties to the skillet and cook for 5-6 minutes per side, or until golden brown and cooked through.
-
5Transfer cooked patties to a paper towel-lined plate to drain excess oil. Serve warm with your choice of dipping sauce or salad.
CLICK FOR NUTRITION INFO
↑
Approximate Information for One Serving
Serving Size:
1 serving
Calories:
260 caloriescal
Protein:
20gg
Fat:
15gg
Saturated Fat:
0g
Trans Fat:
0g
Cholesterol:
0mg
Sodium:
0mg
Potassium:
0mg
Total Carbs:
10gg
Fiber:
0g
Sugar:
0g
Net Carbs:
0g
Vitamin A:
0
Vitamin C:
0mg
Calcium:
0mg
Iron:
0mg
Nutrition Disclaimers
Number of total servings shown is approximate. Actual number of servings will depend on your preferred portion sizes.
Nutritional values shown are general guidelines and reflect information for 1 serving using the ingredients listed, not including any optional ingredients. Actual macros may vary slightly depending on specific brands and types of ingredients used.
To determine the weight of one serving, prepare the recipe as instructed. Weigh the finished recipe, then divide the weight of the finished recipe (not including the weight of the container the food is in) by the desired number of servings. Result will be the weight of one serving.
Did you make this recipe?
Please consider Pinning it!!