How I Fell for This Pumpkin Cheesecake (and Why You Might Too)
You ever have one of those desserts that just kind of sticks in your brain? Like, you taste it once at a restaurant, think about it for months, and finally cave to recreating it yourself? That’s me with Olive Garden’s Pumpkin Cheesecake. One fall, my aunt dragged me (okay, I wasn’t kicking and screaming, but I did want pizza instead) and after that first bite, it was game over. I’ve been making my own version ever since, though it’s never quite as neat as the restaurant’s. I suppose that’s half the charm. Oh, and my dog once managed to swipe a chunk off the counter—so even the pooch approved.
Why You’ll Absolutely Want to Make This
I pull out this recipe every autumn, sometimes even in April if I get that pumpkin itch. My family goes bonkers for it—especially my cousin, who claims it’s the only cheesecake she actually likes. (She’s weird, but I love her.) I make it when I want to impress someone or just need a little comfort after a rough week. Honestly, the gingersnap crust is my secret weapon. I used to fuss with graham crackers, but once I switched, it’s like, why wasn’t I doing this all along? And yes, the batter always looks a bit weird before baking. Don’t panic.
What You’ll Need (Plus Some Swaps)
- For the crust:
– 1 and 1/2 cups gingersnap cookie crumbs (store-bought, or whatever’s on sale; honestly, I just bash them with a rolling pin in a freezer bag)
– 1/2 cup finely chopped pecans (sometimes I skip these, or swap in walnuts if that’s all I have)
– 1/4 cup brown sugar (light or dark, doesn’t matter much)
– 5 tbsp melted butter (salted or unsalted, but if it’s salted, skip the pinch of salt later) - For the filling:
– 24 oz cream cheese, softened (Philadelphia is my go-to, but store brand works in a pinch)
– 1 cup white sugar
– 1 cup canned pumpkin purée (not pumpkin pie filling, though I accidentally used that once—interesting result but not recommended)
– 3 eggs + 1 yolk (room temp if you remember, but not the end of the world if you forget)
– 2 tbsp sour cream (or plain Greek yogurt, but I think the sour cream makes it silkier—maybe it’s just in my head)
– 1/2 tsp cinnamon (sometimes I add a bit extra, shh)
– 1/4 tsp nutmeg (freshly grated is nice, but pre-ground is fine)
– 1/4 tsp allspice
– Pinch of salt
– 2 tsp vanilla extract - For the topping:
– 1 cup heavy whipping cream
– 2-3 tbsp powdered sugar
– 1/2 tsp vanilla
Or, honestly, just get a tub of Cool Whip if you’re pressed for time (no judgment here).
What to Do (Don’t Panic, It’s Easier Than It Looks)
- Preheat your oven to 325°F (165°C). Wrap the outside of a 9-inch springform pan with foil (in case of leaks—the bane of my existence until I learned this trick).
- Press the gingersnap crumbs, nuts, sugar, and melted butter into the bottom of the pan. I use the bottom of a glass to squish it down. Bake for about 10 minutes, then let it cool while you make the filling.
- Beat the cream cheese until fluffy. Add the sugar and beat again. Now, add in eggs one at a time (don’t rush this or you’ll get weird lumps), then yolk, then pumpkin, sour cream, spices, salt, and vanilla. Don’t worry if the batter looks a bit odd; it smooths out during baking.
- Pour the filling over the cooled crust. Tap the pan on the counter a couple times—this gets rid of air bubbles (or so my neighbor swears; I just like the sound it makes).
- Bake at 325°F for 50–60 minutes, until the center’s just set but still a little jiggly. Don’t overbake or it’ll crack (though, honestly, a few cracks never hurt anyone).
- Turn off the oven, crack the door, and let the cheesecake cool in there for about an hour. This helps prevent the Grand Canyon effect. Then refrigerate for at least 4 hours, but overnight is best—I think it tastes richer the next day.
- For the topping, whip cream with sugar and vanilla until soft peaks form. Spread or pipe on top, or just blob it with a spoon (which is what usually happens at my house).
A Few Notes I’ve Learned the Hard Way
- If you forget to wrap your pan with foil, don’t panic—just slide a baking sheet underneath to catch drips. Actually, I find it works better if you double wrap with foil, but I’m not always that organized.
- Crust too crumbly? Add another splash of butter. Too soggy? Bake it a couple minutes longer next time.
- I once tried using low-fat cream cheese. Just don’t. It’s not worth it.
Variations I’ve Attempted (Some More Successful Than Others)
- Chocolate drizzle: Melted dark chocolate zig-zags on top. Looks fancy, tastes yummy.
- Swapped pecans for hazelnuts once—pretty cool, but a bit overpowering.
- Tried making it gluten-free by using almond flour and gluten-free gingersnaps. Success! But watch the bake time—it cooked a little quicker.
- Once, on a dare, I tried a chocolate crust. Honestly, not my best work, but it was edible (barely).
Do You Really Need a Springform Pan?
Look, it helps. But if you don’t have one, just use a deep cake pan and line it with parchment so you can lift it out—it won’t be as tidy, but I mean, who’s judging? (Well, maybe my mother-in-law, but she’s got opinions on everything.)

How to Store (If You Actually Have Leftovers)
Technically, you can store this in the fridge for up to 5 days, covered. But honestly, in my house, it never lasts more than a day! If you’re one of those rare types with restraint, you can freeze slices individually (wrap them well), though the whipped cream topping gets a bit weird after thawing, so I’d add that fresh.
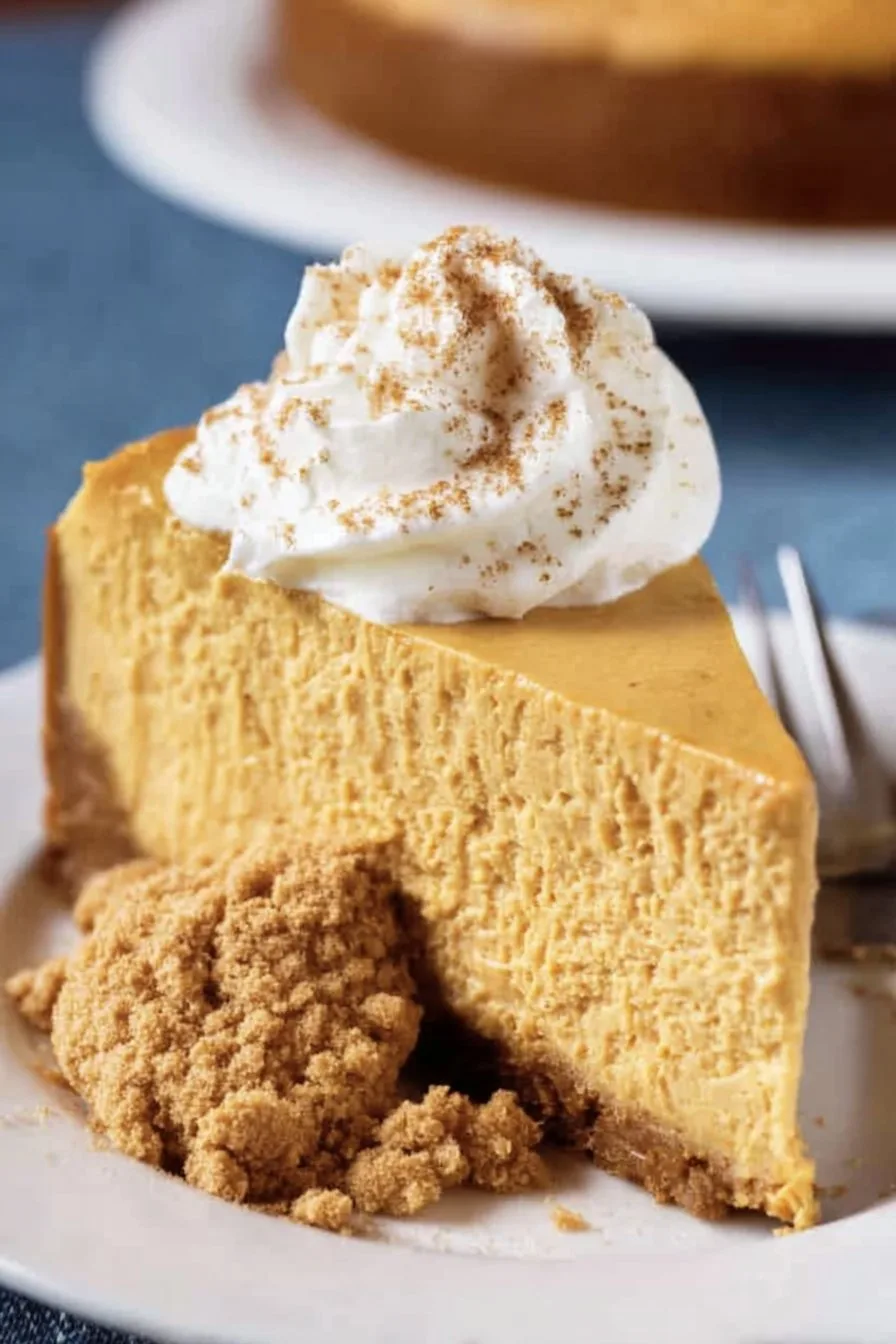
How I Like to Serve This Cheesecake
In my family, we always dust a little extra cinnamon on top and serve with a dollop of whipped cream. I’ve also been known to sneak a slice for breakfast with coffee (no shame). If you want to really go wild, drizzle with caramel sauce—this caramel recipe is one I use all the time.
Hard-Won Pro Tips (Trust Me, I’ve Messed These Up Before)
- Don’t rush the cooling step. I once took it out hot and it collapsed faster than a Jenga tower in an earthquake—patience pays off.
- Actually, I find it works better if you let the cheesecake chill overnight; the flavors really come together.
- If you’re short on time, you can cheat with store-bought whipped cream, but homemade tastes miles better (here’s how I do it).
Some Questions I Get About This Cheesecake
- Can I use pumpkin pie filling instead of purée?
I tried once (by accident, actually). It’s way sweeter and spiced, so the flavor’s a bit off. If it’s all you have, just cut back on the sugar and spices. - Is the crust supposed to be crunchy?
Kind of! It gets a bit softer in the fridge, but that first day, there’s a lovely snap to it—unless I underbake it, which has happened more than once. - Do I need to do a water bath?
Honestly? I skip it half the time. The foil wrap and slow cooling seem to prevent cracks anyway, or at least enough that no one at my table cares. - Can I make this ahead?
Yes! In fact, I think this tastes better the next day. Maybe it’s just me, but the flavors settle in and it slices like a dream. - What if I don’t have gingersnaps?
Graham crackers work, or even digestive biscuits. Heck, I’ve mixed in some vanilla wafers in a pinch. Use what you’ve got.
So that’s my not-so-secret, a-bit-messy, definitely delicious take on Olive Garden Pumpkin Cheesecake. Give it a shot—if nothing else, you’ll have an excuse to eat dessert for breakfast. And if you want more baking ideas, King Arthur’s recipe hub is pure gold for inspiration (I get lost in there way too often). Let me know how yours turns out—unless you eat it all before you can take a picture. (Happens to the best of us.)
Ingredients
- 1 1/2 cups graham cracker crumbs
- 1/4 cup granulated sugar
- 1/2 cup unsalted butter, melted
- 3 (8 oz) packages cream cheese, softened
- 1 cup granulated sugar
- 1 cup canned pumpkin puree
- 3 large eggs
- 1 teaspoon vanilla extract
- 1 teaspoon ground cinnamon
- 1/2 teaspoon ground nutmeg
- 1/4 teaspoon ground cloves
- 1/4 cup sour cream
- Whipped cream, for topping
Instructions
-
1Preheat oven to 325°F (163°C). In a medium bowl, combine graham cracker crumbs, 1/4 cup sugar, and melted butter. Press mixture into the bottom of a 9-inch springform pan to form the crust.
-
2In a large bowl, beat cream cheese and 1 cup sugar until smooth and creamy. Add pumpkin puree, eggs, vanilla extract, cinnamon, nutmeg, and cloves. Mix until well combined.
-
3Pour the cheesecake filling over the prepared crust. Smooth the top with a spatula.
-
4Bake for 70 minutes, or until the center is almost set. Remove from oven and let cool for 10 minutes.
-
5Spread sour cream evenly over the top of the cheesecake. Refrigerate for at least 4 hours or overnight.
-
6Before serving, top with whipped cream and a sprinkle of cinnamon if desired.
CLICK FOR NUTRITION INFO
↑
Approximate Information for One Serving
Serving Size:
1 serving
Calories:
420 caloriescal
Protein:
7gg
Fat:
28gg
Saturated Fat:
0g
Trans Fat:
0g
Cholesterol:
0mg
Sodium:
0mg
Potassium:
0mg
Total Carbs:
38gg
Fiber:
0g
Sugar:
0g
Net Carbs:
0g
Vitamin A:
0
Vitamin C:
0mg
Calcium:
0mg
Iron:
0mg
Nutrition Disclaimers
Number of total servings shown is approximate. Actual number of servings will depend on your preferred portion sizes.
Nutritional values shown are general guidelines and reflect information for 1 serving using the ingredients listed, not including any optional ingredients. Actual macros may vary slightly depending on specific brands and types of ingredients used.
To determine the weight of one serving, prepare the recipe as instructed. Weigh the finished recipe, then divide the weight of the finished recipe (not including the weight of the container the food is in) by the desired number of servings. Result will be the weight of one serving.
Did you make this recipe?
Please consider Pinning it!!