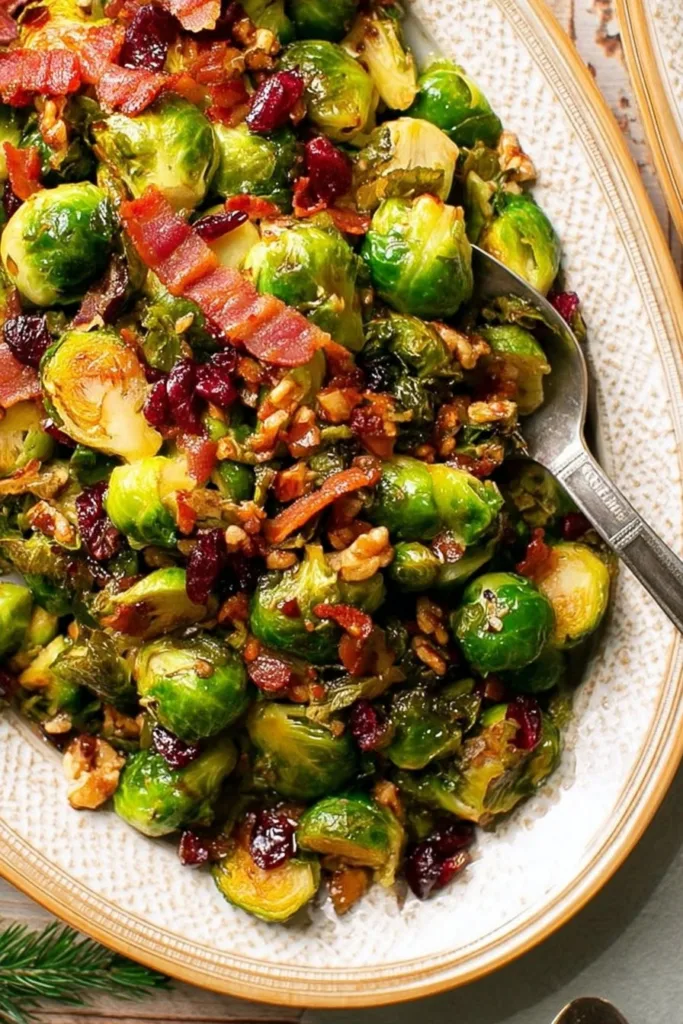
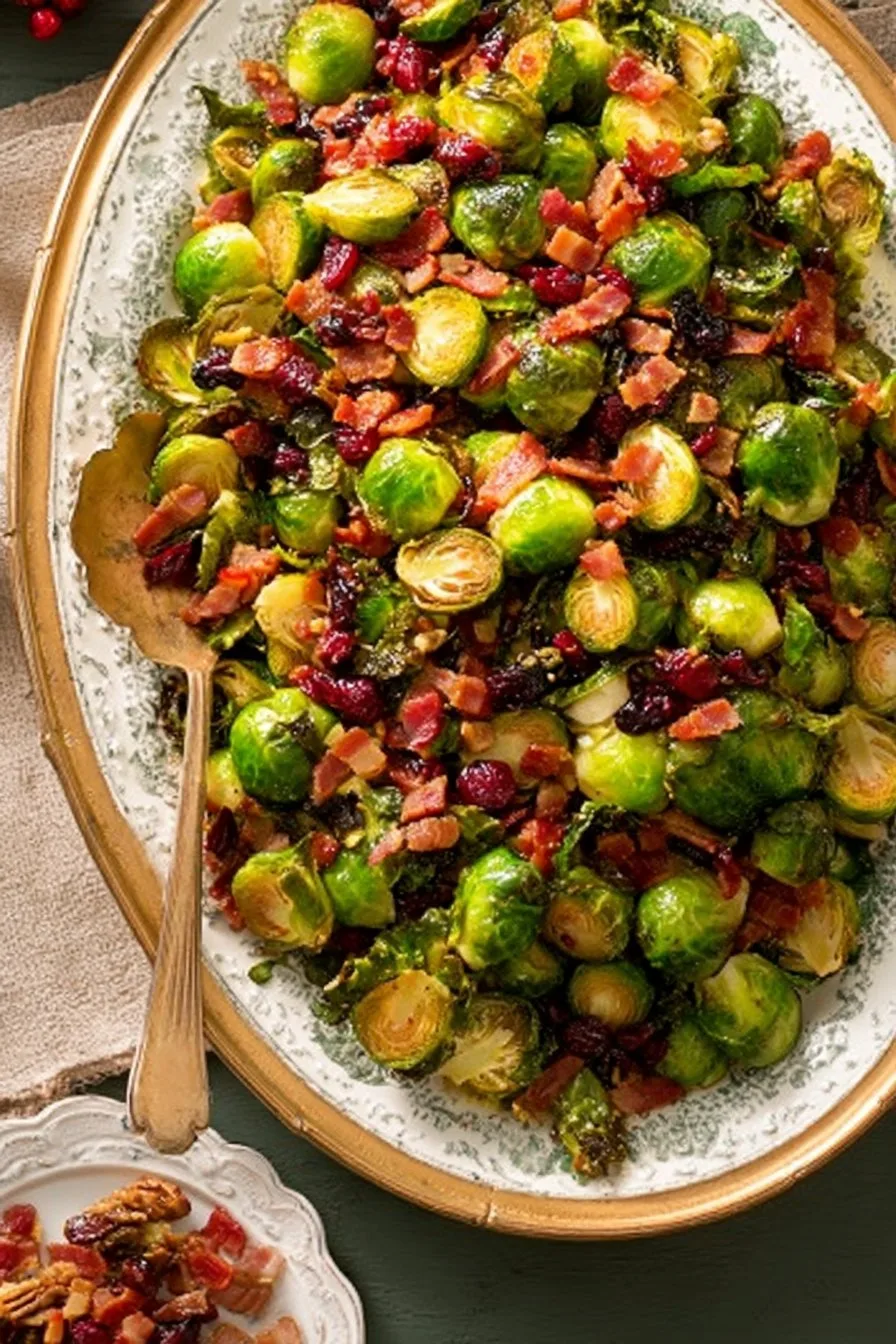
Let Me Tell You About My Maple Bacon Brussels Sprouts Obsession
Alright, friend, you know how some recipes just worm their way into your weekly rotation and then you wonder how you ever lived without them? That’s what happened here. I tried maple bacon Brussels sprouts at a potluck a few years back (shoutout to Jen for the inspiration, even though hers were a bit, um, chewy), and I’ve been tinkering ever since. Now, I make them so often my family basically expects a tray whenever bacon’s on the shopping list. Oh, and quick warning: you’ll probably eat more than seems reasonable. I always do. Once, I made a double batch thinking I’d have leftovers for lunch… ha! Foolish optimism.
Why I Keep Coming Back to This Dish
I make this when I want something that tastes like a treat but is technically a vegetable (I mean, it counts, right?). My family goes crazy for this because it’s got that perfect mix of crispy, salty-sweet, and a little sticky round the edges. Even my cousin, who claims Brussels sprouts are the devil’s veggie, will sneak a few off the tray if no one’s looking. Also, it’s one of those recipes that somehow makes you feel like you know what you’re doing in the kitchen—even if you’re just winging it. The only tiny frustration? If you crowd the pan, you lose some crispiness; I used to ignore that advice, but trust me, don’t skip it. Learned the hard way, as usual.
What You’ll Need (And How I Cheat Sometimes)
- 500g (about 1 lb) Brussels sprouts – I’ve used frozen in a pinch. Just thaw and pat dry. Fresh tastes best though, in my humble opinion.
- 5-6 rashers streaky bacon – Smoked or unsmoked, honestly I just use what’s lurking in the fridge. My gran swore by the thick stuff, but back bacon works too.
- 2-3 tablespoons maple syrup – Real maple syrup is best, but I tried pancake syrup once (hey, desperate times) and it was… fine. Not amazing, but edible.
- 1-2 tablespoons olive oil – Or whatever oil you have, really. I sometimes use avocado oil if I’m feeling fancy. Totally optional.
- Salt & black pepper – To taste. I like a good grind of pepper here.
- Optional: A handful of chopped pecans or walnuts (adds a nice crunch), or a sprinkle of chili flakes for a bit of heat. My kids are suspicious of ‘red bits’ so I usually skip the chili.
How I Actually Throw This Together
- Preheat your oven to 220°C (about 425°F). If your oven runs hot (like mine seems to, randomly), maybe drop it to 400°F. Grab a biggish baking sheet and line it with parchment—saves you some elbow grease later.
- Trim the ends off the Brussels sprouts and halve them (quarter the massive ones—no one likes uneven cooking). Chuck them in a big bowl.
- Slice your bacon into bite-sized pieces. I used to use kitchen scissors for this, but a sharp knife’s less fiddly. Toss the bacon in with the sprouts.
- Drizzle on the olive oil, season generously with salt and pepper, then get in there with your hands and mix it up. This is where I usually sneak a sprout or two—don’t judge.
- Spread everything out on your tray. Make sure things aren’t piled up too much—otherwise, you’ll end up with more steamed than roasted. (Don’t worry if it looks a bit chaotic here. It sorts itself out.)
- Roast in the oven for 20–25 minutes. At the halfway mark, pull the tray out and give everything a wee shuffle; I’ve forgotten this step before, and the bottom gets a bit too dark. You want the bacon starting to crisp and the sprouts to get those lovely golden bits.
- Drizzle over the maple syrup (try to get it on the sprouts and the bacon, not just the tray). Toss in your nuts if you’re using them. Pop it back in the oven for another 8-10 minutes. Watch closely here—bacon can go from perfect to ‘slightly cremated’ pretty fast.
- Once everything looks sticky and caramelized, take it out. Let it sit for a few minutes—I know, patience is tough—but the flavors mellow out a bit and it’s easier to eat without burning your tongue.
Stuff I Wish I’d Known Sooner (Notes!)
- If you’re using really thick bacon, give it a few minutes head start before you add the sprouts. I learned this after a couple of limp bacon disasters.
- Actually, I find it works better if you don’t overcrowd the tray—even if it means doing two batches. The more space, the crispier everything gets.
- I once tried foil instead of parchment. It stuck like crazy. Never again.
Variations (Some Winners, Some Not So Much)
- I tried tossing a little balsamic vinegar in at the end—delicious, but go easy or it overpowers the maple.
- Chopped apples were a fun experiment, but they got mushy. Wouldn’t bother again, honestly.
- Swap pecans for toasted hazelnuts if you’re feeling adventurous. Came out pretty tasty, but my husband thought it was ‘too posh’ for sprouts (his words).
Equipment: What You Need (And What I Use Instead)
- A big baking tray. I sometimes use two smaller ones if I can’t find my ‘good’ one (seriously, where do trays go?).
- Sharp knife or kitchen scissors. Either works, but I lose scissors too often.
- Mixing bowl, unless you’re brave and just toss everything on the tray—done that, but it’s messier.
How to Store Leftovers (If You Have Any…)
Pop leftovers (if you manage to hide any) in an airtight container in the fridge. They’re good for up to two days, but honestly, in my house it never lasts more than a day! I think this actually tastes better the next day, cold, straight from the fridge. No judgment here.
How I Like to Serve These
We usually just plonk the tray in the middle of the table—less washing up. Sometimes I’ll serve alongside roast chicken or pork, but no shame in eating them with nothing but a crusty bit of bread (try this no-knead bread recipe if you want something proper cozy). At Christmas, I sprinkle on some dried cranberries for color—my mum says it looks ‘festive as anything,’ for whatever that’s worth.
Pro Tips (from My Kitchen Fumbles)
- I once tried rushing this by cranking up the oven. Ended up with burnt maple syrup and soggy sprouts. Don’t do it—slow and steady wins here.
- Cut your sprouts evenly. Otherwise, half will be burnt and half will be raw, and no one loves that mix.
- Actually, I find the best bacon is the kind with a little fat left—it sort of bastes the sprouts as they cook. Leaner bacon isn’t as tasty, sorry!
FAQ: Real Questions I’ve Actually Been Asked
- Can I make this ahead of time? Sort of. You can prep the sprouts and bacon, but don’t roast until you’re ready. Or reheat leftovers in the oven—just don’t microwave, they go weirdly soggy.
- I’m vegetarian—can I skip the bacon? Yep! Swap bacon for smoked paprika and maybe some toasted nuts. Not quite the same, but pretty tasty in its own right. I’ve linked a good vegetarian version on Cookie and Kate.
- Is maple syrup really necessary? Well, sort of. You can just use honey if you want, but maple’s got that deep flavor. Pancake syrup works at a pinch but isn’t quite right—still, don’t let it stop you.
- Mine burned! What did I do wrong? Ah, probably left them too long after the syrup went on. Keep a close eye that last 10 minutes. Or maybe your oven’s just a bit on the wild side, like mine. Happens to the best of us!
- Can I add garlic? For sure! I sometimes toss in a couple of smashed cloves—it’s good, just don’t let them burn. Burnt garlic’s not a good time.
So, that’s my take on the BEST Maple Bacon Brussels Sprouts Recipe. If you try it, let me know how it goes—or what you tweak! Always up for new ideas (and excuses for more bacon).

Ingredients
- 1 1/2 pounds Brussels sprouts, trimmed and halved
- 6 slices thick-cut bacon, chopped
- 3 tablespoons pure maple syrup
- 2 tablespoons olive oil
- 1/2 teaspoon salt
- 1/4 teaspoon black pepper
- 1/4 teaspoon garlic powder
- 1 tablespoon balsamic vinegar (optional)
Instructions
-
1Preheat the oven to 400°F (200°C). Line a large baking sheet with parchment paper.
-
2In a large bowl, toss the Brussels sprouts with olive oil, salt, black pepper, and garlic powder until evenly coated.
-
3Spread the Brussels sprouts and chopped bacon evenly on the prepared baking sheet.
-
4Roast for 20-25 minutes, stirring halfway through, until the Brussels sprouts are golden and the bacon is crispy.
-
5Remove from the oven and drizzle with maple syrup (and balsamic vinegar, if using). Toss to coat and serve immediately.
CLICK FOR NUTRITION INFO
↑
Approximate Information for One Serving
Serving Size:
1 serving
Calories:
230 caloriescal
Protein:
8gg
Fat:
13gg
Saturated Fat:
0g
Trans Fat:
0g
Cholesterol:
0mg
Sodium:
0mg
Potassium:
0mg
Total Carbs:
20gg
Fiber:
0g
Sugar:
0g
Net Carbs:
0g
Vitamin A:
0
Vitamin C:
0mg
Calcium:
0mg
Iron:
0mg
Nutrition Disclaimers
Number of total servings shown is approximate. Actual number of servings will depend on your preferred portion sizes.
Nutritional values shown are general guidelines and reflect information for 1 serving using the ingredients listed, not including any optional ingredients. Actual macros may vary slightly depending on specific brands and types of ingredients used.
To determine the weight of one serving, prepare the recipe as instructed. Weigh the finished recipe, then divide the weight of the finished recipe (not including the weight of the container the food is in) by the desired number of servings. Result will be the weight of one serving.
Did you make this recipe?
Please consider Pinning it!!