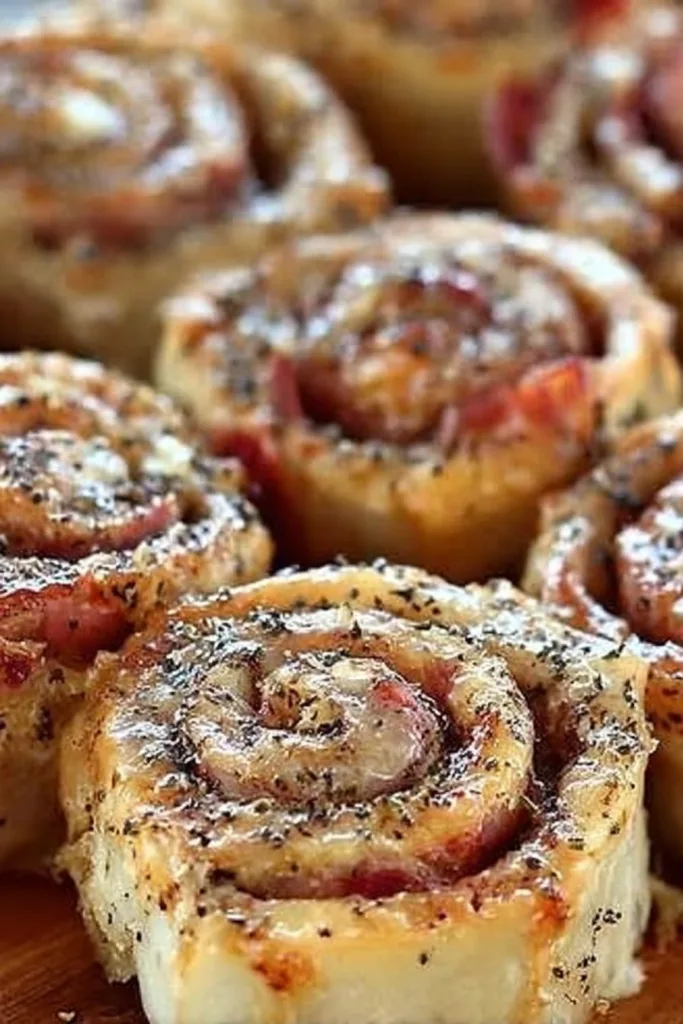
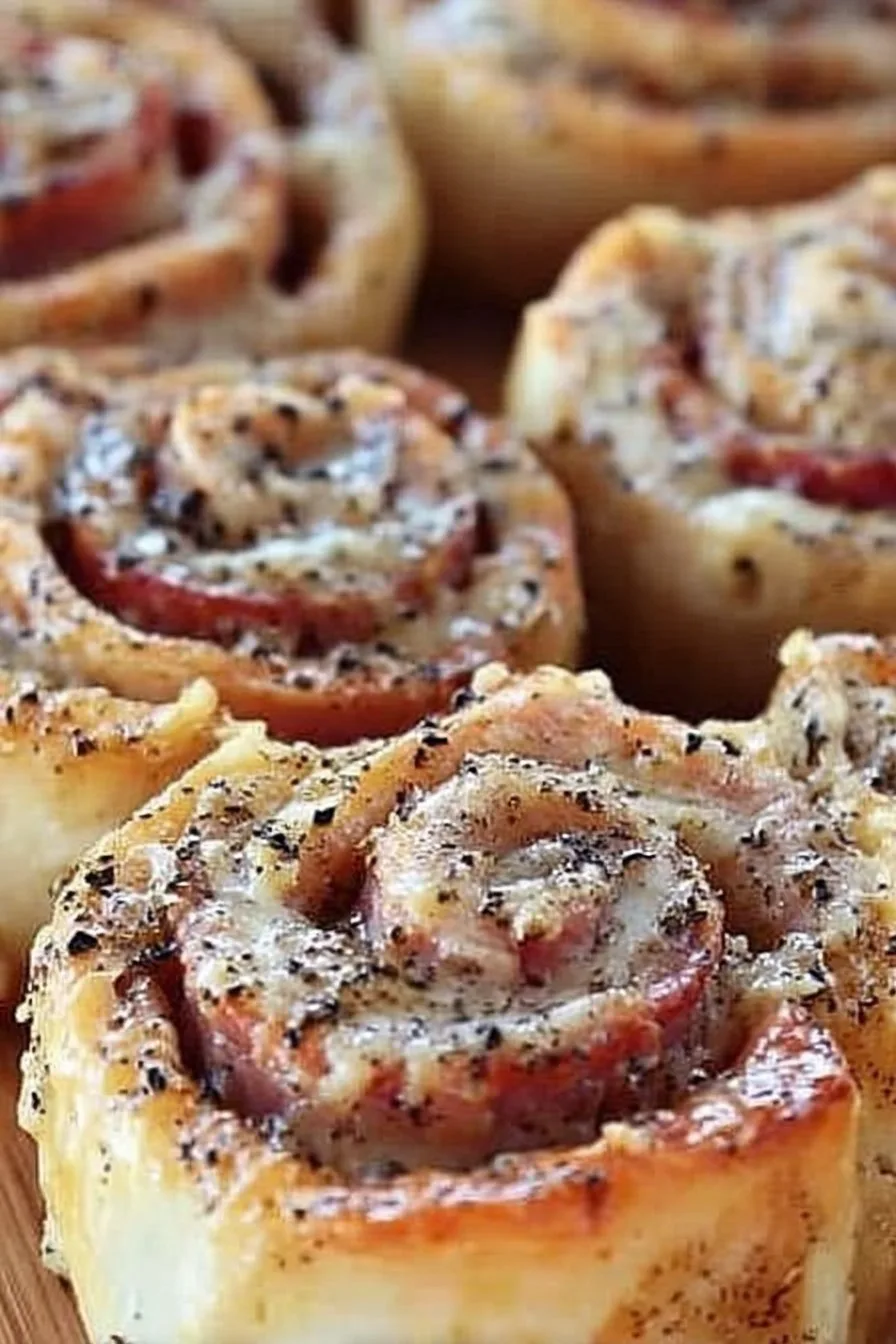
Alright, so picture this: it’s a rainy Saturday afternoon, the kind where you just want to stay in your jammies and binge-watch old sitcoms. My kids are grumbling about being ‘starving’ (even though they just ate, but whatever). That’s when I usually whip out my secret weapon—savory ham and cheese pinwheels. These have been my little lifesaver since my uni days, when I basically lived off whatever I could fit in my tiny oven. Plus, one time my mate tried to use the toaster for these—spoiler, not recommended. Anyway, let’s get rolling (see what I did there?).
Why You’ll Love This (Or at Least Why I Do)
I make this when I need something a bit more exciting than plain sandwiches but can’t be bothered with a full-on meal. My family goes absolutely mad for these—honestly, I have to set some aside if I want any for myself. They’re perfect for parties or those nights when you realize you forgot to plan dinner (oops, again). Sometimes I get annoyed with all the fiddly recipes online, but this one? It’s actually as easy as it looks. And if you don’t have ham, well, the world won’t end (I’ve done it with turkey in a pinch and survived).
What You’ll Need (And a Few Cheeky Substitutes)
- 1 sheet puff pastry (I use the ready-rolled stuff from the store—no shame. My Nan swore by Jus-Rol, but honestly, any brand works.)
- 100g (about 3.5 oz) sliced ham (swap for turkey or even roast chicken if you’re feeling wild)
- 120g (roughly a generous handful) grated cheese (cheddar is classic, but mozzarella is pretty melty, and I’ve sometimes chucked in a bit of Swiss or even a sad end of brie)
- 1 tablespoon Dijon mustard (or English mustard if you want a proper kick; sometimes I skip it if I’m making these for the kids)
- 1 egg, beaten (for the glaze, but a splash of milk will do if you’re out of eggs; been there!)
- Optional: a sprinkle of black pepper or some dried herbs—oregano is lovely, but don’t stress if you don’t have any
How To Make ‘Em (Just Roll With It)
- Preheat your oven to 200°C (or 400°F if you’re in the States). Line a baking tray with parchment. Or just give it a squirt of nonstick spray if you can’t find the parchment—been there.
- Unroll the puff pastry on a lightly floured surface. If it tears a bit, just squish it back together. No one’s judging.
- Spread the mustard all over, sort of like you’re painting a fence. Don’t go overboard unless you’re really into mustard.
- Layer on the ham slices. This is where I usually sneak a slice for myself; quality control and all that.
- Sprinkle the cheese over the ham. I get a bit carried away here—more cheese is always better, right?
- Roll the whole lot up from the long side, kind of like a sleeping bag but tastier. If it’s not perfectly tight, don’t worry. It always looks a bit odd at this stage, but trust me, it works out.
- Use a sharp knife to slice the roll into pieces about 2cm (or about an inch) thick. They don’t all have to be the same—rustic, I say.
- Pop them on your tray, cut side up. Brush with beaten egg (or milk, remember?) to make them all shiny.
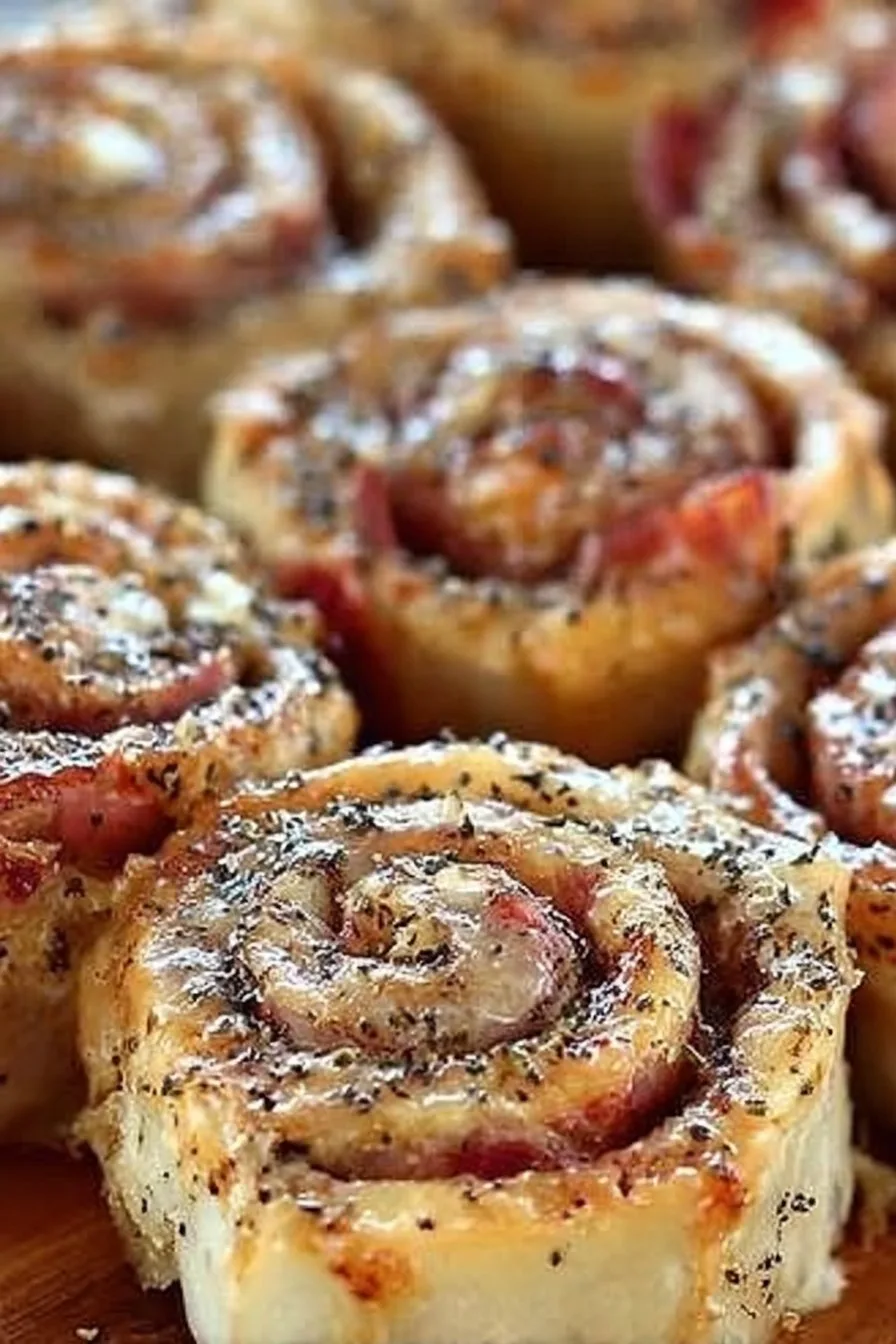
- Bake for about 18–22 minutes until golden and puffed. This is the torture bit—your kitchen will smell like heaven, but you have to wait.
- Let them cool for a few minutes if you can bear it. Honestly, I’ve nearly burnt my tongue more than once because I couldn’t wait.
Notes (Things I’ve Learned the Hard Way)
- If you overload the cheese, it escapes. Not a disaster, but I end up scraping it off the paper and eating it anyway.
- Pastry stuck to the tray? A proper nonstick tray is a game changer, but if you’re like me and keep forgetting to buy one, just let the pinwheels cool a bit before prying them off.
- Once I made these with spicy mustard without realizing, and my youngest nearly exploded. Maybe label your mustards?
Variations (Because Sometimes I Get Bored)
- Swap the ham for roast veggies if you’re feeding vegetarians. My attempt with roasted peppers and goat cheese was actually pretty lush.
- I tried adding pineapple once for a Hawaiian twist—didn’t love it, but maybe your tastebuds are more adventurous.
- Add a smidge of pesto with the cheese. Next-level flavor, but go easy or it’ll overpower everything (learned that the hard way).
Equipment (And What To Do If You Don’t Have It)
- Baking tray – essential. Or so I used to think—turns out a pizza stone works in a pinch, though the pinwheels look a bit wild.
- Sharp knife – I’ve used a bread knife when my good ones are in the wash. It’s fine, just go slow.
- Pastry brush – Or just use your (clean!) fingers to dab on the egg wash. Not posh, but it works.
How To Store (If They Even Last That Long)
Keep leftovers (ha, as if) in an airtight container in the fridge for up to 2 days. They reheat surprisingly well—just pop them in a warm oven for 5 minutes. But honestly, in my house, they’re gone by breakfast the next day, so who am I kidding?
How I Like To Serve ‘Em (And What My Family Thinks)
I love these best when they’re warm from the oven, but my other half swears they’re perfect picnic food. Try them with a quick green salad or just plonk them on a big plate for folks to grab. Sometimes we have them with a mug of tomato soup (especially if it’s cold out—you can find my favorite homemade soup recipe over at BBC Good Food). My youngest dips his in ketchup, don’t ask me why.
Pro Tips (a.k.a. Things I’ve Messed Up So You Don’t Have To)
- Don’t try to slice the roll too thin or it’ll just squish. I once tried to get fancy—regretted it immediately.
- If you’re tempted to skip chilling the pastry, resist! Warm pastry is a pain to work with. Actually, I find it works better if you chill it for 10 minutes before rolling.
- Forgot to preheat the oven? Join the club. But seriously, if you bake these in a cold oven, they’ll go all flat and sad.
FAQ (Because People Really Do Ask Me These Things)
- Can I make these ahead? Yep! Just assemble, slice, and chill the raw pinwheels on the tray in the fridge, covered, for up to 12 hours. Bake ‘em when you’re ready. (I once left them overnight and they were fine!)
- Can I freeze them? Oh, for sure. Either before baking or after. If you freeze baked ones, reheat in the oven so they crisp up again. Don’t microwave—unless you like soggy pastry, which…well, no judgment.
- What cheese works best? The classic is cheddar, but honestly, use whatever’s lying in your fridge. Smoked cheese is lovely too. Sometimes I mix in a bit of Parmesan for zip.
- Can I make these gluten-free? Absolutely! Use gluten-free puff pastry. I’ve tried the Jus-Rol version (here’s a handy link if you want to check ingredients: Jus-Rol Gluten-Free Puff Pastry), and it’s pretty close to the real thing.
- My pinwheels unroll in the oven! What did I do? Happens to the best of us. Sometimes I press the edge with a fork to seal it, or you can brush a dab of water along the seam before rolling up.
Oh, one last thing—if you’re new to pastry, don’t stress about making it look perfect. Frankly, the slightly wonky ones always taste the best. And if you want more snack inspiration, I found some brilliant ideas at Serious Eats (I’ve definitely borrowed a trick or two from them).
Anyway, hope you love these as much as we do. If not, at least your kitchen will smell amazing for an hour or so. Happy rolling!
Ingredients
- 1 sheet puff pastry, thawed
- 120 g sliced ham
- 100 g shredded cheddar cheese
- 50 g shredded mozzarella cheese
- 1 tablespoon Dijon mustard
- 1 egg, beaten (for egg wash)
- 1 tablespoon chopped fresh parsley (optional)
- Salt and black pepper, to taste
Instructions
-
1Preheat the oven to 200°C (400°F) and line a baking sheet with parchment paper.
-
2Unroll the puff pastry sheet on a lightly floured surface. Spread Dijon mustard evenly over the pastry.
-
3Layer the sliced ham evenly over the mustard, then sprinkle both cheddar and mozzarella cheeses on top. Season with salt and black pepper.
-
4Starting from one long edge, tightly roll up the pastry into a log. Slice the log into 2 cm (about 3/4 inch) thick pinwheels.
-
5Place the pinwheels cut side up on the prepared baking sheet. Brush the tops with beaten egg.
-
6Bake for 16-18 minutes or until golden brown and puffed. Garnish with chopped parsley if desired. Serve warm.
CLICK FOR NUTRITION INFO
↑
Approximate Information for One Serving
Serving Size:
1 serving
Calories:
210cal
Protein:
9 gg
Fat:
13 gg
Saturated Fat:
0g
Trans Fat:
0g
Cholesterol:
0mg
Sodium:
0mg
Potassium:
0mg
Total Carbs:
16 gg
Fiber:
0g
Sugar:
0g
Net Carbs:
0g
Vitamin A:
0
Vitamin C:
0mg
Calcium:
0mg
Iron:
0mg
Nutrition Disclaimers
Number of total servings shown is approximate. Actual number of servings will depend on your preferred portion sizes.
Nutritional values shown are general guidelines and reflect information for 1 serving using the ingredients listed, not including any optional ingredients. Actual macros may vary slightly depending on specific brands and types of ingredients used.
To determine the weight of one serving, prepare the recipe as instructed. Weigh the finished recipe, then divide the weight of the finished recipe (not including the weight of the container the food is in) by the desired number of servings. Result will be the weight of one serving.
Did you make this recipe?
Please consider Pinning it!!