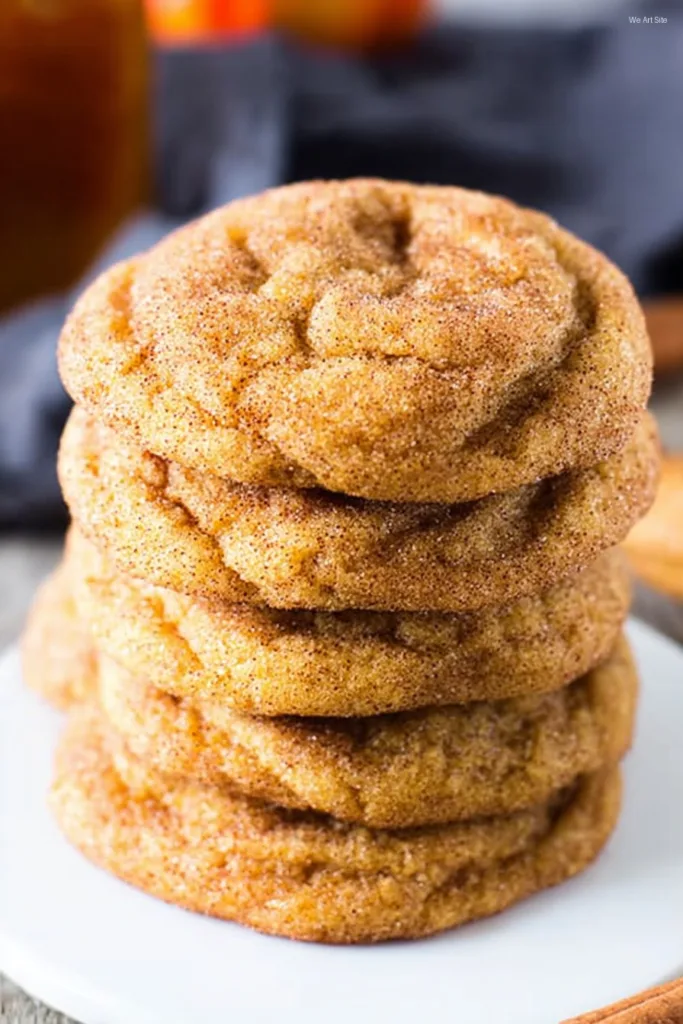
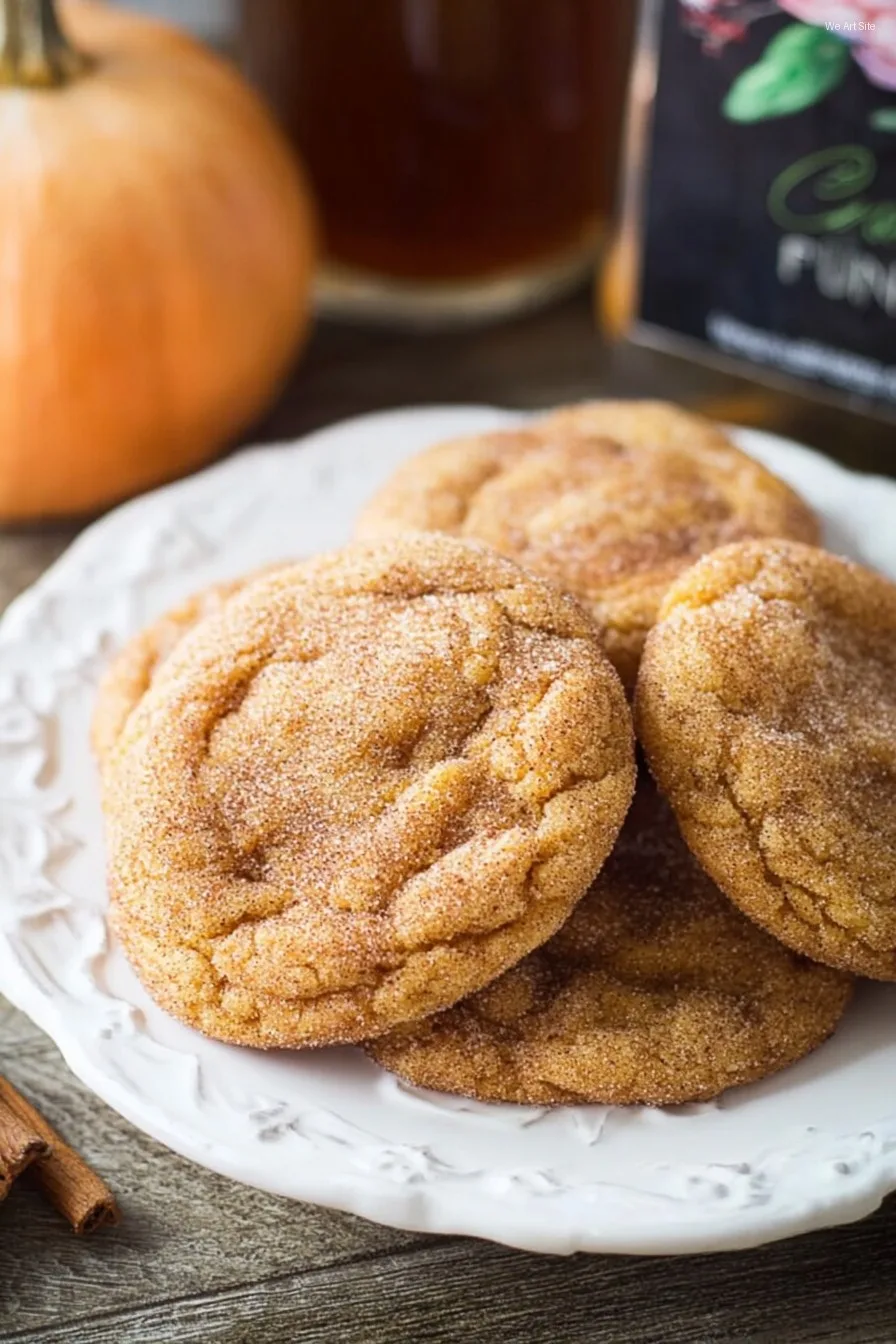
Let’s Talk About Pumpkin Spice Cookies (and My Messy Kitchen)
So there I was, last October, trying to impress my neighbor Alice with my “famous” pumpkin spice cookies while my kids staged a flour explosion in the background. Picture me, elbow-deep in dough, realizing I forgot to buy butter. Typical. But, you know, there’s something about the scent of cinnamon and nutmeg that makes a home feel twice as warm, even when everything else is chaos. Oh, and pro tip: don’t wear your favorite jumper when you’re “enthusiastic” about flour—learned that one the hard way! Anyway, pumpkin spice cookies have become my autumn calling card, maybe my excuse to eat cookies for breakfast (no judgment, right?).
Why You’ll Love This (Or At Least Why I Do)
I make these when I crave something cozy but don’t want to faff around for ages. The real clincher? My family goes wild for them, though my partner always claims he “doesn’t even like pumpkin” (but he eats half a dozen). Honestly, I’ve tried other pumpkin things that tasted like a scented candle—not these! The best thing? The dough’s easy to work with—mostly. Oh, remember last year when I accidentally used salt instead of sugar? Yeah, nobody’ll ever let me live that down. If you’re the type who appreciates a cookie that stays soft even on day three (assuming they last that long—doubtful!), this is your jam… or, well, your cookie.
Your Shopping List (And a Few Cheeky Swaps)
- 1 cup canned pumpkin purée (honestly, puréed roasted squash works fine if you’re in a pinch)
- 1/2 cup unsalted butter, softened (I’ve subbed in margarine when desperate—didn’t notice much difference)
- 1 cup light brown sugar (Grandma says “dark or nothing,” but meh, I use what’s in the cupboard)
- 1/2 cup granulated sugar
- 2 eggs, room temp (sometimes I forgot and used them cold, never ruined the batch)
- 2 tsp vanilla extract
- 2 1/2 cups plain flour (or just a big heap if you eyeball it—kidding, mostly)
- 1 1/2 tsp baking powder
- 1/2 tsp baking soda
- 1/2 tsp salt
- 2 tsp ground cinnamon
- 1 tsp ground ginger
- 1/2 tsp nutmeg (fresh grated if you fancy, but I’m lazy and use the jar stuff)
- 1/2 cup chopped walnuts or pecans (optional, but adds a nice crunch!)
How I Make Pumpkin Spice Cookies – and Yes, Sometimes I Break the Rules
- First things first, preheat your oven to 350°F (180°C). I know, boring. Grab a good old baking tray and line it with parchment—makes clean-up way easier, unless you like prying cookies from pans. I don’t.
- In a big bowl, beat the butter and both sugars till they’re fluffy and lighter than you feel on a Monday. You can use a mixer, but I’ve done it with just a wooden spoon when my mixer died (wrist workout bonus, ha).
- Crack in your eggs—one at a time, or both in together if you’re in a rush—plus the vanilla. Mix again. Now, in goes the pumpkin. This is where it sometimes looks a bit, well, questionable. Don’t worry. Keep going.
- In another bowl, whisk the flour, baking powder, baking soda, salt, and all those lovely spices together. Sometimes I don’t bother to sift them and the world hasn’t ended yet.
- Mix the dry into the wet bit by bit. It’ll look too soft at first; that’s normal. Fold in the nuts if you’re using them. I always snack on a few because, why not?
- Scoop heaping tablespoonfuls onto the tray, leaving a bit of space. Pro tip: the ‘cookie scoop’ is nice but your regular spoon works fine (or just use your hands, I won’t tell).
- Bake about 12-15 minutes, till the edges firm up but the middle’s still kind of pillowy. Honestly, this is where I start hovering—nothing wrong with peeking.
- Let them cool a couple minutes before moving to a rack, though “cool” is relative in my house—I burn my tongue every time. Worth it.
Random Notes From a Serial Cookie Maker
- Every batch looks a bit different for me—sometimes they spread, sometimes they puff. I think it depends on the weather, or maybe my mood.
- I think these actually taste even better the next day (if you remember to hide a few—seriously).
- Once, I tried to double the recipe for a bake sale but forgot to double the eggs. Disaster. Now I triple check.
If You’re Feeling Adventurous (Variations That Sorta Worked)
- Choc chip version? Amazing. Just toss in a handful of dark chocolate chips.
- Add orange zest! It brightens the flavor, and sounds posh too. My mum swore by it.
- I tried cranberries last Christmas—honestly, not my fave, a bit too tart, but maybe you’ll love them.
- If you’re gluten-free, I’ve used this flour blend and it was a hit!
What If I Don’t Have All the Gadgets?
Honestly, plenty of times I’ve lost my hand mixer to a broken beater mid-bake. A big bowl and a sturdy spoon works (it just takes a bit of elbow grease). No cooling rack? Lay out a clean tea towel and shuffle the cookies onto that. It’s rustic, right?
How I (Attempt To) Store Them
Air-tight container is great, but in my house, cookies mysteriously vanish (usually to kids’ lunchboxes or someone’s midnight snack). If you actually manage to hide a few, they’ll stay soft for 3 days, maybe even four, but—let’s be real—they’re probably not going to last that long. You can freeze the dough though (just check out these instructions if you want more detail than I care to write up just now).
How I Like To Serve ‘Em (And a Side Story)
I usually pile these cookies high on my biggest plate and bring them out with a big mug of milky tea. Sometimes, if I’m feeling a bit ‘extra’, I dust a little cinnamon sugar over the top. And for some reason, my daughter insists on dipping hers in hot chocolate—might as well be a seasonal tradition now. Oh, and once I tried serving them with vanilla ice cream after Sunday roast—slightly odd combo, but somehow it worked.
Lessons From My Baking Blunders (a.k.a. Pro Tips)
- Don’t skip chilling the dough if it feels really sticky—otherwise you’ll end up with one massive, sticky cookie (been there; ate it anyway).
- Let them cool before moving or they’ll break apart—unless you like cookie crumbs (honestly, they still taste great).
- Once, I thought I could get away with less spice. It tasted like plain bread. Don’t be shy with the cinnamon!
All the Random Questions I’ve Actually Been Asked
- Can I use fresh pumpkin instead of canned?
- Yep! Just roast and mash—drain a bit so it’s not too watery. Actually, I find it works better if you let it cool first.
- Do I have to use nuts?
- Nope. You can totally leave them out. Or add seeds if you want, though I can’t say I’ve tried that myself.
- What if I’m out of brown sugar?
- You can use all white sugar; maybe add a tiny bit of molasses if you’ve got it. Or just use white, they’ll survive.
- Can I double the batch?
- Absolutely, but—just take it easy and double-check your math. I’ve made that mistake; not fun.
- Are these cookies spicy-hot?
- Nope, just warm spices, nothing that’ll knock your socks off. Unless you add extra ginger for a kick!
Phew, feel free to ping me if you need to vent about a baking flop; we’ve all been there! If you want to brush up on the basics, this cookie baking guide is actually really helpful (and I love their pictures).

Ingredients
- 2 1/4 cups all-purpose flour
- 1 teaspoon baking soda
- 2 teaspoons ground cinnamon
- 1/2 teaspoon ground nutmeg
- 1/4 teaspoon ground ginger
- 1/4 teaspoon ground cloves
- 1/2 teaspoon salt
- 1 cup unsalted butter, softened
- 1 cup granulated sugar
- 1/2 cup packed brown sugar
- 1 cup pumpkin puree
- 1 large egg
- 2 teaspoons vanilla extract
Instructions
-
1Preheat oven to 350°F (175°C). Line two baking sheets with parchment paper.
-
2In a medium bowl, whisk together flour, baking soda, cinnamon, nutmeg, ginger, cloves, and salt.
-
3In a large bowl, cream together the butter, granulated sugar, and brown sugar until light and fluffy.
-
4Mix in pumpkin puree, egg, and vanilla extract until well combined.
-
5Gradually add the dry ingredients to the wet mixture, mixing until just combined.
-
6Drop rounded tablespoons of dough onto prepared baking sheets. Bake for 13-15 minutes or until the edges are set. Let cool before serving.
CLICK FOR NUTRITION INFO
↑
Approximate Information for One Serving
Serving Size:
1 serving
Calories:
120 caloriescal
Protein:
1 gg
Fat:
5 gg
Saturated Fat:
0g
Trans Fat:
0g
Cholesterol:
0mg
Sodium:
0mg
Potassium:
0mg
Total Carbs:
18 gg
Fiber:
0g
Sugar:
0g
Net Carbs:
0g
Vitamin A:
0
Vitamin C:
0mg
Calcium:
0mg
Iron:
0mg
Nutrition Disclaimers
Number of total servings shown is approximate. Actual number of servings will depend on your preferred portion sizes.
Nutritional values shown are general guidelines and reflect information for 1 serving using the ingredients listed, not including any optional ingredients. Actual macros may vary slightly depending on specific brands and types of ingredients used.
To determine the weight of one serving, prepare the recipe as instructed. Weigh the finished recipe, then divide the weight of the finished recipe (not including the weight of the container the food is in) by the desired number of servings. Result will be the weight of one serving.
Did you make this recipe?
Please consider Pinning it!!