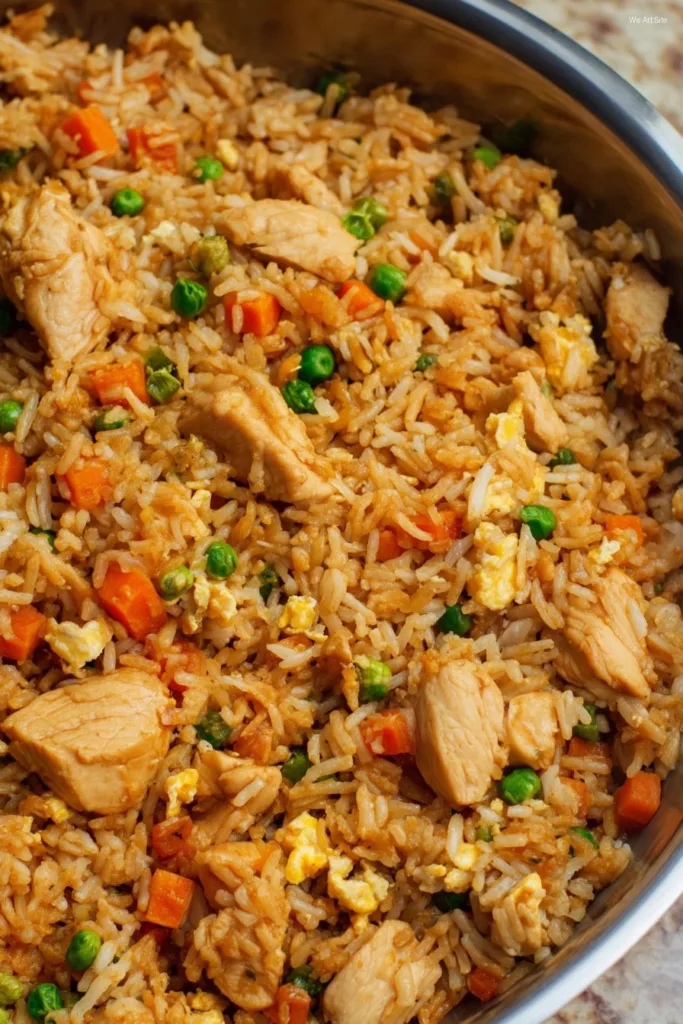
Let’s Talk About Garlic Butter Chicken Fried Rice (Or: Why My Kid Once Demanded It for Breakfast)
Alright, so quick confession—I’m actually writing this with a little bit of rice still stuck to my sleeve. That’s just how it goes when you throw together garlic butter chicken fried rice on a Wednesday and everyone is hoovering it straight from the skillet. First time I tried this, I was attempting to use up leftover rotisserie chicken and honestly wasn’t expecting much, but the way my family reacted—like I’d invented time travel or something? It kinda blew me away. Now, it’s a regular, bordering-on-legendary, event in our kitchen.
Also—I once got distracted halfway through making it and accidentally used parsley instead of scallions. No one noticed, but I insist the green bits are just non-negotiable, even if they’re not the ‘right’ ones (whatever that means).
Why You’ll Actually Love This Weirdly Addictive Dish
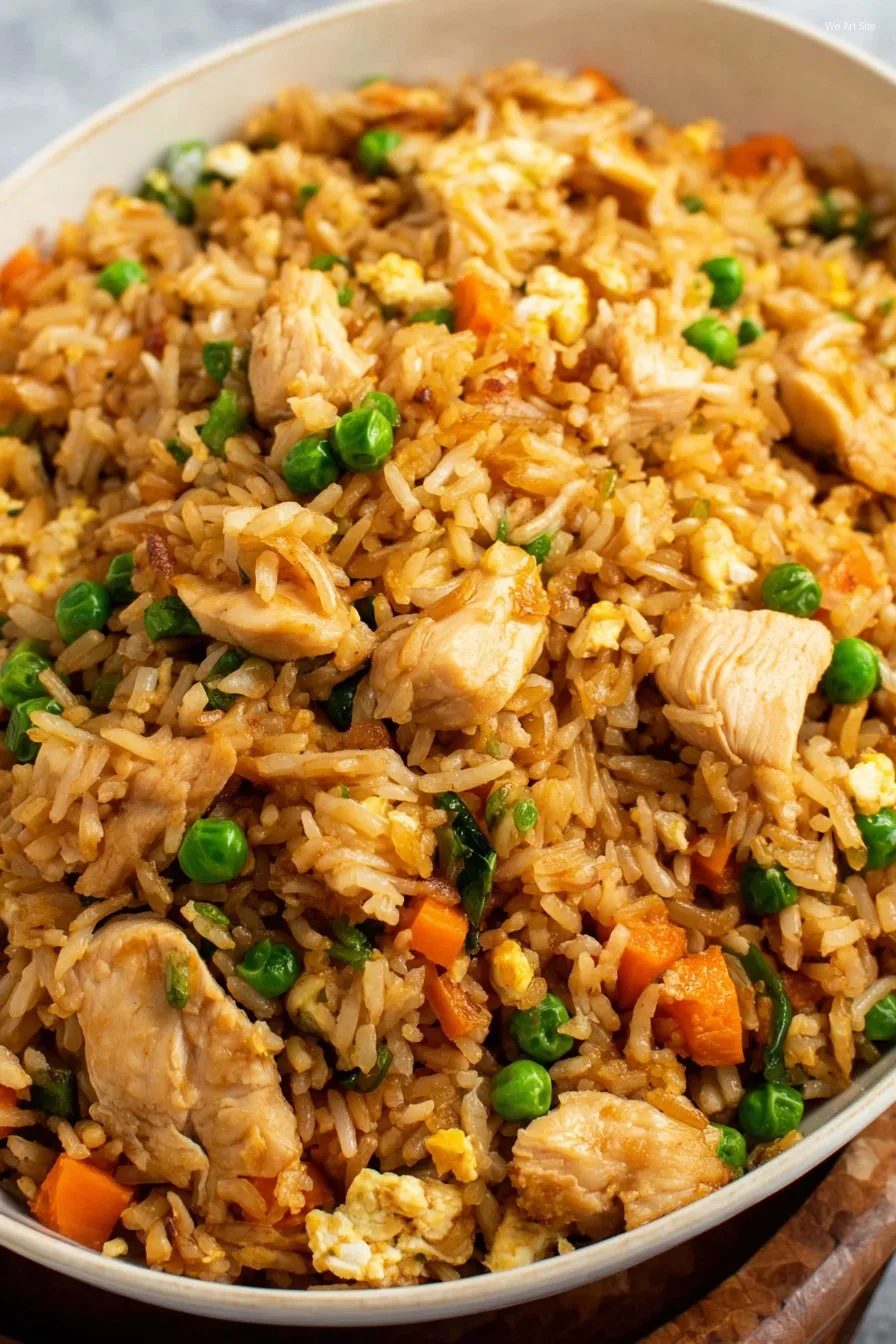
Real talk: I make this when I’m tired, hungry, and maybe just a tad lazy because it’s so forgiving. My family goes absolutely nuts for it (my daughter tried to barter it for her regular bedtime snack once, which just—no). The garlic butter part is what makes it feel a bit fancy, even though it definitely isn’t. It’s also my go-to when I realize I have leftover rice in the back of the fridge—which, honestly, I *plan* for now.
The chicken keeps things filling, and the veggies make me feel like we’re dabbling in health food (sort of). If you ever get put off by soggy fried rice, trust me, I’ve been there. Secret: dry, cold rice is your best mate here (shout out to all the day-old rice hoarders).
What You’ll Need to Make This (and a Few Things You Can Swap In)
- 2 heaping cups of leftover cooked rice (jasmine works best, but I sometimes use random basmati or even sushi rice—don’t tell my gran!)
- 2 chicken thighs or 1 chicken breast, diced (thighs are juicier, but use what you’ve got; rotisserie leftovers are magic for lazy nights)
- 2-3 tablespoons of unsalted butter (or salted—just watch your final salt)
- 2 big cloves garlic, minced (sometimes I cheat and use the jar stuff, especially when I can’t be bothered to peel garlic for the 43rd time that day)
- 1 cup frozen mixed vegetables (peas, carrots, corn, whatever medley’s in the freezer—fresh is fine too if you’re feeling fancy)
- 2 eggs (or one if you’re running low)
- 2-3 tablespoons soy sauce (dark, light, whatever’s handy; my grandma was loyal to Lee Kum Kee, but I’ll use the store brand when it’s on sale)
- 1 teaspoon sesame oil (not essential, actually, but it smells like takeout in the best way)
- Salt and white pepper, to taste (regular black pepper if you’re out)
- A handful of sliced scallions (or chives, or that parsley disaster if you’re me)
If you really want to shake things up, toss in some sliced mushrooms or chopped spinach. Apparently people put sriracha in theirs? I tried that once and my tongue still hasn’t forgiven me.
Let’s Get Cooking (And Yes, It Might Get A Little Messy)
1. Heat up a big ol’ skillet or wok over medium-high heat (don’t panic if you only have a regular frying pan, just make sure it’s hot). Splash in 1 tablespoon butter—wait till it smells all toasty. Dump in your diced chicken and sprinkle a little salt and pepper. Cook, stirring, until it starts browning—about 4-5 minutes. (This is where I usually lean over and sneak a piece. For quality control! Mostly.)
2. Scoot the chicken to the side; melt in another tablespoon of butter. Add garlic and stir for 30 seconds (don’t let it burn—trust me, burnt garlic is weirdly bitter and I still regret that one time).
3. Crack in the eggs. Stir them up like you just can’t be bothered, right in the pan. Let them just barely set before you mix them into the chicken.
4. Toss in the veggies. Stir, then let them get friendly with the rest of the crew for a couple minutes. Don’t worry if they’re still half-frozen when they go in—the rice will finish the job.
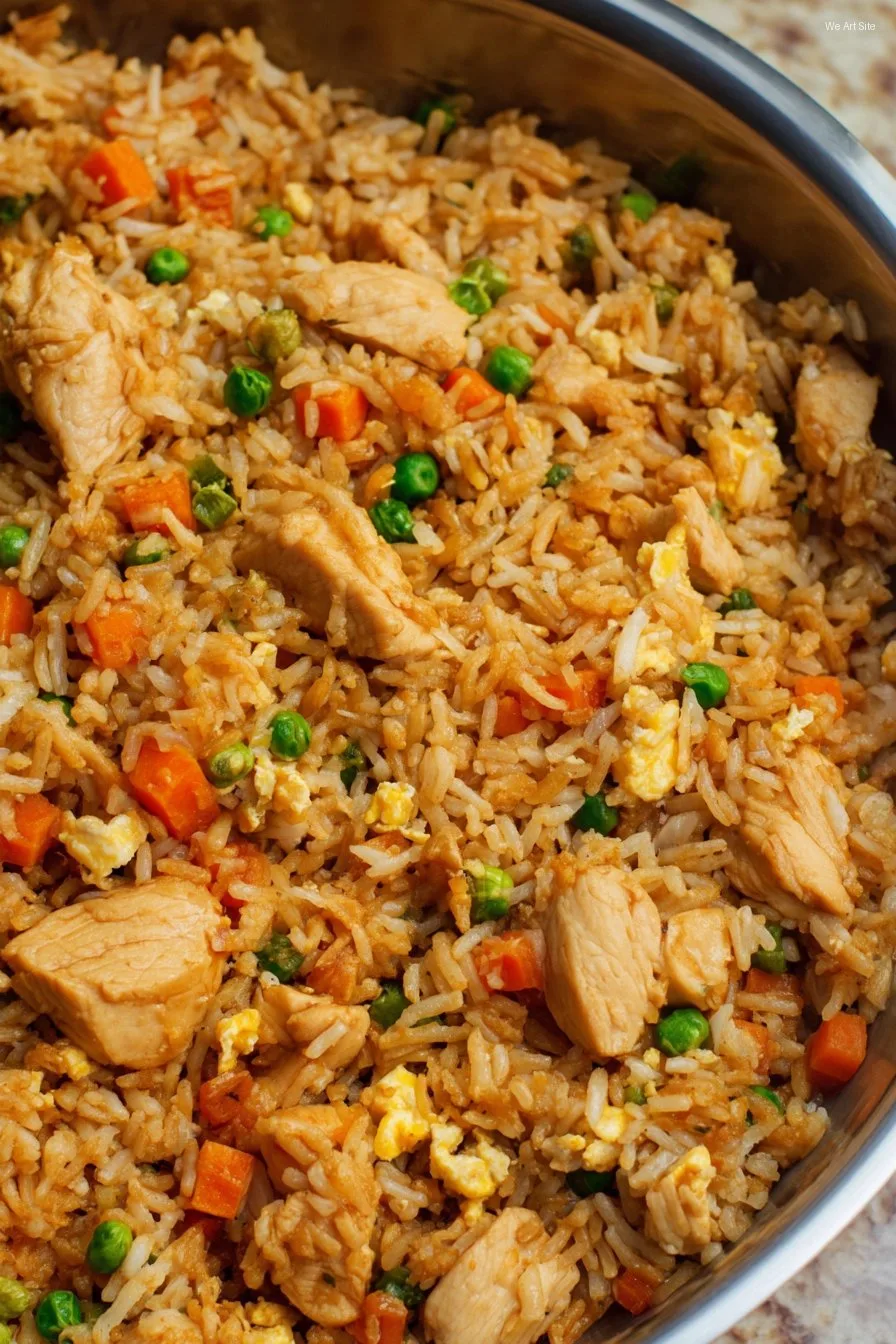
5. Chuck in your rice. Break up any evil rice clumps; sprinkle in another tablespoon of butter (yes, trust me). Pour soy sauce and sesame oil right over the top, then stir-fry the whole glorious mess for another 2-3 minutes—until it sounds a little sizzly and you spot a few toasty bits. (It might look a bit patchy at this stage. That’s perfectly fine. It always pulls together in the end—promise.)
6. Kill the heat. Stir in your scallions or whatever greenish thing you’re determined to include. Taste, and maybe sneak in another sprinkle of salt or a shake of pepper if you reckon it needs it. Serve right away, or—if you’re like me—stand over the pan and ‘sample’ directly while pretending to be testing for doneness.
Stuff I’ve Learned (Usually the Hard Way)
- No cold leftover rice? You can cheat by spreading fresh rice on a tray and sticking it in the freezer for 20 minutes. It’s not exactly the same, but it’ll do in a pinch.
- One time I accidentally dropped a splash of sweet chili sauce in—surprisingly decent, but definitely not essential.
- Don’t skip the butter. Olive oil just doesn’t have that same richness. Or maybe I’m just a butter tragic.
If You Want to Mess With Perfection (Variations)
I’ve made it with leftover roast pork—tasted fantastic, actually, a bit like something you’d get from a takeaway in Sydney. Tried chucking in diced red bell pepper for color—nice, but the kids moaned. One time I added pineapple like a rogue Hawaiian pizza fan and, look, it was weird… wouldn’t recommend unless you’re feeling truly reckless.
You could even skip the chicken altogether for a veg version; just double the veggies and maybe throw in some tofu. Works well, but don’t try to crisp the tofu up in the same pan as the rice. (I tried, it stuck like glue—never again!)
About Pans, Spoons, and Not-So-Essential Gadgets
Love a big wok, but any non-stick frying pan does the trick. If your pan’s on the small side, just ditch a bit of rice or do two batches (not worth dirtying the stove for one epic overflow). No wooden spoon? I’ve used an old plastic spatula more times than I’d care to admit—just make sure it doesn’t melt (true story…)
How to Store This (Though It Rarely Lasts That Long, Oops)
If—if!—somehow there are leftovers, just chuck it in a container and stash it in the fridge. It keeps for a couple days, and I actually think the flavors deepen (though honestly, around here it never lasts more than a day). Want to reheat? Microwave works, or gently on the stove with a splash of water to wake it up.
Here’s How We Serve It (Complete With Forgivable Oddities)
I almost always eat it straight from the pan—just bring the skillet to the table and hand out forks. But if I’m feeling civilized, it’s good with a side of quick pickled cucumbers for crunch, or even drizzled with a little extra soy sauce or chili oil. My partner swears by a poached egg plopped on top, which sounds weird but… try it. Oh! And if you want restaurant vibes, a sprinkle of crispy fried shallots doesn’t go astray (I order mine form Rasa Malaysia’s shop—super handy if you’re in a pinch, link: Rasa Malaysia).
Pro-Style Tips (Mostly Stuff I Messed Up First)
Don’t try to rush the pan heat up to high if your rice is still sticking together. (I once did, ended up with a burnt layer on the bottom and sad, soggy bits everywhere else. Not my finest hour.) If you want extra crispy fried rice, let it sit undisturbed for a minute, then scrape up the brown bits—I only learned that after watching way too many videos from Serious Eats.
Questions I Actually Get About This (Plus a Few I Imagined)
Can I make this without eggs? Absolutely, just skip them—makes it a bit less rich, that’s all. I sometimes add a splash of extra soy sauce to make up for it.
What if I don’t have butter? You can use oil, sure, but the flavor’s less… buttery. Actually, margarine is fine too, just don’t tell my French friend.
How do I make it vegetarian? Ditch the chicken; bump up the veggies, maybe add extra mushrooms, or some tofu. But really, use what you love.
Brown rice okay? Yup! Tastes a bit nuttier, but if your family’s on board, I say go for it.
Is it freezer-friendly? Probably, but the texture’s a bit off after thawing. I did it once for batch meals and, well, it wasn’t terrible, just not quite the same. Fresh is best here.
And one last little digression? I once accidentally dropped a single peanut in the pan, and my son spent the meal hunting for the “magic ingredient.” Now he asks every time. (No, peanuts are not necessary, but apparently they add intrigue.)
Other Useful Stuff
Curious about rice cookers? I use a cheap one, but Cook Smarts has great advice for keeping rice from getting gluey if you’re new to this. Worth a look if, like me, you sometimes forgot to rinse the rice and end up with a lumpy mess.
Alright, that’s enough rambling from me. Enjoy your garlic butter chicken fried rice and don’t forget to sneak a forkful before anyone else gets to it. It’s basically chef’s tax.
Ingredients
- 2 cups cooked jasmine rice (preferably day-old)
- 300g boneless skinless chicken breast, diced
- 3 tablespoons unsalted butter
- 4 cloves garlic, minced
- 2 large eggs, beaten
- 1 cup frozen mixed vegetables (peas, carrots, corn)
- 3 tablespoons soy sauce
- 2 green onions, sliced
- Salt and black pepper to taste
Instructions
-
1In a large skillet or wok, melt 1 tablespoon of butter over medium-high heat. Add the diced chicken pieces, season with salt and pepper, and cook until golden brown and cooked through, about 5-6 minutes. Remove chicken and set aside.
-
2In the same skillet, add another tablespoon of butter and the minced garlic. Sauté until fragrant, about 30 seconds.
-
3Push the garlic to one side of the pan and pour in the beaten eggs. Scramble the eggs gently and cook until just set.
-
4Add the cooked rice and mixed vegetables to the pan. Stir-fry for 2-3 minutes, breaking up any clumps of rice.
-
5Return the cooked chicken to the pan. Drizzle with soy sauce and add the remaining tablespoon of butter. Stir everything together and cook for another 2-3 minutes.
-
6Remove from heat and garnish with sliced green onions. Serve hot.
CLICK FOR NUTRITION INFO
↑
Approximate Information for One Serving
Serving Size:
1 serving
Calories:
490cal
Protein:
27 gg
Fat:
17 gg
Saturated Fat:
0g
Trans Fat:
0g
Cholesterol:
0mg
Sodium:
0mg
Potassium:
0mg
Total Carbs:
54 gg
Fiber:
0g
Sugar:
0g
Net Carbs:
0g
Vitamin A:
0
Vitamin C:
0mg
Calcium:
0mg
Iron:
0mg
Nutrition Disclaimers
Number of total servings shown is approximate. Actual number of servings will depend on your preferred portion sizes.
Nutritional values shown are general guidelines and reflect information for 1 serving using the ingredients listed, not including any optional ingredients. Actual macros may vary slightly depending on specific brands and types of ingredients used.
To determine the weight of one serving, prepare the recipe as instructed. Weigh the finished recipe, then divide the weight of the finished recipe (not including the weight of the container the food is in) by the desired number of servings. Result will be the weight of one serving.
Did you make this recipe?
Please consider Pinning it!!