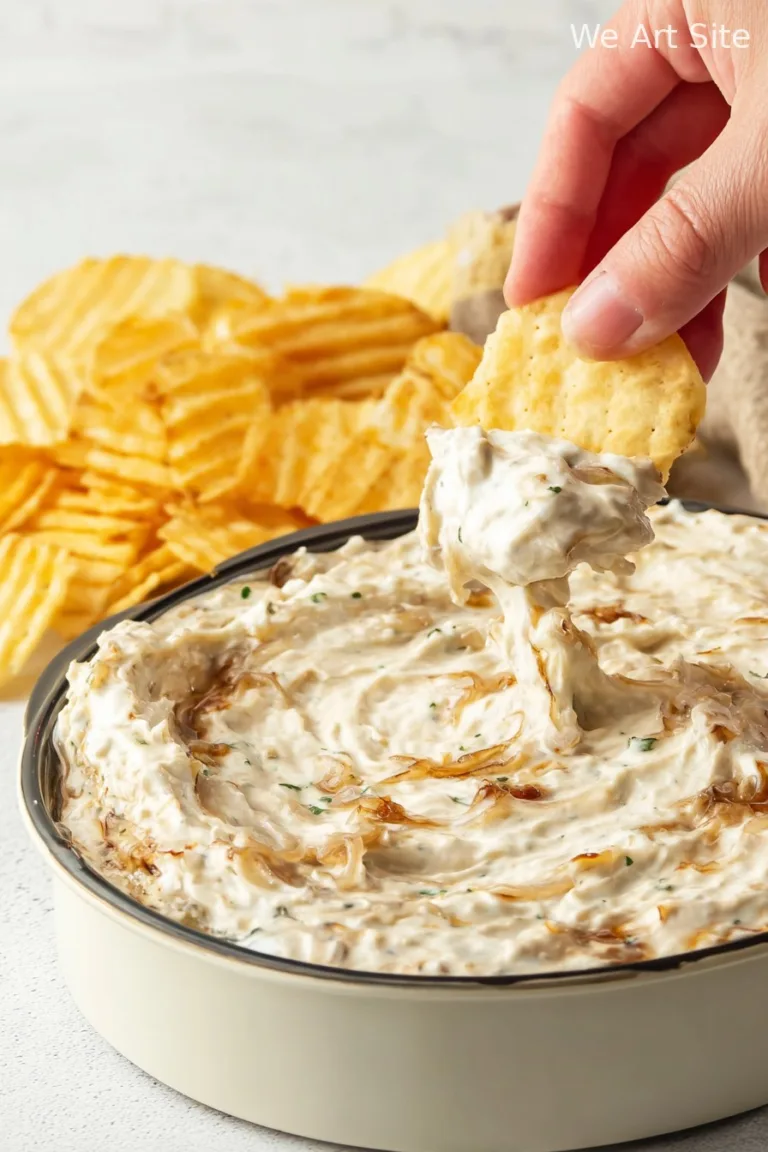
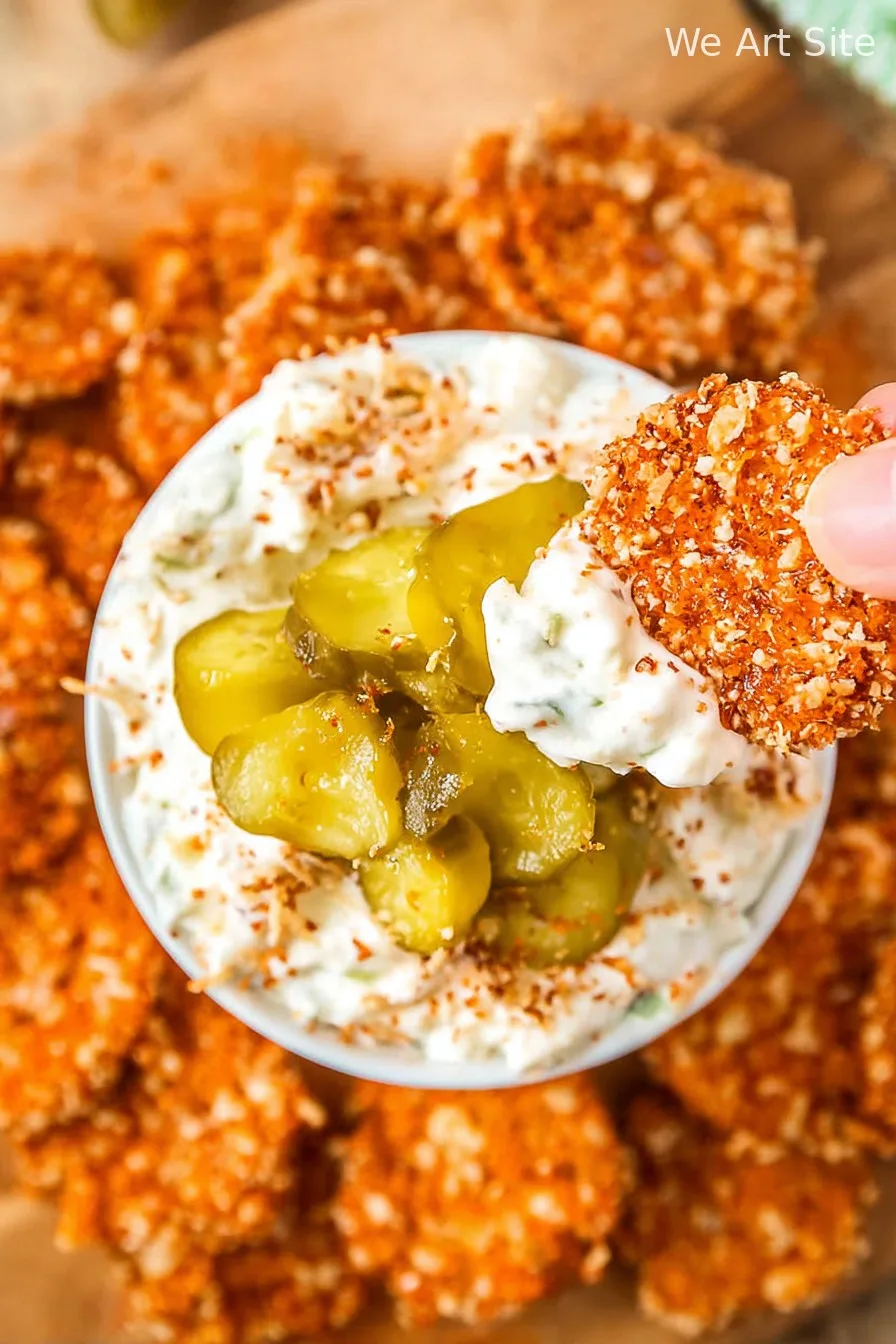
Hey y’all! If you’re a fan of crunchy snacks and creamy dips, this Fried Pickle Dip recipe is about to become your new favorite go-to appetizer. With all the tangy, dill-packed flavor of classic fried pickles wrapped in a rich cream cheese base and a buttery breadcrumb topping, it’s the ultimate crowd-pleaser—perfect for game day, potlucks, or any time you want to wow your guests. Grab your chips, veggies, or crackers—let’s get cooking!
Why You’ll Love This Fried Pickle Dip
- Incredibly easy and quick to make with simple ingredients.
- Packed with the addictive tang of dill pickles and crispy topping.
- Perfect for parties, potlucks, or as a fun movie night snack.
- Creamy, cheesy, and loaded with flavor in every bite.
- Can be served warm or cold, still tasting amazing!
Fried Pickle Dip Ingredients
- 8 oz (225 g) cream cheese, softened
- 1 cup (240 g) sour cream
- 1 1/2 cups (175 g) chopped dill pickles
- 1/2 cup (60 g) shredded cheddar cheese
- 1/4 cup (30 g) chopped fresh dill (or 1 tbsp dried dill)
- 2 tablespoons pickle juice
- 1/2 teaspoon garlic powder
- 1/4 teaspoon onion powder
- 1/2 teaspoon black pepper
- 1 cup (60 g) panko breadcrumbs
- 2 tablespoons unsalted butter, melted
- 1 tablespoon fresh chives, chopped (optional for garnish)
How to Make Fried Pickle Dip: Step-by-Step Directions
Step 1: Mix the Dip Base
In a large mixing bowl, combine the softened cream cheese and sour cream using a hand mixer or spatula until smooth and creamy. Stir in the chopped dill pickles, shredded cheddar cheese, fresh dill, pickle juice, garlic powder, onion powder, and black pepper until well-blended.
Step 2: Prepare the Crunchy Topping
Preheat your oven to 375°F (190°C). In a small bowl, mix the panko breadcrumbs with the melted butter until evenly coated. This mixture will give your Fried Pickle Dip its signature “fried” crunch!
Step 3: Assemble and Bake
Spoon the dip mixture into a medium oven-safe baking dish (about 1-quart/1-liter). Evenly sprinkle the buttery breadcrumbs on top. Bake in the preheated oven for 18-20 minutes, or until the topping is golden brown and the edges are bubbling.
Step 4: Serve and Enjoy
Let the Fried Pickle Dip cool for 5-10 minutes before adding chopped chives (optional) and serving with your favorite dippers.
Fried Pickle Dip Recipe Notes
- For extra flavor, try chopping the pickles as finely or coarsely as you like to adjust the texture of the dip.
- Use full-fat cream cheese and sour cream for the creamiest texture—find more dairy tips from Bon Appétit.
- If you’re looking for a gluten-free option, swap panko for your favorite gluten-free breadcrumbs.
Fried Pickle Dip Variations
- Spicy Fried Pickle Dip: Add 1-2 tablespoons of chopped pickled jalapeños and a pinch of cayenne.
- Bacon-Lover’s Version: Fold in 1/4 cup cooked, crumbled bacon for a smoky twist.
- Vegan Option: Substitute dairy-free cream cheese, vegan sour cream, and plant-based cheese for a delicious plant-based dip.
Required Equipment for Fried Pickle Dip
- Mixing bowls (large & small)
- Hand mixer or spatula
- Oven-safe baking dish (1 quart/1 liter)
- Measuring cups and spoons
- Knife and cutting board
Fried Pickle Dip Storage and Shelf Life
Store any leftover Fried Pickle Dip in an airtight container in the refrigerator for up to 3 days. For best texture, reheat gently in the oven at 300°F (150°C) until warmed through—microwaving may soften the crispy topping. Freezing is not recommended as it can compromise the creamy texture.
Pairings and Serving Recommendations for Fried Pickle Dip
- Serve with sturdy potato chips, pita chips, toasted baguette slices, or crunchy vegetable sticks (like celery, carrots, or bell peppers).
- This Fried Pickle Dip also pairs fabulously with chicken wings or as a unique burger topping for added zing!
- Double the batch for larger parties—this appetizer disappears fast!
Pro Tips for the Best Fried Pickle Dip
- Let the cream cheese fully soften before mixing for a lump-free, creamier dip—learn more about softening cream cheese quickly at The Kitchn.
- Chop pickles finely for even pickle flavor throughout every bite.
- Don’t overbake—keep an eye on your breadcrumb topping for that perfect golden finish.
Fried Pickle Dip FAQ
- Can I make Fried Pickle Dip ahead of time?
- Absolutely! Prepare the dip base and store covered in the fridge, then add breadcrumbs and bake just before serving.
- Can I serve this cold?
- Yes! Fried Pickle Dip is delicious both warm with a crispy topping or chilled, straight from the fridge.
- How can I make this dip healthier?
- Swap in light cream cheese and Greek yogurt for the sour cream for a lighter but still tasty version. For more on nutrition swaps, check out EatRight.org.
Prep Time: 10 minutes | Total Time: 30 minutes | Cook Time: 20 minutes

Ingredients
- 8 oz cream cheese, softened
- 1 cup dill pickles, finely chopped
- 1/2 cup sour cream
- 1/2 cup shredded cheddar cheese
- 1/4 cup mayonnaise
- 1/4 cup green onions, finely sliced
- 1 teaspoon garlic powder
- 1/2 cup panko breadcrumbs
- 2 tablespoons unsalted butter, melted
Instructions
-
1In a medium mixing bowl, combine the softened cream cheese, sour cream, mayonnaise, and garlic powder. Beat until smooth and creamy.
-
2Fold in the chopped dill pickles, shredded cheddar cheese, and sliced green onions. Mix until well incorporated.
-
3Spoon the dip mixture into a serving dish or pie plate and spread evenly.
-
4In a small bowl, mix the panko breadcrumbs with melted butter until evenly coated.
-
5Sprinkle the buttered panko topping evenly over the dip. Bake at 400°F (200°C) for 8 minutes or until the topping is golden brown.
-
6Serve warm with chips, crackers, or fresh vegetables for dipping.
CLICK FOR NUTRITION INFO
↑
Approximate Information for One Serving
Serving Size:
1 serving
Calories:
190 caloriescal
Protein:
4gg
Fat:
15gg
Saturated Fat:
0g
Trans Fat:
0g
Cholesterol:
0mg
Sodium:
0mg
Potassium:
0mg
Total Carbs:
7gg
Fiber:
0g
Sugar:
0g
Net Carbs:
0g
Vitamin A:
0
Vitamin C:
0mg
Calcium:
0mg
Iron:
0mg
Nutrition Disclaimers
Number of total servings shown is approximate. Actual number of servings will depend on your preferred portion sizes.
Nutritional values shown are general guidelines and reflect information for 1 serving using the ingredients listed, not including any optional ingredients. Actual macros may vary slightly depending on specific brands and types of ingredients used.
To determine the weight of one serving, prepare the recipe as instructed. Weigh the finished recipe, then divide the weight of the finished recipe (not including the weight of the container the food is in) by the desired number of servings. Result will be the weight of one serving.
Did you make this recipe?
Please consider Pinning it!!