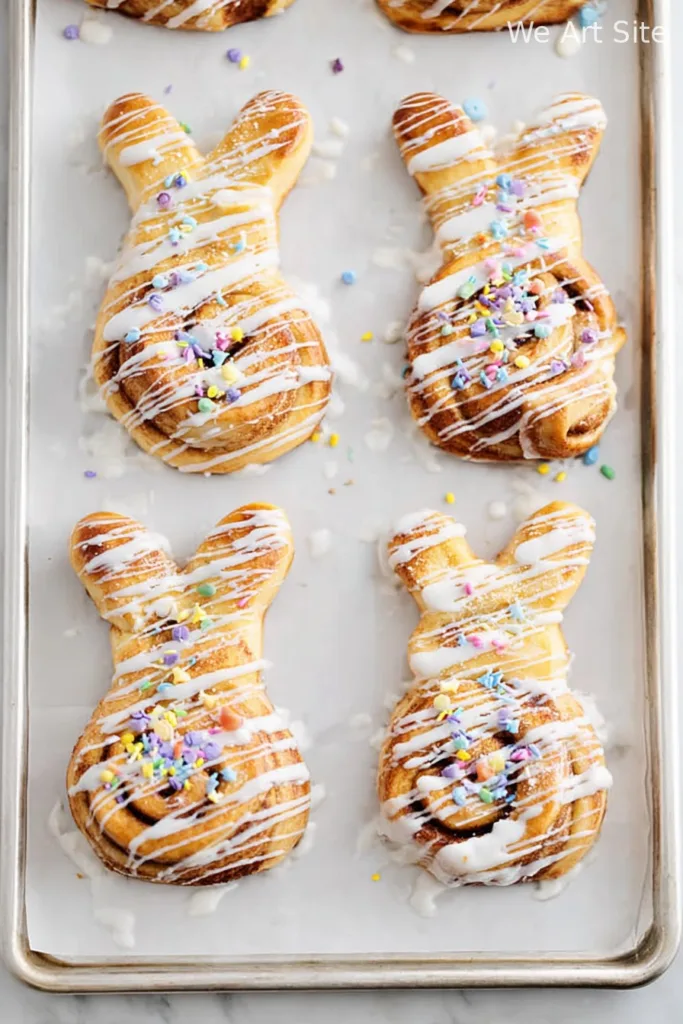
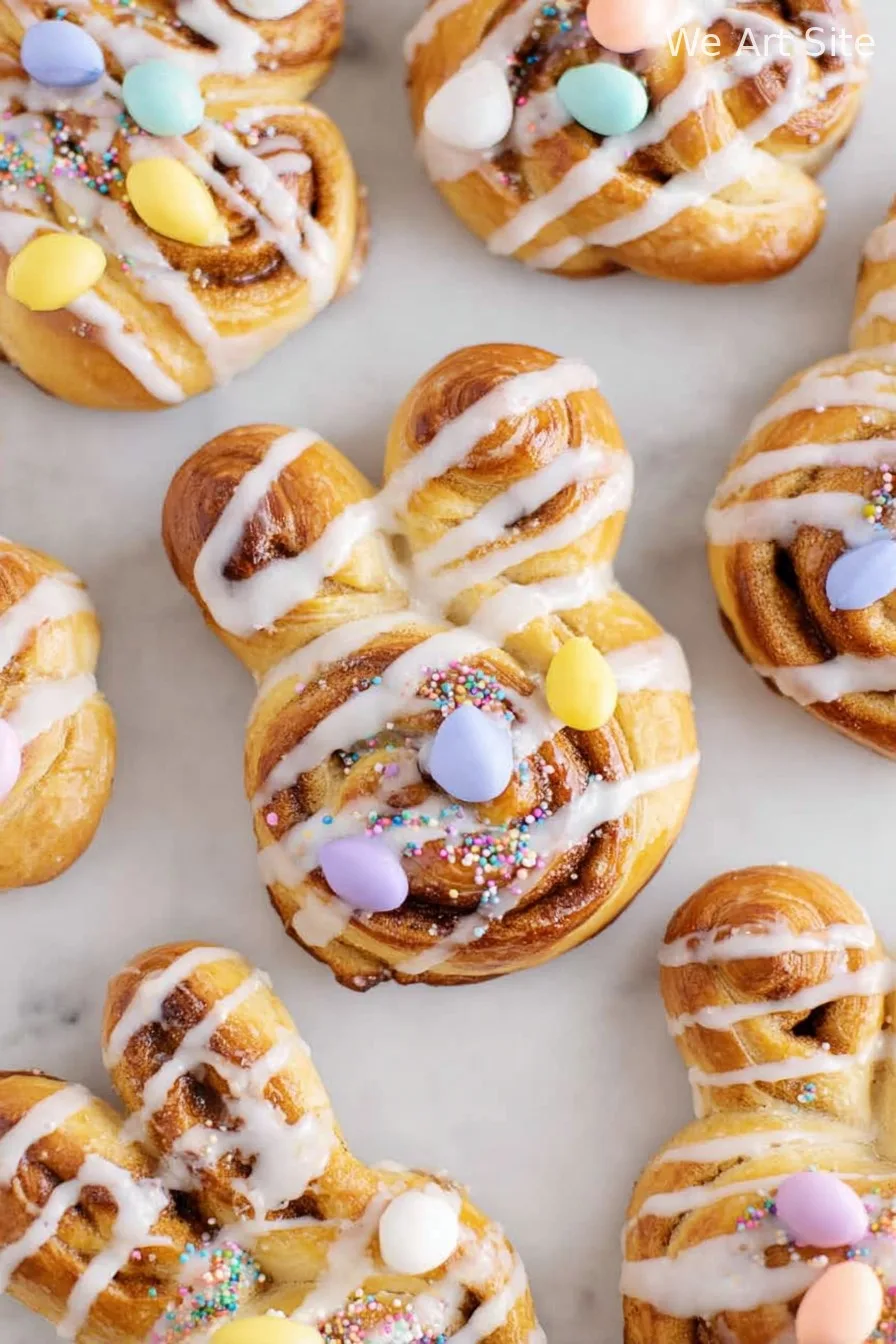
Hey there! If you’re looking for a whimsical, delicious addition to your spring brunch or a charming treat for Easter morning, these Easter Bunny Cinnamon Rolls are about to steal the show. Soft, gooey Cinnamon Rolls transform into irresistible bunny shapes, topped with colorful sprinkles and cute candy faces. They’re quick to make using store-bought dough and a handful of festive toppings. Everyone—kids and grown-ups alike—will adore these clever, tasty treats. Let’s hop right into it!

Why You’ll Love This
- Super easy: Uses store-bought cinnamon roll dough so you can prep in minutes.
- Adorably festive: Shaped like Easter bunnies for maximum holiday fun!
- Perfect for all ages: A fun kitchen project and treat for kids and adults.
- Customizable: Add your own sprinkles or candies for creative flair.
- Fast cleanup: Minimal equipment and no fancy tools needed.
Ingredients
- 1 (5 count) can of Jumbo or Grands! store-bought Cinnamon Rolls with icing
- Easter colored sprinkles
- Easter colored M&M’s
Instructions
Step 1: Preheat and Prep
Start by preheating your oven according to the temperature listed on your can of Cinnamon Rolls—usually 350°F (175°C). Open the can and gently separate all five Cinnamon Rolls, placing them on a clean countertop or parchment for easy shaping.
Step 2: Shape the Bunny Ears
Taking each cinnamon roll, carefully pull a section of the outer edge upward and curve it to form one ‘ear.’ Repeat on the opposite side for the second ear. Pinch gently where the ears meet the round face of the roll and also along the outside edge to help each ear hold its shape. Place shaped rolls onto a lined baking sheet, spacing them apart, and adjust the ears as needed so they resemble little bunnies.
Step 3: First Bake & Ear Adjustment
Place the baking sheet in the oven and bake for the recommended time indicated on the cinnamon roll package, typically 13–17 minutes. About halfway through baking, carefully remove the pan (it will be hot!) and if the ears need a little reinforcing, use the handle of a wooden spoon or tongs to gently press the ear indentations back into shape—be careful not to burn yourself.

Step 4: Finish Baking & Decorate
Return the rolls to the oven and continue baking until golden brown and cooked through. Once out of the oven, generously drizzle the included icing over each warm bunny. Immediately scatter festive Easter sprinkles over the icing, then add two colored M&M’s for bunny eyes and one for a sweet little nose. Serve while warm and enjoy your adorable creations!
Notes
- Chill the dough just briefly before shaping for cleaner bunny ears and easier handling.
- For even baking, leave space between each roll on the sheet.
- Decorate as soon as you ice the rolls so the sprinkles and candies stick well.
Variations
- Chocolate bunnies: Use chocolate chips instead of M&M’s for a decadent twist.
- Carrot noses: Add an orange sprinkle or jelly bean nose for a fun detail.
- Homemade dough: Make your own cinnamon roll dough if you have extra time for baking from scratch.
Required Equipment
- Baking sheet
- Parchment paper or silicone liner
- Oven mitts
- Wooden spoon or tongs (for shaping ears mid-bake)
Storage Instructions
Store leftover bunny cinnamon rolls in an airtight container at room temperature for up to 2 days. For longer freshness, refrigerate for up to 4 days. To reheat, warm in the microwave for about 10 seconds or in a 300°F (150°C) oven until soft and gooey again.
Suggested Pairings & Serving Recommendations
- Serve with fresh fruit and a splash of orange juice for a balanced brunch.
- Pair with a mug of hot chocolate or a latte to complement the sweetness.
- Enjoy alongside savory breakfast favorites like scrambled eggs or bacon for a full spread.
Pro Tips
- Get kids involved—the simple shaping and decorating makes this a family-friendly recipe.
- Use pastel colors for candies and sprinkles to keep things festive and spring-themed.
- Keep a close eye during baking—the ears can brown quickly, so cover loosely with foil if needed.
FAQ
- Can I use regular-sized cinnamon rolls instead of jumbo?
- Yes! Regular size also works; just be gentle shaping the smaller ears and watch the baking time, as they may bake a bit faster.
- Do I have to use M&M’s for the faces?
- No—the faces are completely customizable. Try using mini marshmallows, colored chocolate chips, or even raisins for a different look.
- How can I make these ahead of time?
- Shape and store the rolls (unbaked, covered) in the fridge overnight. Bake and decorate fresh in the morning for best taste and presentation.
Prep time:
10 minutes
Bake time:
13–17 minutes
Total time:
25–30 minutes
Ingredients
- 1 (5 count) can of Jumbo or Grands! store-bought cinnamon rolls with icing
- Easter colored sprinkles
- Easter colored M&M’s
Instructions
-
1Start by preheating your oven according to the temperature listed on your can of cinnamon rolls—usually 350°F (175°C). Open the can and gently separate all five cinnamon rolls, placing them on a clean countertop or parchment for easy shaping.
-
2Taking each cinnamon roll, carefully pull a section of the outer edge upward and curve it to form one ‘ear.’ Repeat on the opposite side for the second ear. Pinch gently where the ears meet the round face of the roll and also along the outside edge to help each ear hold its shape. Place shaped rolls onto a lined baking sheet, spacing them apart, and adjust the ears as needed so they resemble little bunnies.
-
3Place the baking sheet in the oven and bake for the recommended time indicated on the cinnamon roll package, typically 13–17 minutes. About halfway through baking, carefully remove the pan (it will be hot!) and if the ears need a little reinforcing, use the handle of a wooden spoon or tongs to gently press the ear indentations back into shape—be careful not to burn yourself.
-
4Return the rolls to the oven and continue baking until golden brown and cooked through. Once out of the oven, generously drizzle the included icing over each warm bunny. Immediately scatter festive Easter sprinkles over the icing, then add two colored M&M’s for bunny eyes and one for a sweet little nose. Serve while warm and enjoy your adorable creations!
CLICK FOR NUTRITION INFO
↑
Approximate Information for One Serving
Serving Size:
1 serving
Calories:
350cal
Protein:
5 gg
Fat:
8 gg
Saturated Fat:
0g
Trans Fat:
0g
Cholesterol:
0mg
Sodium:
0mg
Potassium:
0mg
Total Carbs:
62 gg
Fiber:
0g
Sugar:
0g
Net Carbs:
0g
Vitamin A:
0
Vitamin C:
0mg
Calcium:
0mg
Iron:
0mg
Nutrition Disclaimers
Number of total servings shown is approximate. Actual number of servings will depend on your preferred portion sizes.
Nutritional values shown are general guidelines and reflect information for 1 serving using the ingredients listed, not including any optional ingredients. Actual macros may vary slightly depending on specific brands and types of ingredients used.
To determine the weight of one serving, prepare the recipe as instructed. Weigh the finished recipe, then divide the weight of the finished recipe (not including the weight of the container the food is in) by the desired number of servings. Result will be the weight of one serving.
Did you make this recipe?
Please consider Pinning it!