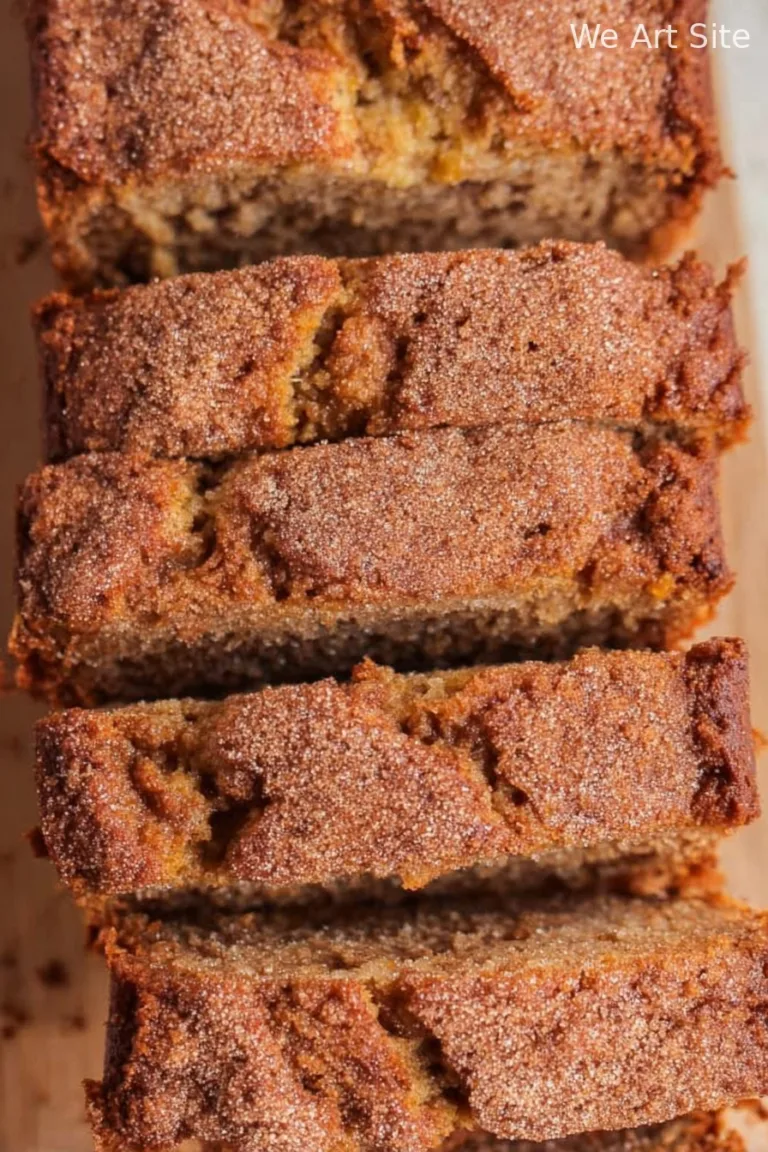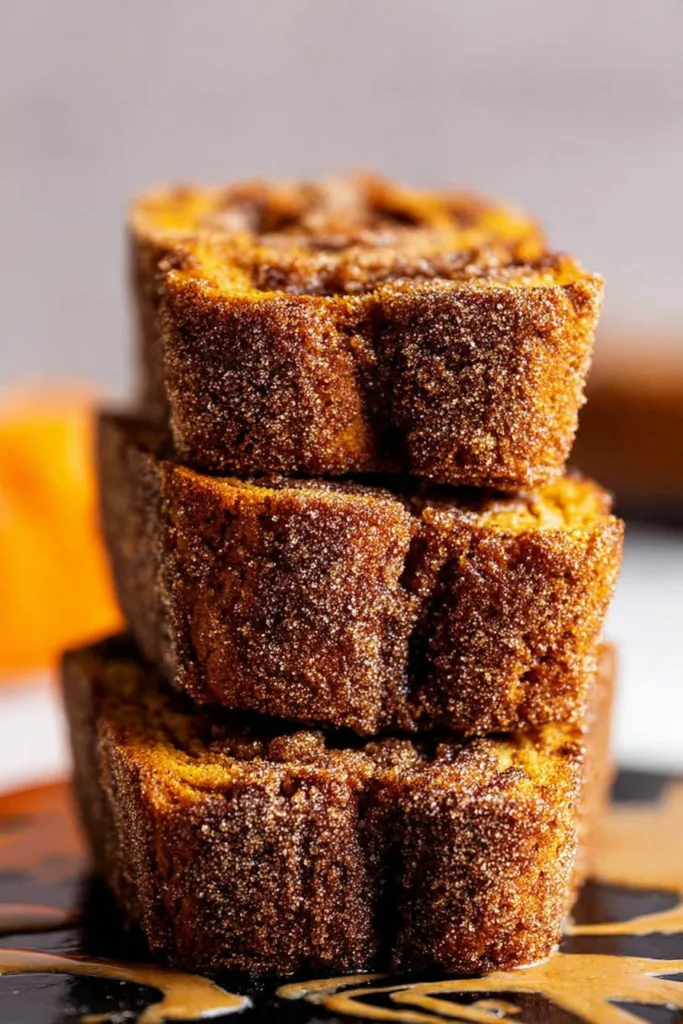
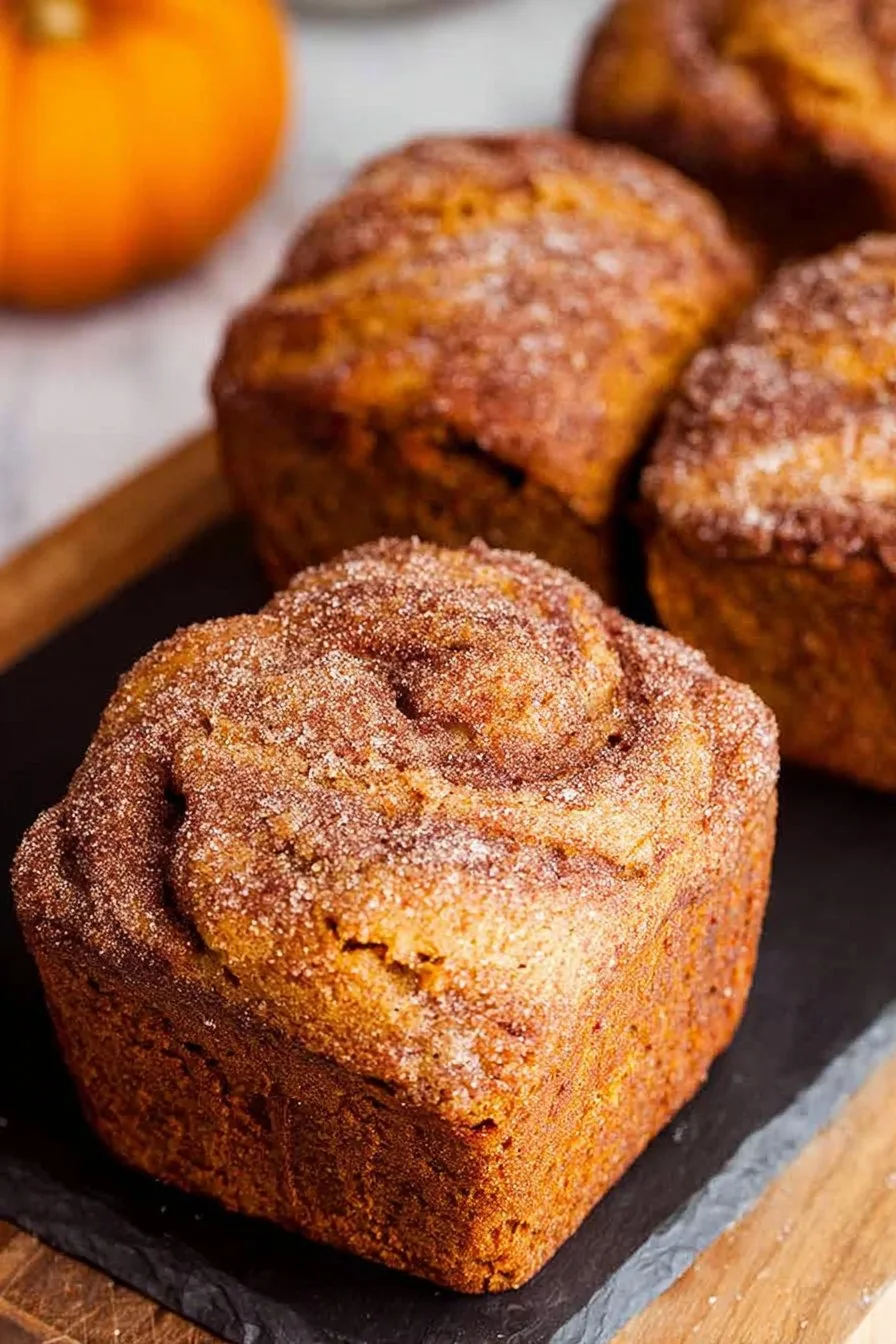
Let Me Tell You About These Mini Loaves…
I still remember the first time I whipped up these cinnamon swirl pumpkin bread mini loaves—I’d just moved into my first flat and was determined to fill it with that homey, spicy smell you get from proper autumn baking. I may have gone a bit overboard and ended up with like, four dozen mini loaves (rookie mistake), but hey, my neighbors sure didn’t mind! And, not to brag, but a certain picky roommate still asks for them every October. Oh, and not gonna lie—sometimes I double the cinnamon just because I can. I mean, can you really have too much?
Why You’ll Love This One (Besides the Smell)
I make these when I want something a little fancy that doesn’t take a million bowls or weird ingredients. My family goes kind of wild for the cinnamon swirl—like they’ll try to claim the biggest loaf with the most gooey swirl (we’re a competitive bunch). And, sometimes when I’m feeling impatient, I just dump everything in one bowl and hope for the best—actually, it still turns out pretty good! So forgiving.
What You’ll Need (and What You Can Swap)
- 1 3/4 cups all-purpose flour (whole wheat works in a pinch, but it’s a bit more… earnest?)
- 1 teaspoon baking soda
- 1/2 teaspoon salt (I never measure this exactly—just a good pinch)
- 1 1/2 teaspoons ground cinnamon (or more; I get carried away sometimes)
- 1/2 teaspoon nutmeg (totally optional—my friend hates it, so I skip it for her)
- 1 cup canned pumpkin puree (homemade is lovely, but let’s be real: I usually use Libby’s)
- 2 large eggs
- 3/4 cup sugar (brown sugar gives a deeper flavor, but white works fine)
- 1/2 cup vegetable oil (I sometimes sneak in a little applesauce for half the oil, and honestly, it works!)
- 1/4 cup milk (any kind—I’ve even used oat milk and survived)
- 1 teaspoon vanilla extract
- For the cinnamon swirl:
- 1/3 cup sugar
- 1 tablespoon ground cinnamon
My grandmother always insisted on fresh nutmeg and fancy pumpkin puree, but (between you and me) store-bought is just fine for this.
How I Throw It All Together
- Get your oven going: Preheat to 350°F (175°C). Grease up your mini loaf pans (I use a nonstick spray, or sometimes just butter if I’m feeling fancy).
- Mix your dry stuff: In a bowl, toss the flour, baking soda, salt, cinnamon, and nutmeg. I usually just use a fork to stir since my whisk always disappears at the worst times.
- Now the wet stuff: In another bowl, mix the pumpkin, eggs, sugar, oil, milk, and vanilla. I start with a spoon, but end up using my hand mixer if I remember to plug it in.
- Combine the two: Pour your wet mix into the dry and gently stir until just combined. Don’t overmix; lumpy is fine here (this is where I usually sneak a taste—no shame).
- Swirl time! In a tiny bowl, mash together the sugar and cinnamon for the swirl. Fill each mini loaf pan about halfway, sprinkle a solid layer of the cinnamon-sugar, then cover with the rest of the batter. Swirl a knife through the middle—don’t overthink it.
- Bake: Pop into the oven for 25-30 minutes, but really, start checking at 22. A toothpick should come out mostly clean (a bit of swirl goo is normal!).
- Cool… or not: Let them cool in the pan for 10 minutes, then on a rack. But honestly, we’ve eaten them warm with a fork right form the pan more than once.
Notes From My Kitchen Chaos
- Once I tried doubling the pumpkin, and the loaves were so moist they basically collapsed. Tasty, but not cute.
- Don’t freak out if the middle sinks a little—it’s part of their rustic charm, or so I tell myself.
- I think these taste better the next day, but the cinnamon swirl is gooier when fresh.
Variations I’ve Messed Around With
- Chocolate chips: My nephew insists on them, but they do make the swirl muddier (still delicious though)
- Pecans or walnuts: If you like a bit of crunch
- Maple glaze: Tried it once—looked amazing, tasted like a pancake, which isn’t a bad thing, but maybe not what I was going for here
- Skipped the cinnamon swirl once by accident—trust me, just don’t
Do You Need Fancy Equipment?
Honestly, you should have mini loaf pans, but if you don’t, just use a muffin tin or even one big loaf pan—just watch your bake time. I even saw someone bake it in a casserole dish once! Not pretty, but hey, it works.
How to Store (If You Have Any Left!)
Store in an airtight container at room temp for up to three days… though honestly, in my house it never lasts more than a day! You can freeze extras, too—I wrap mine in foil, then pop ’em in a zip bag. They reheat well in the microwave, or in the oven if you’re feeling proper.
Serving: How I Like It
These are perfect with a mug of strong coffee or a cold glass of milk. My family’s weird tradition is to slather on a bit of salted butter while they’re still warm—sounds odd, tastes ace. Perfect for a mid-morning snack or an after-dinner treat.
Pro Tips (Because I’ve Messed These Up Before)
- I once tried rushing the cooling step—big mistake, they fell apart everywhere!
- Don’t overmix; I did once and they were tough as old boots. Not my finest hour.
- If you forget the cinnamon swirl (I did, once, late at night)—just sprinkle it on top before baking. It’s better than nothing.
FAQ—Because You’ve Actually Asked
- Can I use fresh pumpkin? You bet! Just roast and puree it first, but honestly, canned saves a lot of faff.
- What if I don’t have mini pans? No sweat—just use a muffin tin or regular loaf pan, but check the bake time. I once used a brownie pan, and, well, it was more like a cake, but not bad.
- Can I make it vegan? Probably! Swap the eggs for flax eggs and use non-dairy milk. I haven’t tried it, though—let me know if you do!
- Does it freeze well? Oh, absolutely. I freeze slices all the time for emergency snacks (or, you know, breakfast).
- Where’d you get those cute loaf pans? I grabbed mine off King Arthur Baking, but I’ve also used the disposable ones from Target—they’re both grand.
Anyway, I could ramble all day about these, but if you give them a try, let me know how it goes! Oh, and if you spill cinnamon everywhere like I always do, at least your kitchen will smell amazing. Cheers, mate.

Ingredients
- 1 3/4 cups all-purpose flour
- 1 cup canned pumpkin puree
- 2 large eggs
- 1/2 cup vegetable oil
- 1 cup granulated sugar
- 1/2 cup brown sugar, packed
- 1 1/2 teaspoons ground cinnamon
- 1/2 teaspoon ground nutmeg
- 1 teaspoon baking soda
- 1/2 teaspoon salt
- 1 teaspoon vanilla extract
Instructions
-
1Preheat oven to 350°F (175°C). Grease four mini loaf pans or line with parchment paper.
-
2In a large bowl, whisk together flour, baking soda, salt, cinnamon, and nutmeg.
-
3In another bowl, combine pumpkin puree, eggs, vegetable oil, granulated sugar, brown sugar, and vanilla extract. Mix until smooth.
-
4Add the wet ingredients to the dry ingredients and stir until just combined. Do not overmix.
-
5Pour half of the batter into the prepared mini loaf pans. Sprinkle a generous layer of cinnamon sugar over the batter, then top with remaining batter. Swirl gently with a knife.
-
6Bake for 30-35 minutes, or until a toothpick inserted into the center comes out clean. Cool in pans for 10 minutes, then transfer to a wire rack to cool completely.
CLICK FOR NUTRITION INFO
↑
Approximate Information for One Serving
Serving Size:
1 serving
Calories:
270 caloriescal
Protein:
4gg
Fat:
10gg
Saturated Fat:
0g
Trans Fat:
0g
Cholesterol:
0mg
Sodium:
0mg
Potassium:
0mg
Total Carbs:
41gg
Fiber:
0g
Sugar:
0g
Net Carbs:
0g
Vitamin A:
0
Vitamin C:
0mg
Calcium:
0mg
Iron:
0mg
Nutrition Disclaimers
Number of total servings shown is approximate. Actual number of servings will depend on your preferred portion sizes.
Nutritional values shown are general guidelines and reflect information for 1 serving using the ingredients listed, not including any optional ingredients. Actual macros may vary slightly depending on specific brands and types of ingredients used.
To determine the weight of one serving, prepare the recipe as instructed. Weigh the finished recipe, then divide the weight of the finished recipe (not including the weight of the container the food is in) by the desired number of servings. Result will be the weight of one serving.
Did you make this recipe?
Please consider Pinning it!!