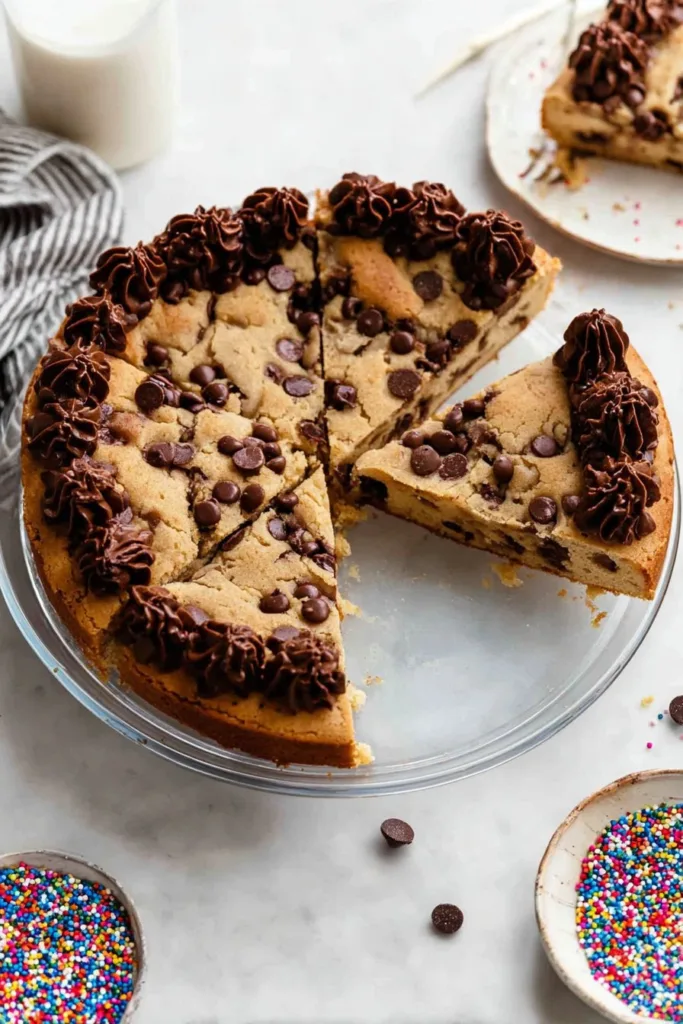
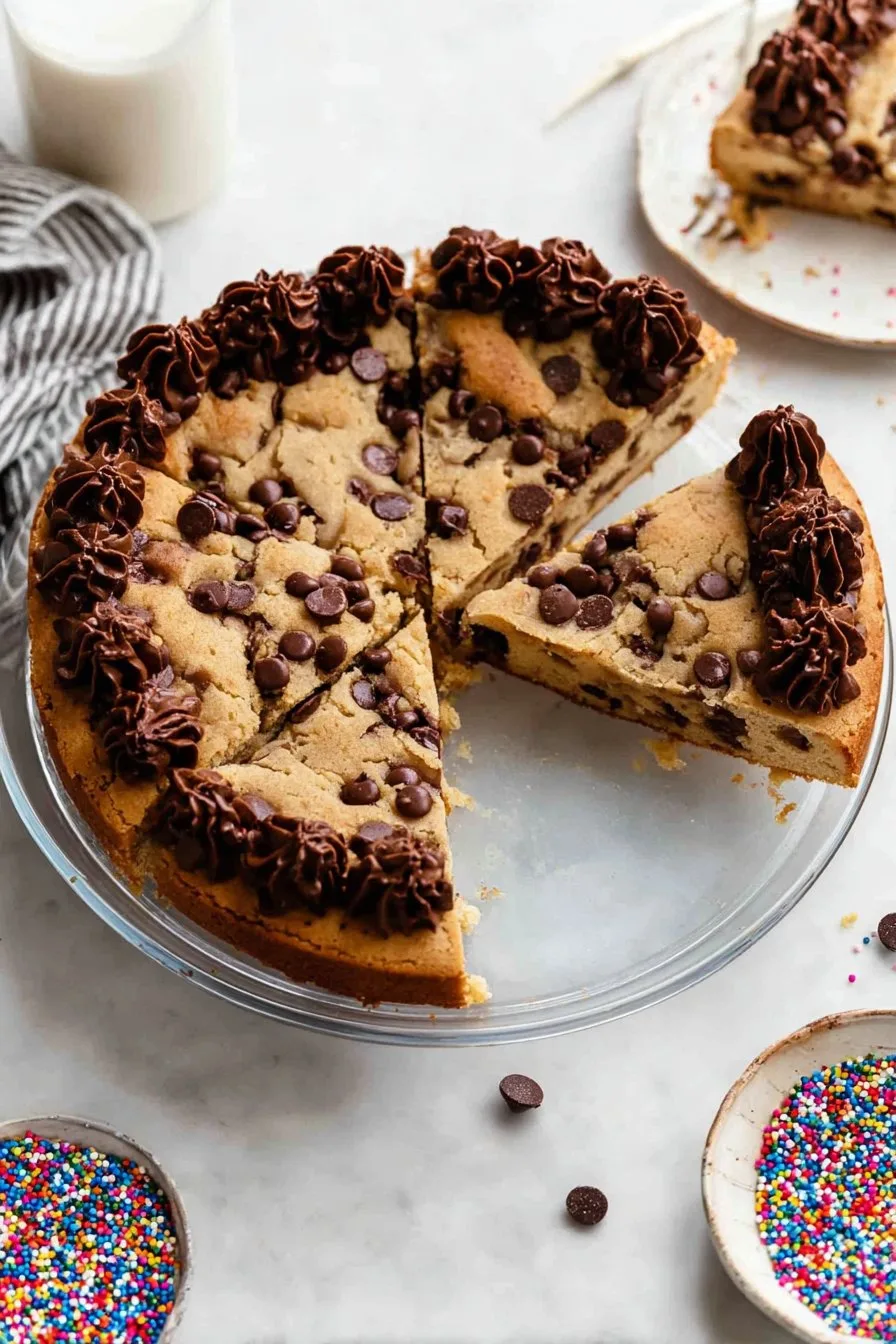
Let Me Tell You About This Cookie Cake (Honestly, It’s a Winner)
Alright, so here’s the deal: if you’ve ever wanted to combine the ooey-gooey goodness of a chocolate chip cookie with the celebratory vibes of a cake, well, you’re in the right place. I actually stumbled onto this recipe because, once, I totally forgot to chill my cookie dough and decided to just bake it in one big round pan. Turned out, everyone loved it more than my regular cookies, go figure. Now my nephew asks for this every birthday. And, I’m not mad about it. Plus, there’s something a bit mischievous about slicing up a giant cookie.
Why You’ll Love This (Or, Why My Family Is Obsessed)
I make this when I’m short on time—or patience—because there’s no need to scoop a million individual cookies. Just spread, bake, done. My family always fights over the gooey center slice (I say, life’s too short to argue, so I sneak an edge piece and call it a day). Oh, and if you’ve ever dealt with unevenly baked cookies (who hasn’t?), this is way less finicky. Kids go bonkers for it at parties, and I like that you can frost it or keep it plain. One time I tried to use fancy dark chocolate chunks and my dad said, “Where’s the regular chocolate chips?” Can’t win ‘em all.
Here’s What You’ll Need (Plus a Few Substitutes)
- 2 and 1/4 cups all-purpose flour (sometimes I use half whole-wheat if I’m feeling virtuous, but not too often)
- 1/2 teaspoon baking soda (or a scant teaspoon of baking powder if you’re genuinely out; just skip the soda)
- 1/2 teaspoon salt (I like sea salt but regular table salt will do in a pinch)
- 3/4 cup unsalted butter, melted and slightly cooled (my grandmother insisted on Land O Lakes, but honestly any brand works fine)
- 1 cup packed brown sugar (light or dark — whatever you’ve got)
- 1/4 cup granulated sugar
- 2 large eggs (room temp if you remember, otherwise just plop them in)
- 2 teaspoons vanilla extract (imitation or real, no judgment)
- 1 and 1/2 cups chocolate chips (I use semi-sweet mostly, but milk or dark if that’s your jam)
- Optional: a handful of chopped walnuts or pecans (sometimes I add M&Ms for color, especially if kids are lurking nearby)
How I Make Chocolate Chip Cookie Cake (With a Few Side Steps)
- First, preheat your oven to 350°F (or about 175°C for the metric folks). Grease a 9-inch (23cm) round cake pan. Or, if you don’t have one, use a square pan—actually, I once used my lasagna dish and it was fine.
- In a big bowl, whisk together the flour, baking soda, and salt. You know, the usual dry crew.
- Grab another bowl. Pour in the melted butter, brown sugar, and granulated sugar. Mix until it looks like very runny caramel and you start second-guessing yourself (don’t worry, it thickens up!).
- Add eggs and vanilla to the buttery mix. Stir it together until smooth. I usually taste a little here, even though I shouldn’t. Raw eggs and all that. But sometimes you gotta live a little.
- Now, combine the dry and wet ingredients. I dump the flour mix in all at once and stir with a wooden spoon. It’ll look a bit lumpy—that’s totally normal. Don’t over mix.
- Fold in your chocolate chips (reserve a few for the top if you want it to look extra photogenic). Throw in nuts or candies if using. This part is honestly quite satisfying.
- Scoop the dough into your prepared pan. Press it out so it’s mostly even; it will spread a bit as it bakes. I flatten with my hands because why not?
- Bake for 22 to 28 minutes. At 24 minutes, check for a golden top and slightly jiggly center. (It firms up as it cools; don’t overdo it or you’ll lose that chewy magic.)
- Let it cool in the pan for at least 20 minutes. Actually, I find it works better if you wait a full hour, but sometimes I just can’t.
Notes from My Messy Kitchen
- If you melt the butter too hot, your dough might look oily at first. Let it cool a minute or two before mixing in the sugars.
- Once I tried using coconut oil instead of butter. The flavor was nice but it was a bit too crumbly. Maybe you’ll have better luck?
- The edges always cook faster. I just cut them off and call it an extra treat for the chef (me!).
Restless? Here’s How I’ve Switched Things Up (Some Success, Some…Not)
- Peanut butter chips instead of chocolate chips? Awesome. Made it once for a friend allergic to chocolate (tragic, I know—he loved it).
- White chocolate and dried cranberries: pretty, but my crew prefers the classic.
- Once I tried swirling in a bit of raspberry jam. Didn’t set up quite right, so maybe keep that as a drizzle on top instead.
- If you want a gluten-free version, Minimalist Baker has a great cookie base to adapt.
Equipment (Or What I Reach For—But There’s Always a Hack)
- 9-inch round cake pan (I said it was essential, but yeah, a square or even a pie dish will do—just keep an eye on bake time)
- Mixing bowls (one big, one medium)
- Wooden spoon or sturdy spatula (I’ve used a soup spoon in a pinch)
- Measuring cups/spoons (eyeballing works for some stuff, but maybe not the flour)

How I (Try to) Store It
Wrap leftovers in foil or toss them in an airtight container. It’ll keep for up to three days at room temp, but honestly, in my house it never lasts more than a day! If you somehow have leftovers, a quick zap in the microwave brings it back to life—just don’t overdo it or you’ll have a rubbery mess.
How I Like to Serve It (And a Family Quirk)
We usually slice it like a pizza. Sometimes I top it with a scoop of vanilla ice cream and a squiggle of hot fudge, especially if it’s a special occasion—or just a boring Wednesday. My aunt likes hers with a cuppa tea. Actually, my cousin dips her slice in milk. To each their own, yeah?
Pro Tips (Learned These the Hard Way…)
- Don’t rush the cooling, no matter how good it smells. I once served it piping hot and it crumbled everywhere. Tasted great, looked like a trainwreck.
- If your cookie cake seems dry, you probably overbaked. Next time, pull it while the center’s still a bit wobbly.
- I sometimes swap white sugar for all brown sugar for extra chewiness. It’s a bit sweeter, but I like it better that way. Oh, and if you want to pipe some frosting on top, Sally’s Baking Addiction has a great simple buttercream recipe.
FAQ (Because I Get These All the Time!)
- Can I make this ahead of time? Yup, and honestly, I think this tastes better the next day. Wrap it up so it doesn’t dry out.
- Do I have to use a cake pan? Well, I said yes earlier, but no, not really. Use what you’ve got. Just watch the edges for doneness.
- Can I freeze it? Sure, but I find the texture changes a smidge. Still great in a pinch (esp. if you sneak it frozen—guilty as charged!).
- What if I want it thicker/thinner? Use a smaller or larger pan. But baking time will change; keep an eye out.
- Can I use vegan butter? I’ve tried it once, and it worked okay, but the flavor was a bit different. Maybe add an extra splash of vanilla?
- Why is my cake sinking in the middle? Ah, classic! Might be underbaked or too much butter. But, honestly, it still tastes great with ice cream covering the evidence.
Got your own tweaks? Drop me a line or check out King Arthur Baking’s version for more inspo. Happy baking—and hey, don’t sweat the small stuff. It’s just cake (cookie? c’aookie?).
Ingredients
- 2 1/4 cups all-purpose flour
- 1 teaspoon baking soda
- 1/2 teaspoon salt
- 1 cup unsalted butter, softened
- 3/4 cup granulated sugar
- 3/4 cup packed brown sugar
- 2 large eggs
- 2 teaspoons vanilla extract
- 2 cups semi-sweet chocolate chips
Instructions
-
1Preheat the oven to 350°F (175°C). Grease a 9-inch round cake pan or line with parchment paper.
-
2In a medium bowl, whisk together the flour, baking soda, and salt. Set aside.
-
3In a large bowl, beat the softened butter, granulated sugar, and brown sugar until light and fluffy.
-
4Add eggs one at a time, beating well after each addition. Mix in the vanilla extract.
-
5Gradually add the dry ingredients to the wet ingredients, mixing until just combined. Fold in the chocolate chips.
-
6Spread the dough evenly into the prepared pan. Bake for 22-25 minutes or until golden brown. Allow to cool before slicing and serving.
CLICK FOR NUTRITION INFO
↑
Approximate Information for One Serving
Serving Size:
1 serving
Calories:
380 caloriescal
Protein:
4gg
Fat:
18gg
Saturated Fat:
0g
Trans Fat:
0g
Cholesterol:
0mg
Sodium:
0mg
Potassium:
0mg
Total Carbs:
52gg
Fiber:
0g
Sugar:
0g
Net Carbs:
0g
Vitamin A:
0
Vitamin C:
0mg
Calcium:
0mg
Iron:
0mg
Nutrition Disclaimers
Number of total servings shown is approximate. Actual number of servings will depend on your preferred portion sizes.
Nutritional values shown are general guidelines and reflect information for 1 serving using the ingredients listed, not including any optional ingredients. Actual macros may vary slightly depending on specific brands and types of ingredients used.
To determine the weight of one serving, prepare the recipe as instructed. Weigh the finished recipe, then divide the weight of the finished recipe (not including the weight of the container the food is in) by the desired number of servings. Result will be the weight of one serving.
Did you make this recipe?
Please consider Pinning it!!