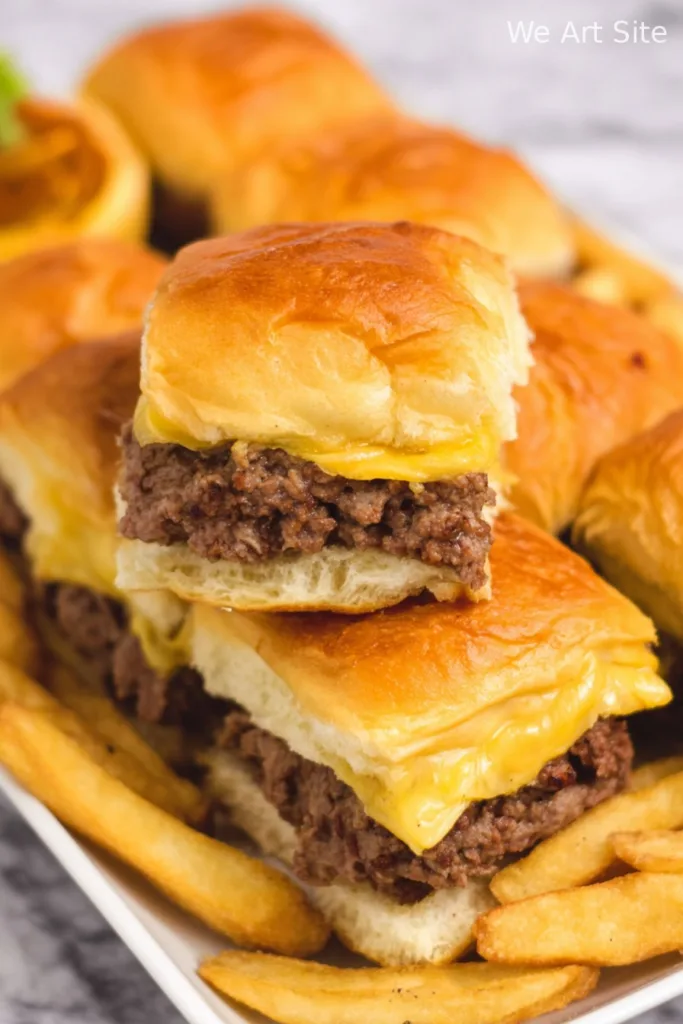
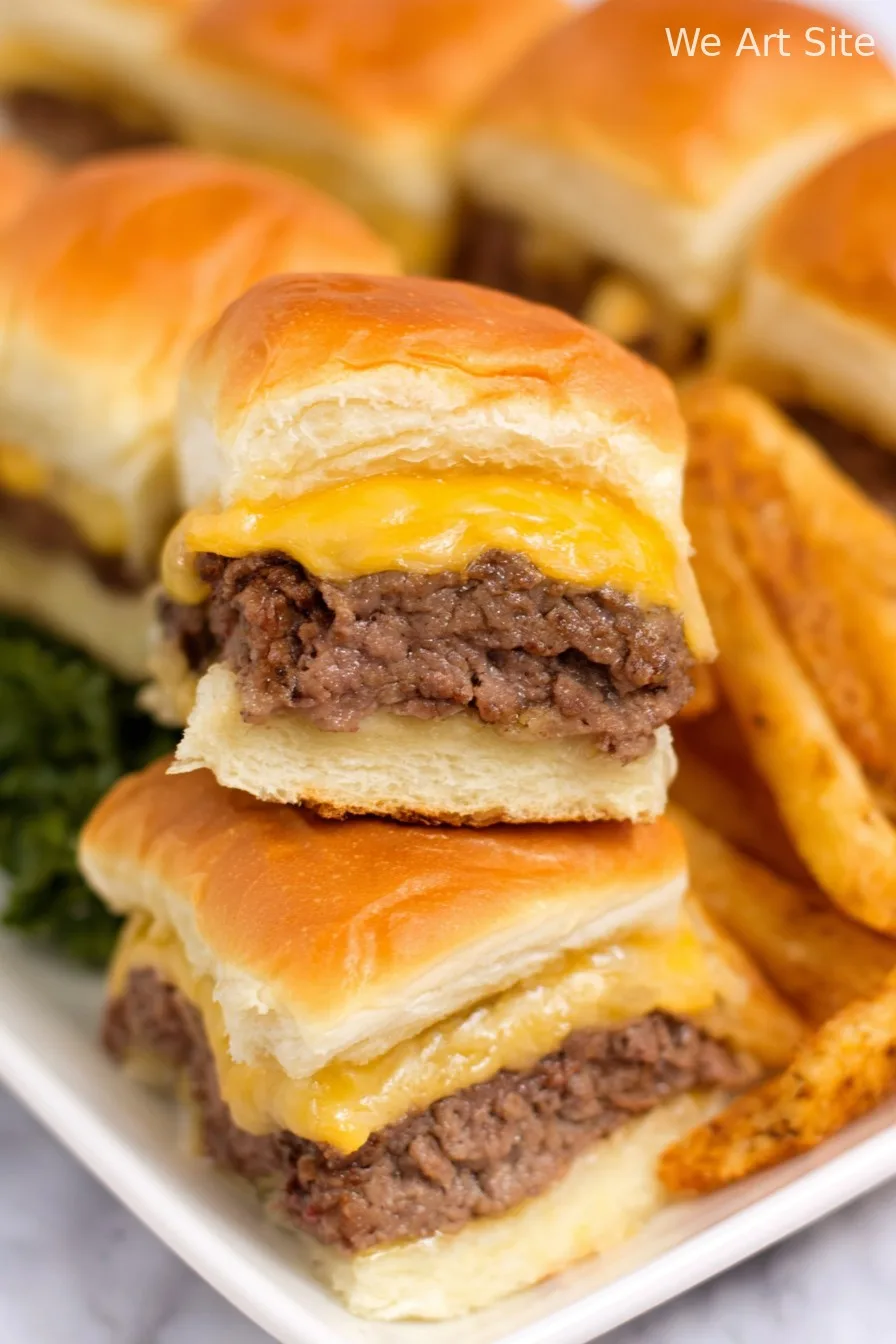
Hey y’all! If you’re searching for the ultimate party recipe, these Cheeseburger Sliders with Hawaiian Rolls are about to be your new go-to. Juicy seasoned beef, melty cheese, and those irresistible sweet Hawaiian Rolls come together for a crowd-pleasing bite everyone will love—whether it’s game day, a family gathering, or a fun weeknight dinner. Ready to impress your friends and family with minimal effort? Let’s get cooking!

Why You’ll Love This
- Quick and easy—prep and bake in under 35 minutes, perfect for busy days.
- Sweet Hawaiian rolls pair perfectly with savory beef and gooey cheese.
- Serves a crowd and is super customizable for picky eaters.
- No-fuss cleanup since everything bakes in one dish.
- Kid-friendly and guaranteed to disappear fast!
Ingredients
- 1 package (12 count) Hawaiian sweet rolls
- 1 pound ground beef (80/20 recommended)
- 1 teaspoon salt
- 1/2 teaspoon black pepper
- 1/2 teaspoon garlic powder
- 1/2 teaspoon onion powder
- 6 slices cheddar cheese (or American cheese)
- 1/4 cup dill pickle slices
- 1/4 cup diced onions (optional)
- 2 tablespoons mayonnaise
- 2 tablespoons ketchup
- 2 tablespoons yellow mustard
- 2 tablespoons unsalted butter, melted
- 1 tablespoon sesame seeds (optional for garnish)
Directions
Prep and Preheat
- Preheat your oven to 350°F (175°C).
Brown the Beef
- In a large skillet over medium heat, cook the ground beef until browned and no longer pink, about 5-7 minutes. Drain excess fat.
- Stir in salt, black pepper, garlic powder, and onion powder. Mix well, then remove from heat.
Assemble the Sliders
- Using a serrated knife, slice the Hawaiian rolls in half horizontally to create a top and bottom slab. Do not separate individual rolls.
- Place the bottom slab of rolls in a 9×13-inch baking dish.
- Spread the cooked beef mixture evenly over the bottom halves of the rolls.
- Lay the cheddar cheese slices over the beef to cover completely.
- Scatter pickle slices and diced onions (if using) evenly on top of the cheese.
- Mix mayonnaise, ketchup, and mustard in a small bowl. Drizzle sauce evenly over the pickles and onions for extra flavor.
- Gently place the top slab of rolls over the fillings.
Brush and Bake
- Brush the tops of the rolls with melted butter. Sprinkle with sesame seeds if desired.
- Cover the dish loosely with foil and bake for 15 minutes.
- Remove the foil and bake an additional 5-7 minutes, until the tops are golden and cheese is bubbly.
- Remove from oven and let cool for a few minutes before slicing into individual sliders.
Notes
- For extra flavor, add a layer of crispy bacon or sautéed mushrooms.
- If you like a crispier top, broil for the last 1-2 minutes, watching closely.
- Make ahead: assemble and refrigerate up to a day in advance; bake just before serving.
Variations
- BBQ Bacon Sliders: Add a drizzle of barbecue sauce and crumbled cooked bacon.
- Spicy Jalapeño Sliders: Add sliced pickled jalapeños and pepper jack cheese.
- Turkey Sliders: Substitute ground turkey for beef and use Swiss cheese.
Required Equipment
- Large skillet
- Serrated knife
- 9×13-inch baking dish
- Small mixing bowl
- Basting brush
- Foil
Storage Instructions
- Store leftover sliders in an airtight container in the refrigerator for up to 3 days.
- To reheat, cover with foil and warm in a 300°F oven for 10-12 minutes or microwave individually until heated through.
- Freezing is not recommended as the rolls may become soggy.
Serving Suggestions
- Pair with crispy fries, chips, or a fresh green salad.
- Serve with classic diner sides like coleslaw, baked beans, or potato wedges.
- Great with a cold soda, lemonade, or your favorite game-day drink!
Pro Tips for the Best Cheeseburger Sliders
- Slice the rolls evenly and keep them attached for easier assembly and even filling.
- Drain beef thoroughly to avoid soggy sliders.
- Let sliders cool for 5 minutes before cutting for neater servings.
FAQ
Can I double this recipe for a larger crowd?
Absolutely! Use two packages of rolls, double the filling ingredients, and use two baking dishes or a large sheet pan.
Can I use a different type of roll?
Yes, slider or dinner rolls work in place of Hawaiian rolls, but you may miss out on the sweet, buttery flavor that makes these sliders special.
Is it okay to assemble ahead of time?
Definitely! Assemble up to 1 day ahead, cover tightly, and refrigerate. Bake just before serving for best results.
Ingredients
- 1 package (12 count) Hawaiian sweet rolls
- 1 pound ground beef (80/20 recommended)
- 1 teaspoon salt
- 1/2 teaspoon black pepper
- 1/2 teaspoon garlic powder
- 1/2 teaspoon onion powder
- 6 slices cheddar cheese (or American cheese)
- 1/4 cup dill pickle slices
- 1/4 cup diced onions (optional)
- 2 tablespoons mayonnaise
- 2 tablespoons ketchup
- 2 tablespoons yellow mustard
- 2 tablespoons unsalted butter, melted
- 1 tablespoon sesame seeds (optional for garnish)
Instructions
-
1Preheat your oven to 350°F (175°C).
-
2In a large skillet over medium heat, cook the ground beef until browned and no longer pink, about 5-7 minutes. Drain excess fat.
-
3Stir in salt, black pepper, garlic powder, and onion powder. Mix well, then remove from heat.
-
4Using a serrated knife, slice the Hawaiian rolls in half horizontally to create a top and bottom slab. Do not separate individual rolls.
-
5Place the bottom slab of rolls in a 9×13-inch baking dish.
-
6Spread the cooked beef mixture evenly over the bottom halves of the rolls.
-
7Lay the cheddar cheese slices over the beef to cover completely.
-
8Scatter pickle slices and diced onions (if using) evenly on top of the cheese.
-
9Mix mayonnaise, ketchup, and mustard in a small bowl. Drizzle sauce evenly over the pickles and onions for extra flavor.
-
10Gently place the top slab of rolls over the fillings.
-
11Brush the tops of the rolls with melted butter. Sprinkle with sesame seeds if desired.
-
12Cover the dish loosely with foil and bake for 15 minutes.
-
13Remove the foil and bake an additional 5-7 minutes, until the tops are golden and cheese is bubbly.
-
14Remove from oven and let cool for a few minutes before slicing into individual sliders.
CLICK FOR NUTRITION INFO
↑
Approximate Information for One Serving
Serving Size:
1 serving
Calories:
290cal
Protein:
15 gg
Fat:
16 gg
Saturated Fat:
0g
Trans Fat:
0g
Cholesterol:
0mg
Sodium:
0mg
Potassium:
0mg
Total Carbs:
21 gg
Fiber:
0g
Sugar:
0g
Net Carbs:
0g
Vitamin A:
0
Vitamin C:
0mg
Calcium:
0mg
Iron:
0mg
Nutrition Disclaimers
Number of total servings shown is approximate. Actual number of servings will depend on your preferred portion sizes.
Nutritional values shown are general guidelines and reflect information for 1 serving using the ingredients listed, not including any optional ingredients. Actual macros may vary slightly depending on specific brands and types of ingredients used.
To determine the weight of one serving, prepare the recipe as instructed. Weigh the finished recipe, then divide the weight of the finished recipe (not including the weight of the container the food is in) by the desired number of servings. Result will be the weight of one serving.
Did you make this recipe?
Please consider Pinning it!