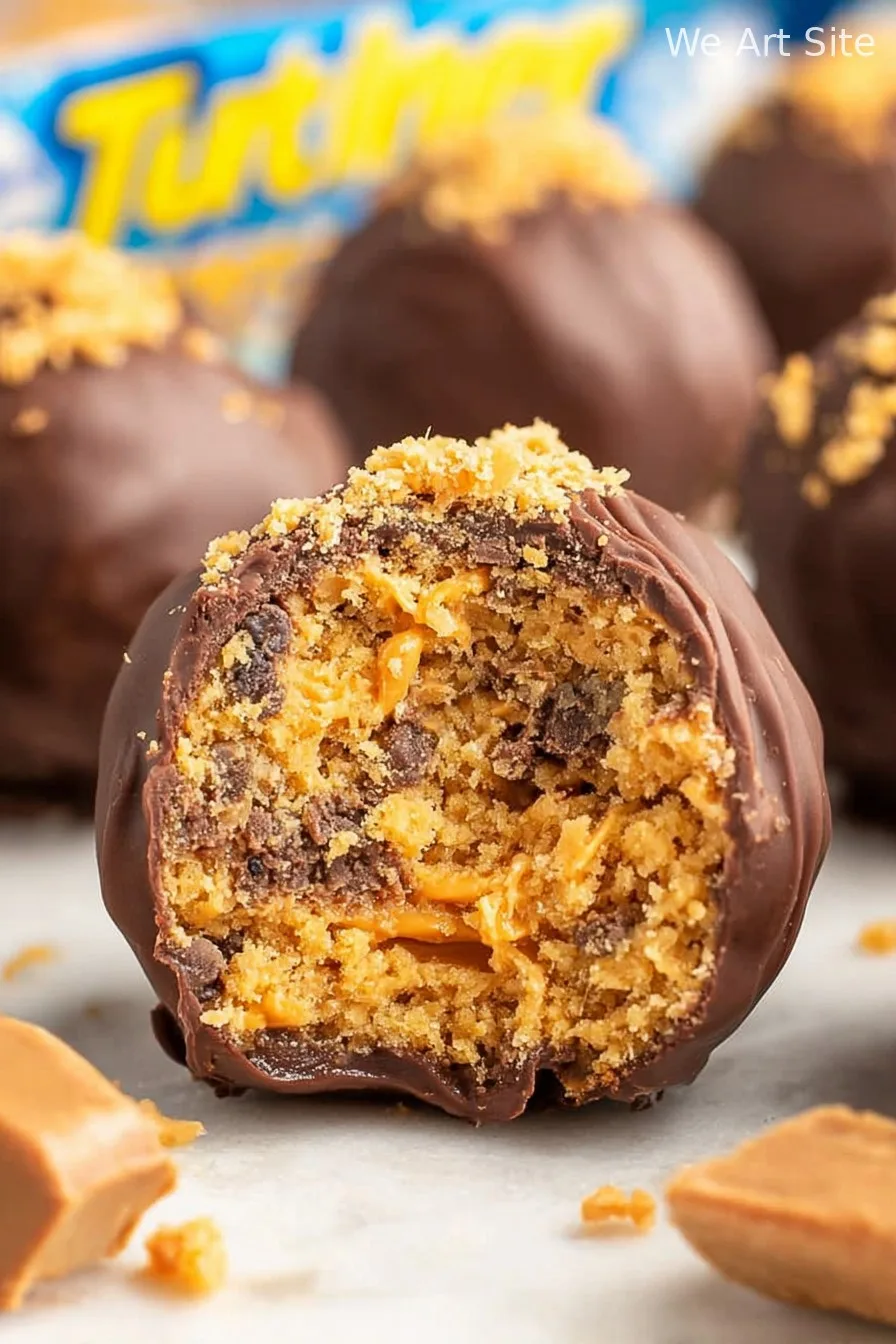
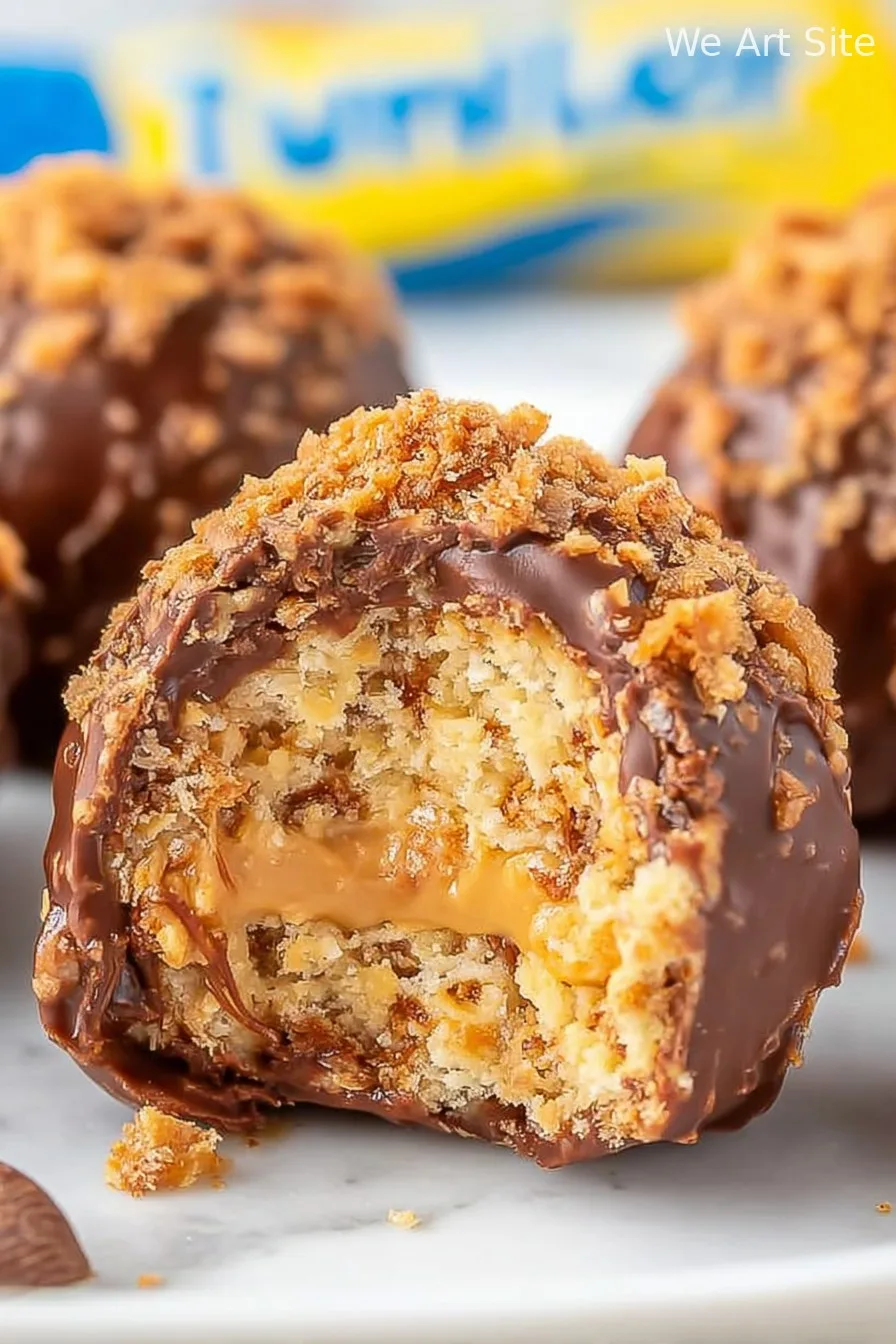
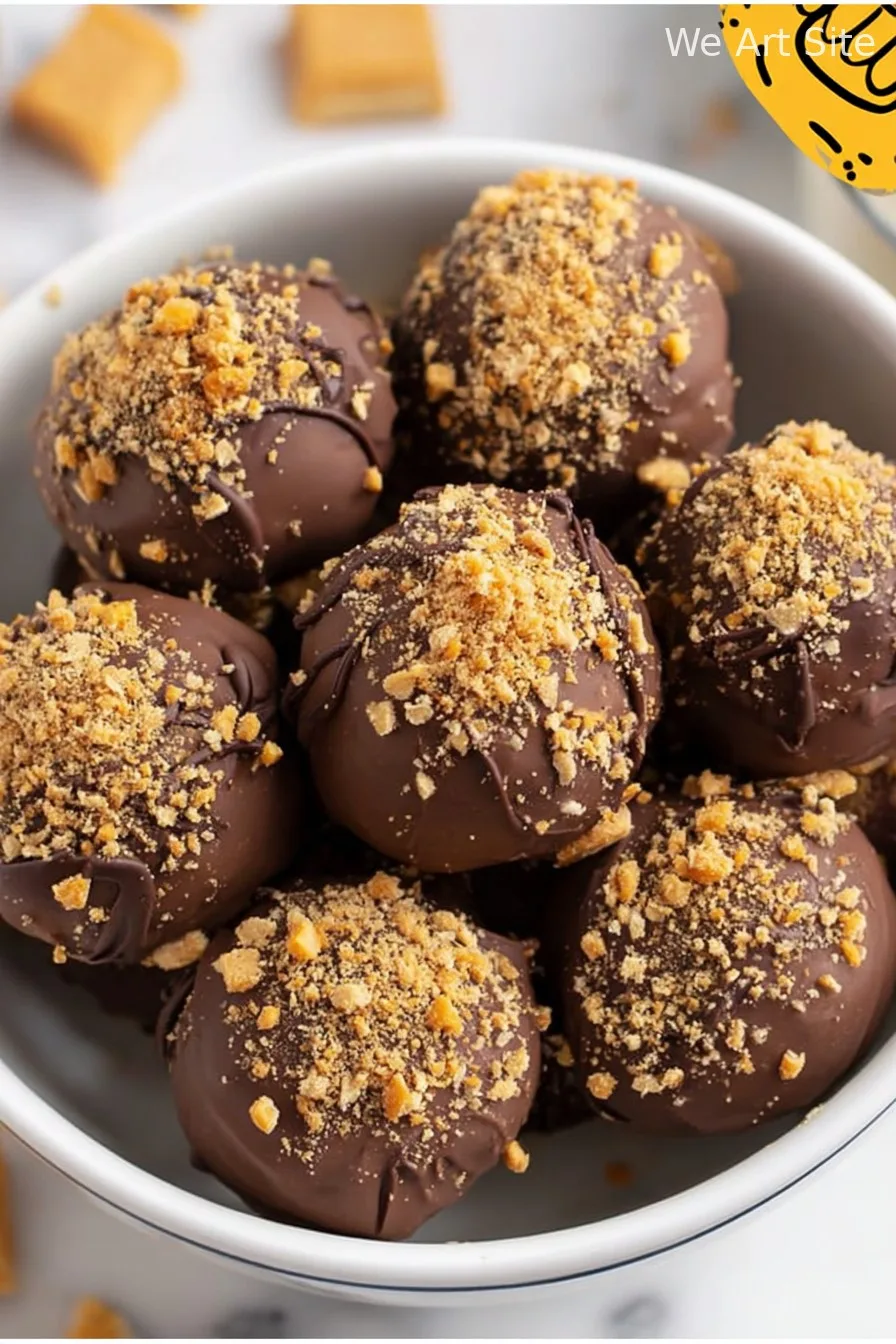
Hey y’all! If you’re looking for a delicious treat that’s crunchy, creamy, and downright irresistible, these Butterfinger Balls are the answer. They’re the ultimate no-bake dessert, blending peanut butter, chocolate, and a pop of Butterfinger crunch. Whether you’re hosting a party, need a quick holiday treat, or just want a sweet snack, this is the perfect recipe for any occasion. Let’s get cooking!
Why You’ll Love This Butterfinger Balls Recipe
- No-bake convenience means you can whip them up in minutes—no oven required!
- Decadent peanut butter and chocolate flavor with satisfying Butterfinger crunch.
- Perfect for gifting, potlucks, parties, or easy snack cravings.
- Bite-sized and portable—great for kids and adults alike.
- Customizable with your favorite toppings or mix-ins.
Ingredients for Butterfinger Balls
- 1 cup creamy peanut butter
- 1/4 cup unsalted butter (softened to room temperature)
- 2 cups powdered sugar
- 1 1/2 cups crushed Butterfinger candy bars (about 7 fun-size bars)
- 2 cups semi-sweet chocolate chips
- 1 tablespoon coconut oil or vegetable shortening (optional, for a smoother chocolate coating)
How to Make Butterfinger Balls: Step-by-Step Directions
Step 1: Mix the Base
In a large bowl, combine peanut butter and softened butter. Mix until smooth and creamy using an electric mixer or sturdy spoon.
Step 2: Add Sugar and Butterfinger Bars
Gradually blend in powdered sugar until fully incorporated and the mixture is thick. Gently fold in the crushed Butterfinger candy bars, distributing them evenly.
Step 3: Shape the Balls
Using a tablespoon or small cookie scoop, roll the mixture into 1-inch balls. Place each ball on a parchment-lined baking sheet. Chill in the refrigerator for 30 minutes to firm up.
Step 4: Melt the Chocolate
Add chocolate chips (and coconut oil, if using) to a microwave-safe bowl. Heat in 20-second intervals, stirring after each, until melted and smooth (about 1-2 minutes total). Want to brush up on chocolate melting techniques? Check out this detailed guide from Bon Appétit.
Step 5: Dip and Set
Using a fork or candy dipping tool, dip each Butterfinger Ball into the melted chocolate, letting excess drip off. Return coated balls to the lined baking sheet. Chill for another 15-20 minutes, or until chocolate is set.
Step 6: Serve and Enjoy
Arrange Butterfinger Balls on a platter or in mini cupcake liners for a festive touch. Dive in and enjoy!
Notes for Perfect Butterfinger Balls
- If the mixture is too sticky to roll, chill it for another 10-15 minutes before forming balls.
- Swap semi-sweet chocolate chips for milk or dark chocolate chips to suit your taste.
- Learn about peanut butter varieties and their nutrition on the Peanut Butter Lovers website.
Butterfinger Balls Variations
- White Chocolate Butterfinger Balls: Use white chocolate chips for coating instead of semi-sweet.
- Salty Pretzel Crunch: Mix in 1/2 cup crushed pretzels for a sweet-salty twist.
- Gluten-Free Version: Opt for gluten-free peanut butter and check your candy bars for gluten-free labeling (learn more about gluten-free eating).
Required Equipment for Butterfinger Balls
- Large mixing bowl
- Electric mixer (optional, but helpful)
- Spatula or sturdy spoon
- Parchment paper
- Baking sheet
- Microwave-safe bowl
- Fork or dipping tool
- Measuring cups and spoons
Butterfinger Balls Storage Instructions
Store Butterfinger Balls in an airtight container in the refrigerator for up to 2 weeks. For longer storage, freeze in a single layer, then transfer to a freezer bag—good for up to 2 months. Thaw in the fridge before serving. Avoid leaving them at room temperature for extended periods, as the chocolate will soften.
Serving Recommendations for Butterfinger Balls
- Pair with a glass of cold milk, hot coffee, or homemade hot chocolate.
- Serve alongside a scoop of vanilla ice cream for a decadent dessert.
- Arrange in a decorative tin for holidays, parties, or gifting.
Pro Tips for Amazing Butterfinger Balls
- Use high-quality chocolate chips for a glossier, tastier coating.
- Refrigerate balls between dipping batches to keep them firm for easy handling.
- Chop candy bars fine to ensure even distribution and iconic Butterfinger texture in every bite. For more tips on making no-bake desserts, browse Sally’s Baking Addiction.
FAQ: Butterfinger Balls
Can I use chunky peanut butter instead of creamy?
Yes, chunky peanut butter adds a bit more texture and extra peanut crunch—just make sure to mix thoroughly.
Can I make Butterfinger Balls ahead of time?
Absolutely! Prepare and refrigerate up to a week in advance or freeze for longer storage.
Is there a nut-free version?
Try using sunflower seed butter and nut-free crispy candy bars for a similar treat, but always check allergies carefully.
Prep Time: 20 minutes
Chill Time: 45 minutes
Total Time: 1 hour 5 minutes
Makes: 24-28 bite-sized Butterfinger Balls
Ingredients
- 12 fun-sized Butterfinger bars, crushed
- 1 cup creamy peanut butter
- 1/2 cup unsalted butter, softened
- 2 cups powdered sugar
- 1 teaspoon vanilla extract
- 2 cups semisweet chocolate chips
- 1 tablespoon coconut oil (optional, for melting chocolate)
- Pinch of salt
Instructions
-
1Line a baking sheet with parchment paper.
-
2In a medium bowl, mix together the peanut butter, unsalted butter, vanilla extract, and a pinch of salt until smooth.
-
3Add powdered sugar and crushed Butterfinger bars to the mixture. Stir until fully combined.
-
4Roll the mixture into 1-inch balls and place them on the prepared baking sheet. Chill in the freezer for 15 minutes.
-
5In a microwave-safe bowl, melt chocolate chips and coconut oil together in 30-second intervals, stirring until smooth.
-
6Dip each ball into the melted chocolate, coating completely. Place back on the parchment paper and chill until set.
CLICK FOR NUTRITION INFO
↑
Approximate Information for One Serving
Serving Size:
1 serving
Calories:
170 caloriescal
Protein:
2 gg
Fat:
9 gg
Saturated Fat:
0g
Trans Fat:
0g
Cholesterol:
0mg
Sodium:
0mg
Potassium:
0mg
Total Carbs:
20 gg
Fiber:
0g
Sugar:
0g
Net Carbs:
0g
Vitamin A:
0
Vitamin C:
0mg
Calcium:
0mg
Iron:
0mg
Nutrition Disclaimers
Number of total servings shown is approximate. Actual number of servings will depend on your preferred portion sizes.
Nutritional values shown are general guidelines and reflect information for 1 serving using the ingredients listed, not including any optional ingredients. Actual macros may vary slightly depending on specific brands and types of ingredients used.
To determine the weight of one serving, prepare the recipe as instructed. Weigh the finished recipe, then divide the weight of the finished recipe (not including the weight of the container the food is in) by the desired number of servings. Result will be the weight of one serving.
Did you make this recipe?
Please consider Pinning it!!