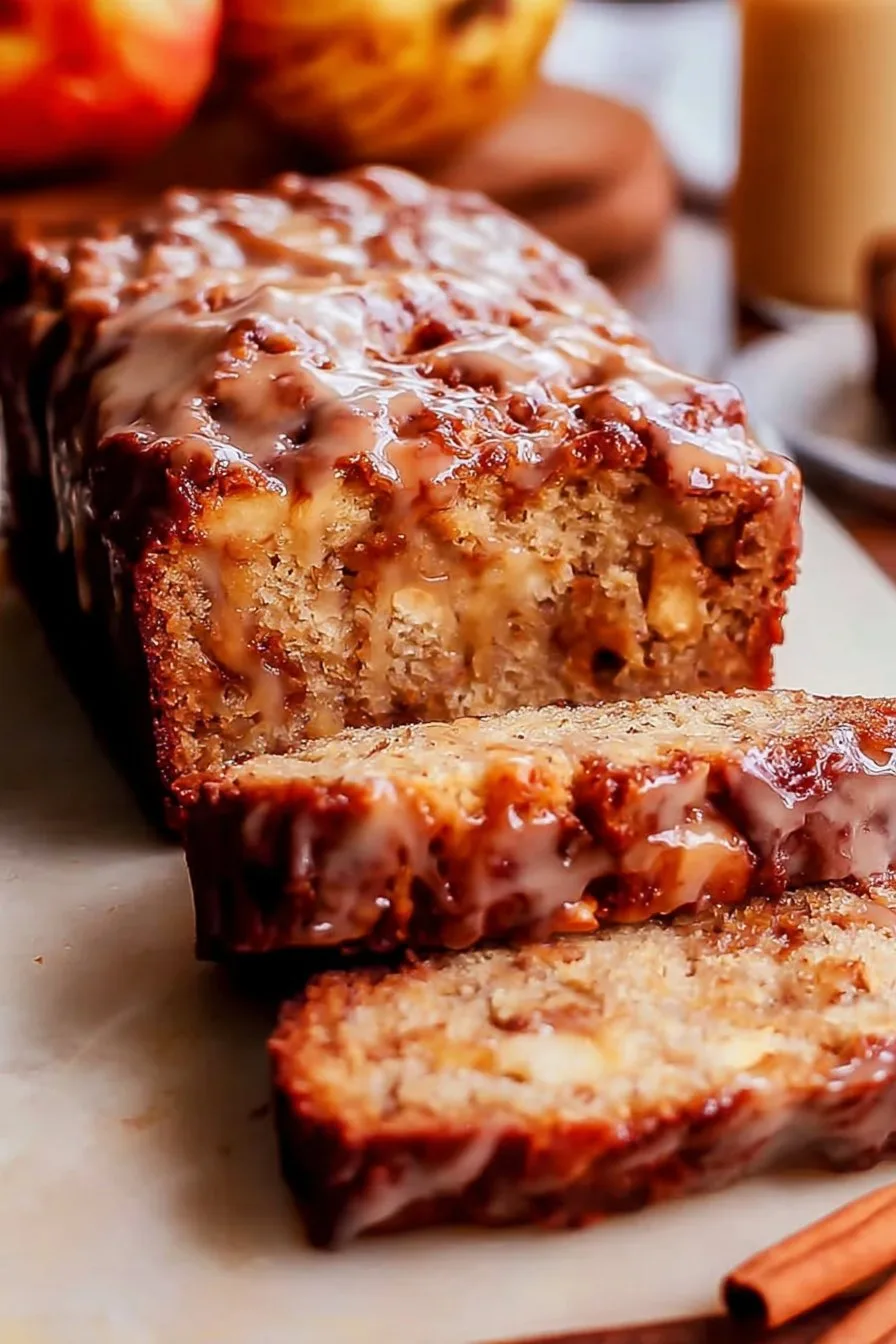
Let Me Tell You About This Amish Apple Fritter Bread
Alright, friend, picture this: a rainy Saturday, my kitchen smelling like brown sugar and apples, and my socks slightly mismatched (because let’s be real, who has time to sort those?). Amish Apple Fritter Bread is my go-to comfort bake when I’m craving something sweet but can’t be bothered with anything too fiddly. First time I tried making it, my dog stole an apple right off the counter. Lessons were learned, laughter was had, and the bread? Well, it was gone by breakfast the next day. If you’ve never made it before… oh, you’re in for a treat (and maybe a sticky counter or two).
Why I Keep Coming Back to This Recipe
I make this when my kitchen needs a little love and the fruit bowl’s overflowing with apples (usually Granny Smith, but honestly, whatever’s rolling around in there works). My family goes nuts for this—especially my sister, who claims it tastes better than those fancy bakery fritters (though she also says pineapple belongs on pizza, so take that with a grain of salt). Sometimes, I end up with a kind of lopsided loaf, but nobody ever complains. Actually, I tend to think the extra caramelized bits make it even better. And you know that feeling when you run out of cinnamon mid-recipe? Been there. You can totally wing it with pumpkin spice or just double up the nutmeg; nobody’s judging.
What You’ll Need (With a Few Cheeky Substitutions)
- 2 large apples, peeled and chopped (Granny Smith is classic, but Pink Lady is great too. I’ve even used pears once—tasted fine but not quite as jammy)
- 1/3 cup brown sugar (Grandma swore by dark brown, but I just grab what’s in the cupboard)
- 2 teaspoons cinnamon (or 1 tsp cinnamon + 1 tsp pumpkin spice if you’re feeling wild)
- 2/3 cup white sugar
- 1/2 cup softened unsalted butter (salted works in a pinch—just skip the extra salt)
- 2 eggs
- 1 1/2 teaspoons vanilla extract (I once used almond and… well, not my best idea)
- 1 1/2 cups all-purpose flour
- 1 3/4 teaspoons baking powder
- 1/2 cup milk (honestly, oat milk worked once when I ran out—tasted a bit nuttier, but pretty good)
- Pinch of salt
How I Actually Make Amish Apple Fritter Bread
- Mix your apples: Toss the chopped apples with brown sugar and cinnamon. I usually do this in a mixing bowl, but once I just did it straight on the cutting board (fewer dishes, right?). Set aside.
- Start the batter: Cream the butter and white sugar together until it’s kind of fluffy—honestly, I use a fork if I don’t feel like dragging out the mixer. Beat in eggs one at a time, then splash in the vanilla. Don’t stress if it looks a bit lumpy at this stage; it’ll work itself out.
- Dry ingredients time: In a separate bowl (or on second thought, just the other side of your mixing bowl if you’re lazy like me), stir together the flour, baking powder, and salt. Add this to your wet mix in batches, alternating with the milk. I do, like, 1/3 of the flour, then some milk, then repeat until it’s all in. The batter will be thick. That’s good.
- Layer it all up: Pour half the batter into a greased loaf pan (a 9×5-inch works best, but once I used a weird oval Pyrex and it was… fine). Scatter half the apple mixture on top. Spoon over the rest of the batter, then top with the remaining apples. Swirl it slightly with a knife. This is where I usually sneak a taste—raw apple, sure, but live a little.
- Bake: Pop it in a 350°F (175°C) oven for about 55 to 65 minutes. Check with a toothpick in the center—if it comes out sticky, give it another 5 minutes. Sometimes the top gets super brown; I just lay a piece of foil over it for the last 10 minutes if it starts to look a bit too toasty.
- Cool and glaze: Let it cool before slicing, if you can stand it. For the glaze (optional, but why not): mix 1/2 cup powdered sugar with about a tablespoon of milk or cream. Drizzle it over once the bread isn’t piping hot. Or, just skip it—still great.
Notes (a.k.a. What I Learned the Hard Way)
- If you overmix the batter, the bread can go a bit dense. I always think “just one more stir”… and then regret it. Learn from my mistakes.
- Using tart apples like Granny Smith gives you that punchy flavor, otherwise it’s a bit flat. But in a pinch, whatever apples you’ve got are fine. Even the wrinkly ones at the bottom of the bowl.
- The glaze gets runny if you add too much milk. Add it slooowly—trust me, or you’ll end up with a puddle (been there, mopped that).
Variations (Some Worked, Some… Not So Much)
- I tried subbing half the apples with diced pears once. Not bad, but a little bland. Maybe more spice next time?
- Walnuts or pecans on top—yum! The crunch is a nice touch, especially if you toast them first.
- I once swapped all the butter for coconut oil. It was fine, but the coconut flavor kind of took over. Not my favorite, but maybe you’ll like it?
Tools I Use (Or What to Do If You Don’t Have Them)
- Mixing bowls (but salad bowls work in a pinch)
- Electric mixer—or a sturdy fork and a bit of arm power
- Loaf pan (9×5-inch is the gold standard, but honestly, any baking dish you can MacGyver will work—just watch the bake time)
- Knife for swirling—though I’ve used a chopstick when all the knives were in the dishwasher

How to Store It (Not That It Ever Lasts That Long)
Wrap the cooled loaf up in plastic or keep in an airtight container. It’ll stay soft for about 2 days at room temp, maybe longer in the fridge—though honestly, in my house it never lasts more than a day! If, by some miracle, there are leftovers, it’s lovely toasted with a dab of butter. Is it just me, or does it taste even better the day after?
Serving Ideas—Here’s How We Do It
We’re pretty casual: thick slices, sometimes a drizzle of extra glaze. If I’m feeling fancy (which is rare, but it happens), I’ll serve it with a scoop of vanilla ice cream or just a dollop of whipped cream. Oh! And my dad likes his with a strong mug of black coffee, says it’s the only way to eat it. On holidays, we’ll even have it for breakfast—don’t judge.
My Pro Tips (AKA: Things I Messed Up So You Don’t Have To)
- I once tried to rush the cooling step and sliced the bread while it was still hot. It completely fell apart. So yeah, patience is key here (I know, I know—hard to wait, but do it!)
- Don’t skip greasing your pan. Trust me, cleaning welded-on apple bits is not my idea of a good time.
- If your apples are super juicy, pat them dry a bit. Otherwise, the bread can end up a tad soggy in the middle.
FAQ—Some Real Questions I Actually Got (and a Couple I’m Guessing You Might Have)
- Can I freeze Amish Apple Fritter Bread? Yep, just wrap it up well. I’d slice it first, otherwise you’ll need a chisel to break off a piece.
- Do I have to peel the apples? Honestly, I’m lazy sometimes and leave the peels on. The texture’s a bit different, but it works!
- Why is my bread a bit dense? Probably overmixed. Or maybe your baking powder’s seen better days (it happens!).
- Can I double the recipe? Oh sure, just use two loaf pans. Or, if you only have one, bake one after the other—don’t try to squish it all in or you’ll have a mess. Ask me how I know…
- Where do you get your vanilla? I actually order mine online from King Arthur Baking. Good stuff, not too pricey.
- Is this really Amish? Well, maybe originally, but my version’s gone a bit off the rails. Still tastes pretty darn good, if you ask me.
- Where do you find more recipes like this? Oh, I usually check Allrecipes or sometimes Sally’s Baking Addiction if I’m feeling fancy.
So that’s the scoop—my not-so-perfect, definitely delicious Amish Apple Fritter Bread Recipe. If you give it a try, let me know what you think! Or if you swap in something wild (like, I dunno, mango?), I wanna hear about it, even if it goes sideways. Happy baking!
Ingredients
- 2 cups all-purpose flour
- 1 1/2 teaspoons baking powder
- 1/2 teaspoon salt
- 1/2 cup unsalted butter, softened
- 3/4 cup granulated sugar
- 2 large eggs
- 1/2 cup milk
- 2 teaspoons vanilla extract
- 2 cups peeled and diced apples
- 1/3 cup brown sugar
- 2 teaspoons ground cinnamon
- 1 cup powdered sugar
- 2 tablespoons milk (for glaze)
Instructions
-
1Preheat oven to 350°F (175°C). Grease and flour a 9×5-inch loaf pan.
-
2In a medium bowl, whisk together flour, baking powder, and salt. Set aside.
-
3In a large bowl, cream together the butter and granulated sugar until light and fluffy. Beat in eggs, one at a time, then add vanilla extract.
-
4Gradually add the flour mixture to the wet ingredients, alternating with milk, mixing just until combined.
-
5In a small bowl, toss diced apples with brown sugar and cinnamon. Pour half the batter into the loaf pan, layer with half the apple mixture, then repeat. Swirl gently with a knife.
-
6Bake for 50 minutes or until a toothpick inserted in the center comes out clean. Cool, then drizzle with a glaze made from powdered sugar and milk.
CLICK FOR NUTRITION INFO
↑
Approximate Information for One Serving
Serving Size:
1 serving
Calories:
290 caloriescal
Protein:
4gg
Fat:
9gg
Saturated Fat:
0g
Trans Fat:
0g
Cholesterol:
0mg
Sodium:
0mg
Potassium:
0mg
Total Carbs:
48gg
Fiber:
0g
Sugar:
0g
Net Carbs:
0g
Vitamin A:
0
Vitamin C:
0mg
Calcium:
0mg
Iron:
0mg
Nutrition Disclaimers
Number of total servings shown is approximate. Actual number of servings will depend on your preferred portion sizes.
Nutritional values shown are general guidelines and reflect information for 1 serving using the ingredients listed, not including any optional ingredients. Actual macros may vary slightly depending on specific brands and types of ingredients used.
To determine the weight of one serving, prepare the recipe as instructed. Weigh the finished recipe, then divide the weight of the finished recipe (not including the weight of the container the food is in) by the desired number of servings. Result will be the weight of one serving.
Did you make this recipe?
Please consider Pinning it!!