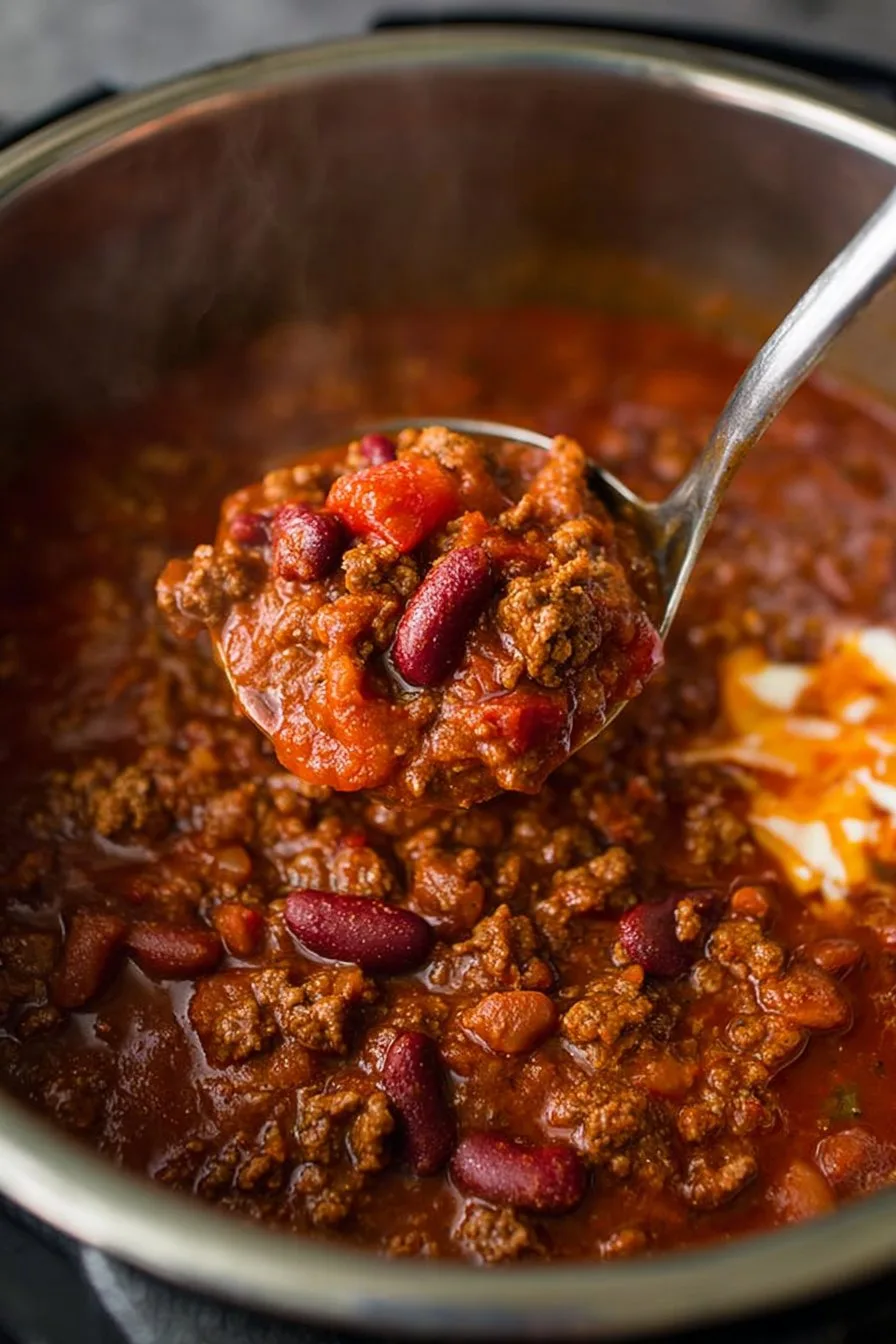
So, You Want to Make Chili (the Instant Pot Way)
I’ll be honest: Chili night at my place is a bit of a circus, but in the best possible way. There’s usually a dog hovering for scraps, I’m dodging rogue Lego pieces (seriously, how do they get in the kitchen?), and my kids are arguing over who gets the last scoop. But you know what? The Instant Pot Chili always brings everyone to the table, even if someone ends up with a bean in their sock. I remember the first time I tried this — I thought using the Instant Pot would save time, but I forgot to plug it in. Classic me. Since then, it’s been my go-to for nights when I want something hearty, but can’t face standing over the stove for an hour. Plus, you get that “simmered all day” magic in under an hour.
Why You’ll Love This (Or at least, why I do!)
I make this when the weather turns chilly (pun intended, sorry), or when I just want to feed a crowd without losing my mind. My family goes wild for it — and that’s saying something, considering one of them once declared ketchup a vegetable. If you’re into meals that taste like you tried harder than you did, this is your ticket. I even use it for game nights, or, honestly, when I just want leftovers for lunch the next day (it’s way better the second day — fight me). The only thing that ever threw me was the first time the steam shot out of the valve — thought I was about to launch the lid into orbit, but nope, it’s all part of the fun.
What You Need (and How I Cheat Sometimes)
- 1 pound (about 450g) ground beef (or turkey, or even lentils if you’re feeling veg)
- 1 onion, diced — I use red if that’s all I’ve got, nobody notices
- 2-3 cloves garlic, minced (or, I dunno, a hefty scoop from the jar if you’re in a rush)
- 1–2 bell peppers, any color (green is classic, but yellow looks cheery)
- 1 can (14oz/400g) diced tomatoes (fire-roasted if you want to be fancy, but regular is fine)
- 1 can (15oz/425g) kidney beans, drained and rinsed (pinto or black beans work too)
- 1 can (15oz/425g) black beans, drained and rinsed (or just double up on kidney beans — I won’t tell)
- 2–3 tbsp chili powder (I eyeball it, but don’t go wild unless you like heat)
- 1 tsp cumin (ground, but I once used whole seeds and it was fine, just crunchier)
- 1 tsp smoked paprika (optional, but it’s that little something-something)
- Salt and pepper, to taste (my grandmother swore by Lawry’s, but honestly, whatever salt you’ve got works)
- 1 cup beef or chicken broth (water works if you forget, it’s happened)
- 1 tbsp olive oil
- Optional: a pinch of brown sugar, a dash of Worcestershire, or a sprinkle of cocoa powder (don’t knock it till you’ve tried it)
How I Throw It Together (With Minimal Drama… Usually)
- First, hit “Sauté” on your Instant Pot. Pour in the olive oil, then toss in your diced onion and peppers. Stir them around for about 3 minutes — if they stick, just add a splash more oil. Or water. Or wine if you’re having one (no judgment).
- Add the garlic and ground beef. Break up the beef with a wooden spoon (or spatula, or whatever’s clean). Cook until it’s mostly brown, though if there’s a little pink, don’t sweat it — the pressure cooker will finish the job.
- Dump in the chili powder, cumin, paprika, salt, and pepper. Give everything a good stir so the spices coat the meat and veggies. This is where I usually sneak a taste — just to check if it’s got enough kick. (Okay, sometimes it’s just because I’m hungry.)
- Add the tomatoes, beans, and broth. If you’re feeling wild, throw in your cocoa powder or Worcestershire now. Stir it up. Don’t worry if it looks like a weird bean swamp right now — it always does!
- Lock the Instant Pot lid. Set the valve to “Sealing” (I always check twice after one memorable disaster). Cook on “Manual” or “Pressure Cook” mode for 15 minutes. It’ll take a few minutes to come to pressure.
- Now, you can clean up, or scroll through funny cat videos, or just stand there debating if you should make cornbread. Your call.
- When it beeps, let it naturally release for 10-15 minutes (I used to quick-release, but the kitchen smelled like chili for a week). Then, carefully move the valve to “Venting” — I use a wooden spoon because, well, steam burns are no joke.
- Open the lid (the best part), stir, and taste. Add more salt, pepper, or chili powder if you want. Sometimes I throw in a handful of shredded cheese right at the end, just because.
Notes I Learned the Hard Way
- If you use extra-lean meat, the chili can be a bit dry. I actually prefer using 80/20 beef — it’s just tastier.
- If you double the recipe (which I’ve tried), don’t double the liquid or it’s more like chili soup. Learned that one the hard way.
- Oh, and don’t skip rinsing your beans unless you enjoy a, ah, musical after-effect.
Trying Something New? Variations I’ve Experimented With
- Sweet potato chili — so good! Cube one and toss it in with the beans.
- I swapped beer for broth once; actually, it’s pretty great (just don’t use a super hoppy IPA, unless you like bitter chili. I learned that the hard way too.)
- Chicken chili with white beans — works, but my kids said it “tasted like soup pretending to be chili.” So, maybe not my top pick.
- Vegetarian version? Just ditch the meat, add more beans, and maybe a handful of corn. Totally works, and my veggie friends were impressed.
What If I Don’t Have an Instant Pot?
Honestly, you can make this in a big stockpot on the stove. Just let it simmer for at least 45 minutes, stirring so it doesn’t burn at the bottom. Or a slow cooker — just brown the meat first, then dump everything in and cook on low for 5-6 hours. The Instant Pot is handy, but not a dealbreaker (despite what my brother-in-law says every Thanksgiving).

Does It Keep? (In Theory…)
Sure, you can keep it in the fridge for 3-4 days in a sealed container. It actually tastes better the next day, IMO. But, truth be told, mine disappears by the next afternoon. You can also freeze it — just don’t forget it’s in there. I found a mystery container labeled “Chili, maybe” after two months, and it was fine after a quick defrost and heat.
How I Serve It (And the Weird Family Tradition)
I like to pile it into bowls and let everyone top their own — sour cream, shredded cheese, chopped onions, jalapeños, Fritos (don’t knock it), or even a squirt of lime. My youngest swears by crumbling in cornbread, which I used to think was odd, but now I’m converted. Occasionally, we do “chili dogs” which are a bit of a mess, but so fun. Here’s a cornbread recipe from Serious Eats I like, if you’re looking.
Pro Tips (a.k.a. Learn from My Oopsies)
- Don’t skip the natural pressure release if you can help it. I once tried quick-releasing because I was starving. Chili volcano. Not worth it.
- Taste as you go. I’ve over-salted it before, thinking it needed more. Actually, the flavors kind of bloom after pressure cooking, so start slow.
- If you want it thicker, just hit sauté at the end and simmer for a few minutes. Or throw in a handful of crushed tortilla chips — not traditional, but it works.
Questions People Actually Ask Me
- Can I use frozen ground beef? You can, but it’ll take longer to sauté — maybe add a couple extra minutes. Just break it up as it thaws.
- My chili’s too watery — what gives? Happens to the best of us. Next time, cut back on broth. For now, simmer it open till it thickens.
- Is this spicy? Not unless you want it to be. Add more chili powder, or toss in a chipotle if you’re a heat-seeker. Or just serve hot sauce at the table (I like Tapatío for a kick).
- What if I don’t have canned tomatoes? Use fresh, or even salsa in a pinch — different vibe, but it works. Once I used tomato soup. Wouldn’t recommend.
- Do I need to soak the beans? Not for canned. If you’re going dry, soak overnight or use the Instant Pot’s bean preset. But honestly, I’m too lazy most days.
By the way, if you’re into more Instant Pot adventures, I get a kick out of these pressure cooker recipes — some are wild, but the step-by-step photos help!
So, that’s my not-so-secret Instant Pot Chili routine. And if you end up with a bean in your sock, just consider it a badge of honor. Happy cooking!
Ingredients
- 1 lb ground beef
- 1 medium onion, diced
- 3 cloves garlic, minced
- 1 bell pepper, diced
- 1 (15 oz) can kidney beans, drained and rinsed
- 1 (15 oz) can black beans, drained and rinsed
- 1 (28 oz) can diced tomatoes
- 2 tbsp chili powder
- 1 tsp ground cumin
- 1 tsp smoked paprika
- 1/2 tsp salt
- 1/2 tsp black pepper
- 1 cup beef broth
Instructions
-
1Set the Instant Pot to sauté mode. Add ground beef and cook until browned, breaking it up with a spoon.
-
2Add diced onion, bell pepper, and minced garlic. Sauté for 3-4 minutes until vegetables are softened.
-
3Stir in chili powder, cumin, smoked paprika, salt, and black pepper. Cook for 1 minute until fragrant.
-
4Add kidney beans, black beans, diced tomatoes, and beef broth. Stir to combine.
-
5Secure the lid, set the valve to sealing, and cook on high pressure for 15 minutes.
-
6Allow a natural pressure release for 10 minutes, then quick release any remaining pressure. Stir and serve hot.
CLICK FOR NUTRITION INFO
↑
Approximate Information for One Serving
Serving Size:
1 serving
Calories:
370 caloriescal
Protein:
28gg
Fat:
13gg
Saturated Fat:
0g
Trans Fat:
0g
Cholesterol:
0mg
Sodium:
0mg
Potassium:
0mg
Total Carbs:
34gg
Fiber:
0g
Sugar:
0g
Net Carbs:
0g
Vitamin A:
0
Vitamin C:
0mg
Calcium:
0mg
Iron:
0mg
Nutrition Disclaimers
Number of total servings shown is approximate. Actual number of servings will depend on your preferred portion sizes.
Nutritional values shown are general guidelines and reflect information for 1 serving using the ingredients listed, not including any optional ingredients. Actual macros may vary slightly depending on specific brands and types of ingredients used.
To determine the weight of one serving, prepare the recipe as instructed. Weigh the finished recipe, then divide the weight of the finished recipe (not including the weight of the container the food is in) by the desired number of servings. Result will be the weight of one serving.
Did you make this recipe?
Please consider Pinning it!!