So Let Me Tell You How I Ended Up Baking Zucchini Bread
You know those recipes you inherit but never actually make until one day, bam—there’s a heap of zucchini staring you down? That was me last summer after my neighbor gave me, no joke, a grocery bag packed with zucchini—like she was running a covert veggie operation. The first batch turned out pretty wonky (too soggy, don’t ask), but once I got the hang of it, this classic zucchini bread recipe became my go-to. Still, every time I grate zucchini, my dog looks at me like I’ve lost the plot. Anyway, let’s get into it before I start rambling about why zucchinis are shaped like that.
Why I Keep Coming Back to This Bread
I make this when I need the house to smell like I’ve got my act together (works like a charm). My family goes a bit wild for it—especially if I manage to hide a slice for breakfast the next day (which, honestly, is rare). And it’s forgiving. Forgot the nuts? Nobody minds. Out of vanilla? No one will even notice; I swear. Even my best friend, who claims she doesn’t like zucchini, eats this and then asks for the recipe (she still calls it “zuccini” though—bless her). The only bit that trips me up is squeezing the zucchini to get the water out. Like, how wet is too wet? I still don’t totally know but the bread always turns out. Oh, and when the oven timer is done, everyone in my house suddenly shows up in the kitchen like a pack of hungry wolves.
What You’ll Need (And a Few Swaps If You Must)
- 2 cups grated zucchini (sometimes I just eyeball this—don’t stress if it’s a smidge over)
- 1 1/2 cups all-purpose flour (I’ve swapped in whole wheat for half, no big drama)
- 1/2 teaspoon salt
- 1/2 teaspoon baking powder
- 1/2 teaspoon baking soda
- 1 teaspoon ground cinnamon (sometimes I add nutmeg, but just a bit—my gran always did)
- 2 eggs (room temp if you remember, straight form the fridge if you don’t)
- 1/2 cup vegetable oil (I’ve used melted butter and even coconut oil, it all works, just tastes a bit different)
- 3/4 cup sugar (brown sugar is lovely too, or even a mix—feel free to cut it down if you like it less sweet)
- 1 teaspoon vanilla extract (I ran out once and used almond—pretty delicious, actually)
- 1/2 cup chopped walnuts or pecans (optional, but I say go for it; skip for nut allergies, obviously)
- 1/2 cup chocolate chips (totally optional, but my nephew insists—kids, eh?)
How I Actually Make This (With a Few Honest Asides)
- Grate the zucchini: Just grab a box grater (watch your knuckles, trust me), and shred up those zucchinis. Scoop the shreds into a clean kitchen towel and squeeze like you mean it. I sometimes get lazy and just press them in a sieve—does the trick.
- Mix the dry stuff: In a biggish bowl, toss together the flour, salt, baking powder, baking soda, and cinnamon (plus nutmeg if you’re feeling it). Give it a good stir. Don’t worry if it’s not perfectly mixed, it all comes together later.
- Stir up the wet things: Grab another bowl and whisk the eggs, oil, sugar, and vanilla. I always sneak a tiny taste here. I know, raw eggs, but I’m living on the edge.
- Combine it all: Dump the wet ingredients into the dry bowl. Fold it just enough to see flour disappear. Don’t go wild, or the bread turns out tough (learned that the hard way).
- Add the zucchini and extras: Fold in the zucchini, nuts, and chocolate chips (if using). If it looks a bit thick, that’s normal. Sometimes the batter’s a little lumpy—doesn’t matter one bit.
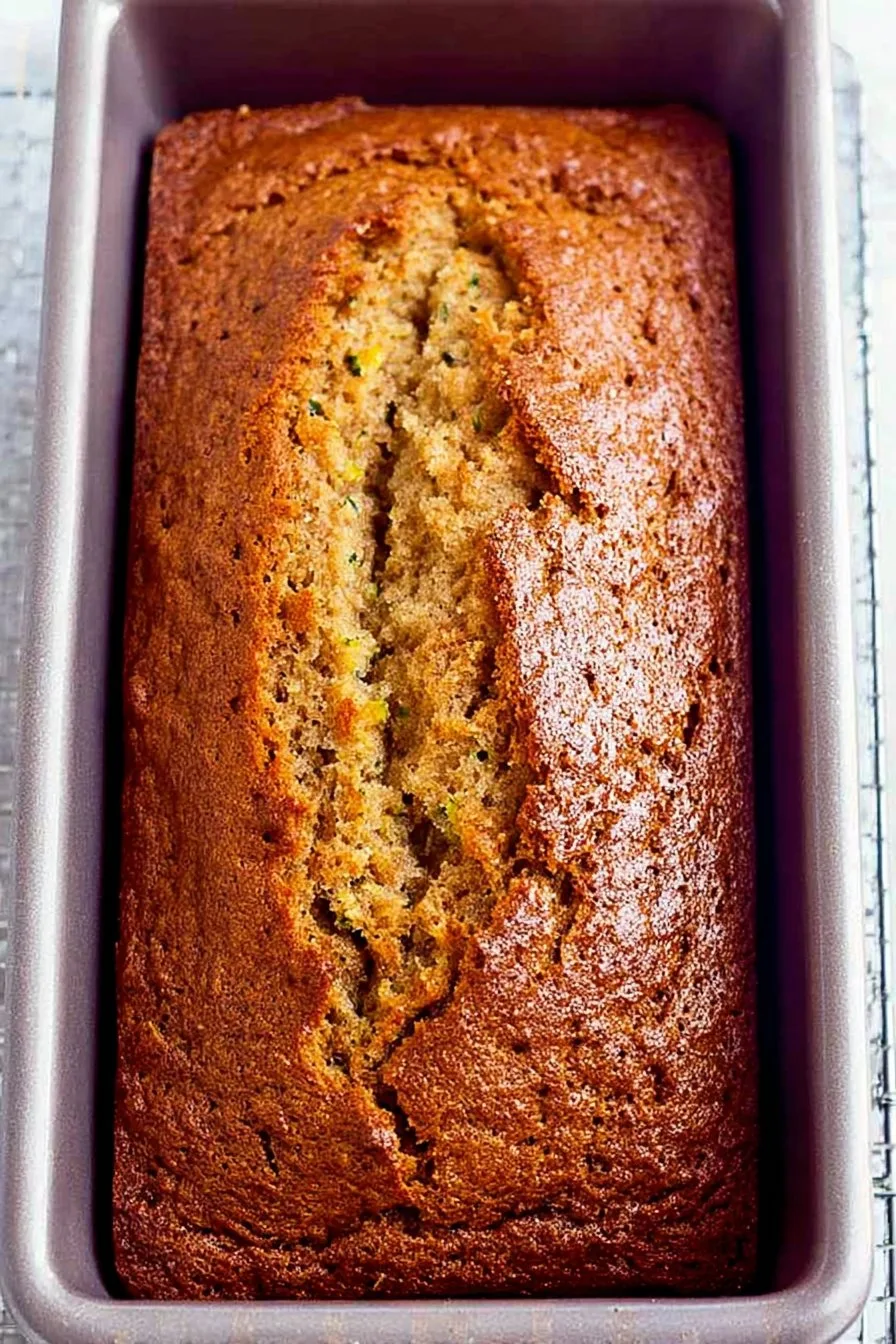
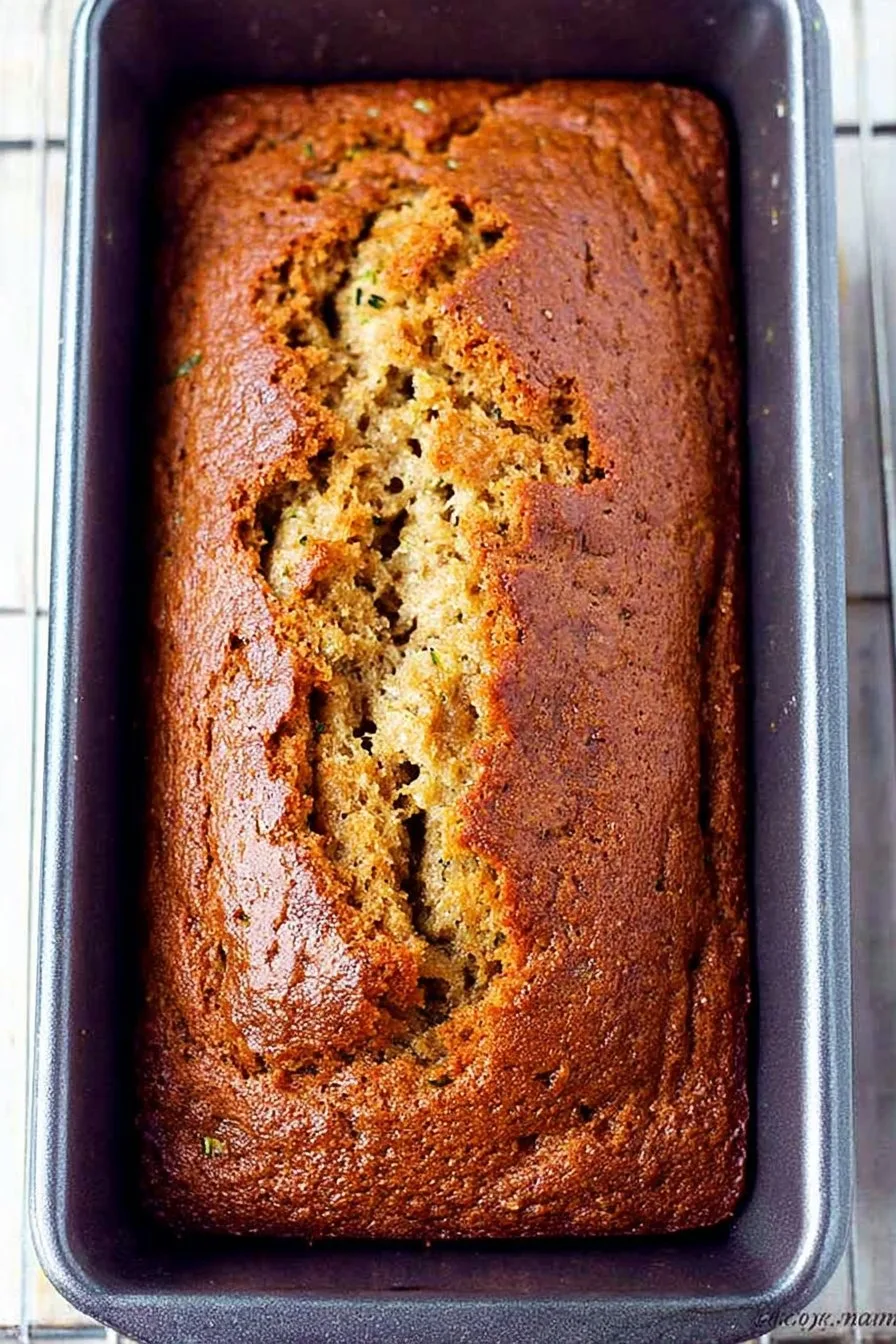
- Bake: Pour the lot into a greased 9×5 inch loaf pan. Smooth the top a little. Bake at 350°F (175°C) for about 50–60 minutes. (Mine usually takes closer to 55 minutes, but my oven’s a bit moody.) Start checking at 50 minutes—poke it with a toothpick in the center. If it comes out clean, you’re golden. If not, give it 5 mins more.
Notes (Learned the Hard Way)
- If you forget to squeeze the zucchini, the bread turns out super wet. Still edible, just…squishy. So, yeah, squeeze as much as you can.
- Too much mixing makes it dense. So, stop once you see the flour disappear.
- Bread sometimes cracks on top. Looks homey, tastes perfect—don’t sweat it.
- I’ve tried baking this in muffin tins when I was impatient. Actually, worked great but reduce baking time to about 20–25 mins.
Variations I’ve Tried (Some Good, Some Not So Much)
- Swapped in grated carrot for half the zucchini—honestly, pretty nice, like a carrot-zucchini hybrid.
- Tried gluten-free flour once; it was okay, just a smidge drier. Next time I’ll add a splash of yogurt or applesauce.
- I once tried a lemon zest version (don’t know what I was thinking). It was…okay, but not my favorite. The lemon kind of took over.
- For a vegan take, I’ve used flax eggs and coconut oil. It held together all right, but definitely more crumbly.
Equipment—And What To Do If You Don’t Have It
- Mixing bowls (two if you can, but I’ve totally done it with just one—fewer dishes, right?)
- Box grater (food processor works if you want to be fancy; or, if you’re desperate, just chop super fine with a knife—bit of a faff, but doable)
- 9×5 loaf pan (I’ve used an 8×4 pan in a pinch—just bake a bit longer)
- Spatula or wooden spoon (I’m not picky)
How I Store It (Or Try To…)
Honestly, it rarely lasts more than a day in my house, but if you’ve got more self-control, just wrap it in foil or stash in an airtight container. Stays soft on the counter for 2–3 days. Pop in the fridge if it’s hot out, but—heads up—it’ll dry out a little. Freezes like a champ, though. Slices or the whole loaf, just wrap well. Here’s a useful tip I picked up from King Arthur Baking on storing quick breads.
How We Actually Eat This (Serving Suggestions)
My personal favorite is to slather a thick slice with salted butter (because life’s too short for bland bread). Sometimes we toast a slice under the broiler for breakfast—my dad adds honey, my sister likes a smear of cream cheese. Oh, and if you’re feeling wild, try it warm with a scoop of vanilla ice cream. Not traditional, but, wow. If you want to go full afternoon tea mode, you could even check out these afternoon tea ideas—I sometimes serve it with a strong cuppa, just sayin’.
Pro Tips (Learned the Hard, Slightly Messy Way)
- I once tried to rush the cooling step and sliced the bread too soon. It just fell apart. Actually, I find it works better if you wait at least 15–20 mins before slicing (I know, the wait is agony).
- Don’t skip the greasing-the-pan bit. I did once, and spent ages scraping bread out with a fork (still tasty, but a pain).
- If your zucchini is extra watery, let it sit in a colander for a bit while you prep the other stuff. That extra drip really helps.
FAQ – People Actually Ask Me This Stuff
- Can I make this gluten free? Oh, for sure. Use a good 1:1 gluten-free flour blend. It’ll be a bit crumblier, but nobody minds.
- How fine should I grate the zucchini? I just use the regular holes—nothing fancy. Finer grating = smoother bread, but coarser gives nice flecks.
- Do I need to peel the zucchini? Nope! The skin is soft and you won’t even notice it. Plus, less faff.
- Can I double the recipe? Oh, absolutely, though you’ll need two pans. Or one ginormous one; but then who knows how long it’ll take to bake? (Let me know if you try!)
- Any way to make this less sweet? Just knock down the sugar by a third, works fine. Or use applesauce for some of the oil and sugar—I’ve seen that work, though I haven’t done it myself (yet).
- How do I know if it’s done? Toothpick test, but honestly, if your kitchen smells like warm cinnamon and people are hovering, you’re close.
All right, now you know my entire zucchini bread saga. If you try it, let me know how it turns out—or if your dog judges your grating technique, too. Oh! And if you want to geek out about zucchini varieties (I actually did once, long story), this page at Gardener’s Supply is properly helpful. Happy baking, mate!
Ingredients
- 2 cups all-purpose flour
- 1 1/2 cups grated zucchini (about 2 medium)
- 1 cup granulated sugar
- 1/2 cup vegetable oil
- 2 large eggs
- 1 teaspoon vanilla extract
- 1 teaspoon baking soda
- 1/2 teaspoon baking powder
- 1/2 teaspoon salt
- 1 teaspoon ground cinnamon
- 1/4 teaspoon ground nutmeg
Instructions
-
1Preheat the oven to 350°F (175°C). Grease a 9×5-inch loaf pan or line with parchment paper.
-
2In a large bowl, whisk together the flour, baking soda, baking powder, salt, cinnamon, and nutmeg.
-
3In another bowl, beat together the eggs, sugar, vegetable oil, and vanilla extract until well combined.
-
4Stir the wet ingredients into the dry ingredients until just combined. Fold in the grated zucchini.
-
5Pour the batter into the prepared loaf pan and smooth the top. Bake for 50-55 minutes, or until a toothpick inserted into the center comes out clean.
-
6Allow the bread to cool in the pan for 10 minutes, then transfer to a wire rack to cool completely before slicing.
CLICK FOR NUTRITION INFO
↑
Approximate Information for One Serving
Serving Size:
1 serving
Calories:
210 caloriescal
Protein:
3gg
Fat:
8gg
Saturated Fat:
0g
Trans Fat:
0g
Cholesterol:
0mg
Sodium:
0mg
Potassium:
0mg
Total Carbs:
32gg
Fiber:
0g
Sugar:
0g
Net Carbs:
0g
Vitamin A:
0
Vitamin C:
0mg
Calcium:
0mg
Iron:
0mg
Nutrition Disclaimers
Number of total servings shown is approximate. Actual number of servings will depend on your preferred portion sizes.
Nutritional values shown are general guidelines and reflect information for 1 serving using the ingredients listed, not including any optional ingredients. Actual macros may vary slightly depending on specific brands and types of ingredients used.
To determine the weight of one serving, prepare the recipe as instructed. Weigh the finished recipe, then divide the weight of the finished recipe (not including the weight of the container the food is in) by the desired number of servings. Result will be the weight of one serving.
Did you make this recipe?
Please consider Pinning it!!