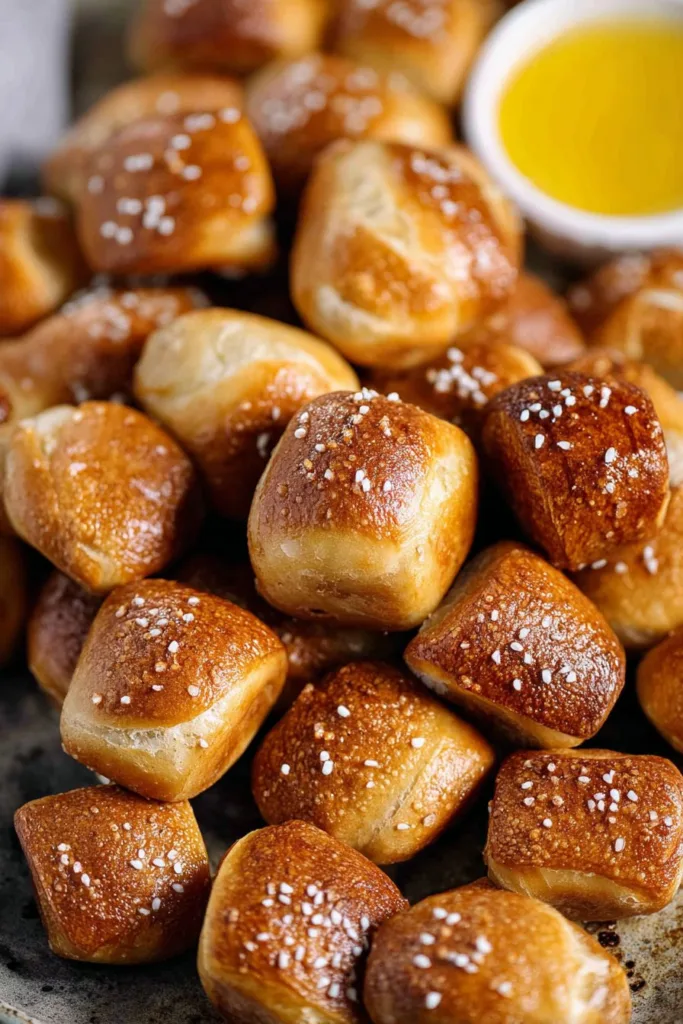
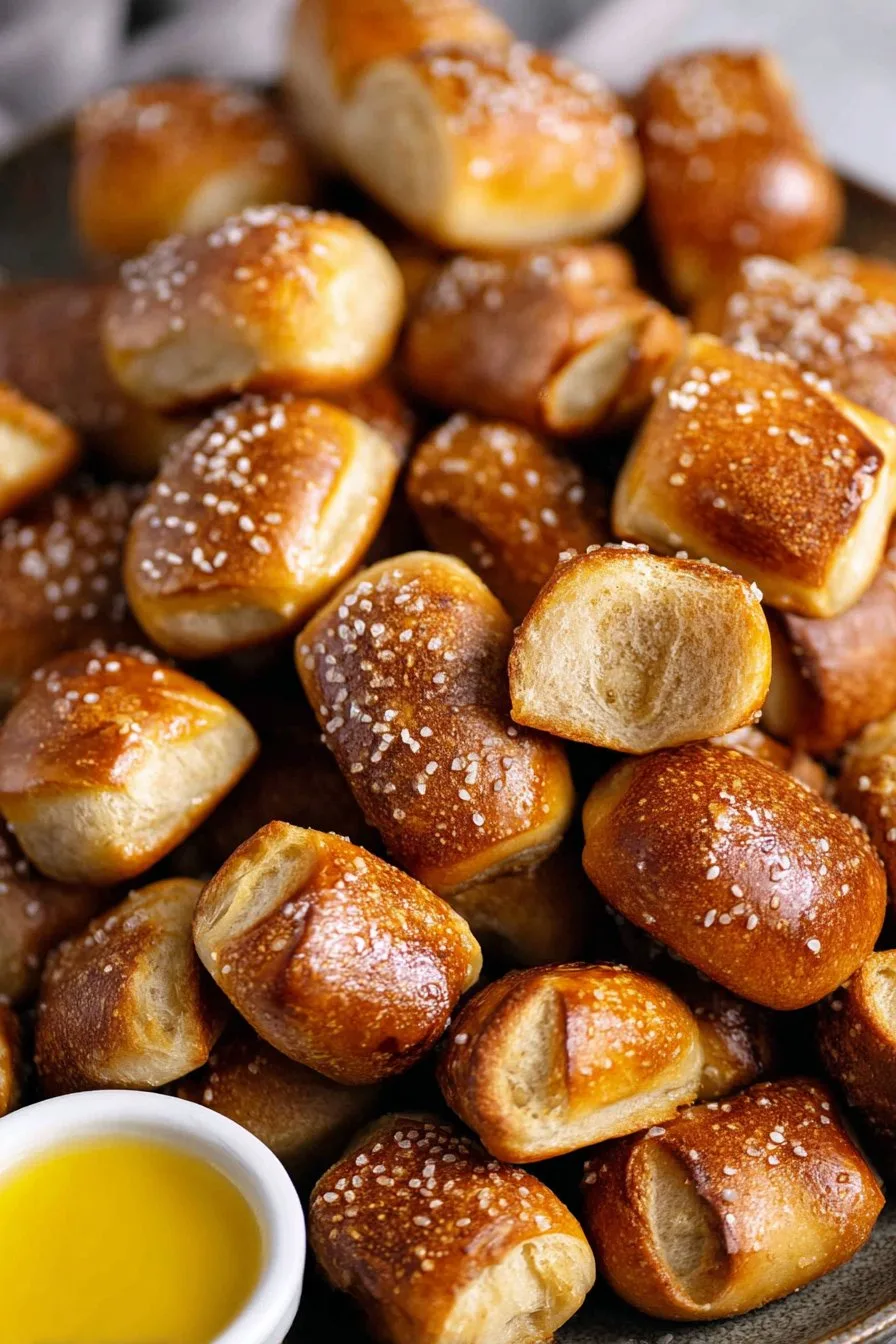
Let Me Tell You About These Sourdough Discard Pretzel Bites
Okay, so you know that moment where your kitchen smells like yeasty heaven and you remember you forgot to use up your sourdough discard (again)? Yeah, that’s basically the story of how these little pretzel bites became a staple at my place. I started making them on a rainy Sunday when I just couldn’t face another pancake. Honestly, the first time was a mess—flour everywhere, the dog tried to eat a dough ball, and yet… they tasted amazing. Now it’s sort of a family joke that I’m whipping them up whenever anyone looks a bit peckish (or there’s a football match on, which is, um, always).
Why You’ll Probably Love This (I Do, Anyway)
I make these Sourdough Discard Pretzel Bites when it’s Friday night, and nobody wants a real meal but everyone wants to snack. My family goes crazy for them, especially if I remember to make the cheese dip (which, let’s face it, doesn’t always happen). There’s something about the chewy, salty, buttery little bites that makes them disappear in record time—even that one cousin who claims not to like bread sneaks a handful. Plus, if you (like me) sometimes forget about your discard until it’s threatening to walk out of the fridge on its own, this is the perfect fix.
The Stuff You’ll Need (And What I’ve Swapped In)
- 1 cup sourdough starter discard (unfed is totally fine, honestly)
- 2 and 1/2 cups all-purpose flour (but bread flour works if that’s what’s in the cupboard)
- 2 tablespoons unsalted butter, melted (I’ve used olive oil in a pinch—different but still good)
- 1 tablespoon sugar (occasionally I toss in honey if I’m feeling fancy)
- 3/4 cup warm water (tap is fine, just don’t make it bathwater hot)
- 1 teaspoon fine salt (sea salt, table salt, whatever your hand grabs first)
- 1 packet instant yeast (about 2 and 1/4 teaspoons; I once used active dry without proofing, and shockingly, it worked out…sort of)
- 1/2 cup baking soda (for the water bath—not for the dough!)
- 1 large egg, beaten (sometimes I skip the egg wash, and they just look a little dull, but still taste fab)
- Coarse salt, for sprinkling (my grandmother always insisted on Diamond Crystal, but really, any chunky salt works)
Alright, Here’s How You Do It
- First, grab a big bowl and stir together your sourdough discard, flour, melted butter, sugar, warm water, salt, and yeast. I usually just use a wooden spoon at this point—less washing up—though a stand mixer with a dough hook feels like cheating in the best way.
- Knead the dough for about 7 minutes until it’s smooth-ish. If it’s looking a bit shaggy, don’t stress; it comes together, promise. Sometimes I get bored and give up at 5 minutes, and it’s still fine.
- Cover the bowl with a towel (any towel; I once used a clean T-shirt—don’t ask) and let it rise somewhere warm until it’s doubled. Sometimes mine takes 45 minutes, other times over an hour if the kitchen’s cold. Go have a cuppa or do something else.
- Punch the dough down, then turn it out onto a lightly floured surface. Divide it into 6-ish pieces (don’t get your ruler out), then roll each into a rope about 18 inches long. If it keeps springing back, let it rest a minute, then try again.
- Cut the ropes into bite-sized bits—maybe the width of your thumb, or, honestly, whatever size you want to pop in your mouth.
- Preheat your oven to 425°F (220°C), and line a baking sheet with parchment paper (I’ve been known to just butter the pan when I’m out of parchment—works, just a bit more cleanup).
- Now the fun part: bring about 6 cups of water to a boil, add the baking soda (careful, it fizzes up!), and drop the dough bits in for 20–30 seconds each. Fish them out with a slotted spoon and plop them onto your baking sheet. They look weird here. That’s normal.
- Brush them with the beaten egg (or skip it if you’re feeling lazy; they’ll just be matte instead of shiny) and sprinkle with coarse salt. This is where I usually sneak a taste of the raw dough—not recommended, but, well, old habits.
- Bake for 12–15 minutes. They’re done when they’re deep golden brown and your kitchen smells unreal. Cool slightly so you don’t burn your mouth (I never wait long enough).
A Few Notes I’ve Picked Up (The Hard Way)
- If your dough is too sticky, just knead in a bit more flour; if it’s too dry, a splash of water does wonders.
- I’ve forgotten the egg wash entirely before; honestly, no one noticed except me.
- The baking soda bath gives these their classic pretzel flavor—don’t skip, but don’t panic if you accidentally under-boil them. Still tasty.
- Once, I tried to double the recipe and ended up with dough all over the floor. Maybe stick to a single batch your first go.
What Else Can You Do? Variations & Experiments
- I sometimes toss in a handful of shredded cheddar or parmesan into the dough—melty, salty goodness.
- Sprinkled with everything bagel seasoning? Chef’s kiss.
- One time I tried stuffing them with cream cheese—looked cool but got messy fast. Maybe stick to dips.
- For a sweet twist, brush with melted butter after baking and roll in cinnamon sugar. My kids claim this is their favorite, but honestly, I still prefer the classic salty version.
What You Need (And What You Can Improvise)
- Mixing bowl (any size that fits your dough; if not, divide it up)
- Wooden spoon or dough hook—your call
- Baking sheet (or, real talk, I once used a pizza pan)
- Parchment paper (skip if you must, just grease that pan well)
- Slotted spoon (but a regular spoon works if you’re careful, just drippy)
By the way, if you’re missing any of these, don’t let that stop you. I once shaped the dough on a floured cutting board and transferred with my hands. Messy? Yep, but it worked.
How to Store (If You Have Any Leftover…Rarely Happens Here)
They keep in an airtight container at room temp for about 2 days; in the fridge, maybe 4. But honestly, in my house, they don’t last more than a day—someone always grabs a handful when they walk by. If you do have leftovers, pop them in a 350°F oven for 5 minutes to revive.
Serving Ideas (Or: How I Actually Eat These)
My personal favorite: warm, dipped in spicy brown mustard or a super easy queso (seriously, Serious Eats’ cheese sauce has never failed me). My daughter likes them with honey-mustard and my partner claims they’re best with a cold beer. Hey, whatever floats your boat. We once took them on a picnic and they were the first thing gone—didn’t even make it to the scenic overlook.

Some ‘Pro’ Tips (Learned the Clumsy Way)
- Don’t rush the rise. I once tried to bake them after just 20 minutes, and they turned out dense as bricks. Patience is not just a virtue—it’s necessity, apparently.
- Be careful with the baking soda bath; it bubbles up something fierce if you dump it in too fast. Learned that with a mini geyser on my stovetop!
- If the bites aren’t browning, just give them an extra minute or two. Or flip on the broiler really briefly—just don’t wander off during this part. (I did. Twice.)
FAQ (Because Folks Actually Ask These)
- Can I use active sourdough starter instead of discard?
Sure, but then you might need a bit less yeast. Actually, I find it works better if you stick with discard for the signature tang. - Help, my dough is super sticky!
Add a spoonful of flour, knead, and try again. It’s not an exact science—sometimes the weather even messes with it. Just keep going. - Do I have to do the baking soda bath?
Technically, no. But then they’re just little rolls, not pretzels. If that’s your jam, go for it! - Can I freeze these?
Yep, freeze after baking (not before). Reheat in the oven until hot. Not quite as good as fresh, but still better than store-bought. I once tried freezing before baking and got weird results, so… lesson learned. - Where did you learn this recipe?
Bits and bobs form blogs like King Arthur Baking and fiddling until it worked for my kitchen. Honestly, most of my best recipes start with a bit of internet rabbit-holing.
Oh, and before I forget: sometimes, in the middle of baking, I remember that I left my tea in the microwave. Don’t be like me—set a timer or you’ll end up with cold tea and burnt pretzels. Not that I’m speaking from experience (I totally am).

Ingredients
- 1 cup sourdough discard (unfed, room temperature)
- 2 cups all-purpose flour
- 1 tablespoon granulated sugar
- 1 teaspoon instant yeast
- 1/2 teaspoon salt
- 2 tablespoons unsalted butter (melted)
- 1/2 cup warm water
- 1/4 cup baking soda (for boiling)
- 1 large egg (beaten, for egg wash)
- Coarse salt (for topping)
Instructions
-
1In a large bowl, combine sourdough discard, warm water, sugar, and instant yeast. Stir until well mixed.
-
2Add flour, salt, and melted butter to the bowl. Mix until a soft dough forms, then knead for 5-7 minutes until smooth and elastic.
-
3Cover the dough and let it rest for 30 minutes. Preheat oven to 425°F (220°C) and line a baking sheet with parchment paper.
-
4Divide the dough into 6 pieces. Roll each into a rope and cut into 1-inch bites.
-
5Bring a large pot of water to a boil and add baking soda. Boil pretzel bites in batches for 30 seconds, then transfer to the prepared baking sheet.
-
6Brush boiled pretzel bites with beaten egg and sprinkle with coarse salt. Bake for 12-15 minutes until golden brown. Serve warm.
CLICK FOR NUTRITION INFO
↑
Approximate Information for One Serving
Serving Size:
1 serving
Calories:
180cal
Protein:
5 gg
Fat:
3 gg
Saturated Fat:
0g
Trans Fat:
0g
Cholesterol:
0mg
Sodium:
0mg
Potassium:
0mg
Total Carbs:
33 gg
Fiber:
0g
Sugar:
0g
Net Carbs:
0g
Vitamin A:
0
Vitamin C:
0mg
Calcium:
0mg
Iron:
0mg
Nutrition Disclaimers
Number of total servings shown is approximate. Actual number of servings will depend on your preferred portion sizes.
Nutritional values shown are general guidelines and reflect information for 1 serving using the ingredients listed, not including any optional ingredients. Actual macros may vary slightly depending on specific brands and types of ingredients used.
To determine the weight of one serving, prepare the recipe as instructed. Weigh the finished recipe, then divide the weight of the finished recipe (not including the weight of the container the food is in) by the desired number of servings. Result will be the weight of one serving.
Did you make this recipe?
Please consider Pinning it!!