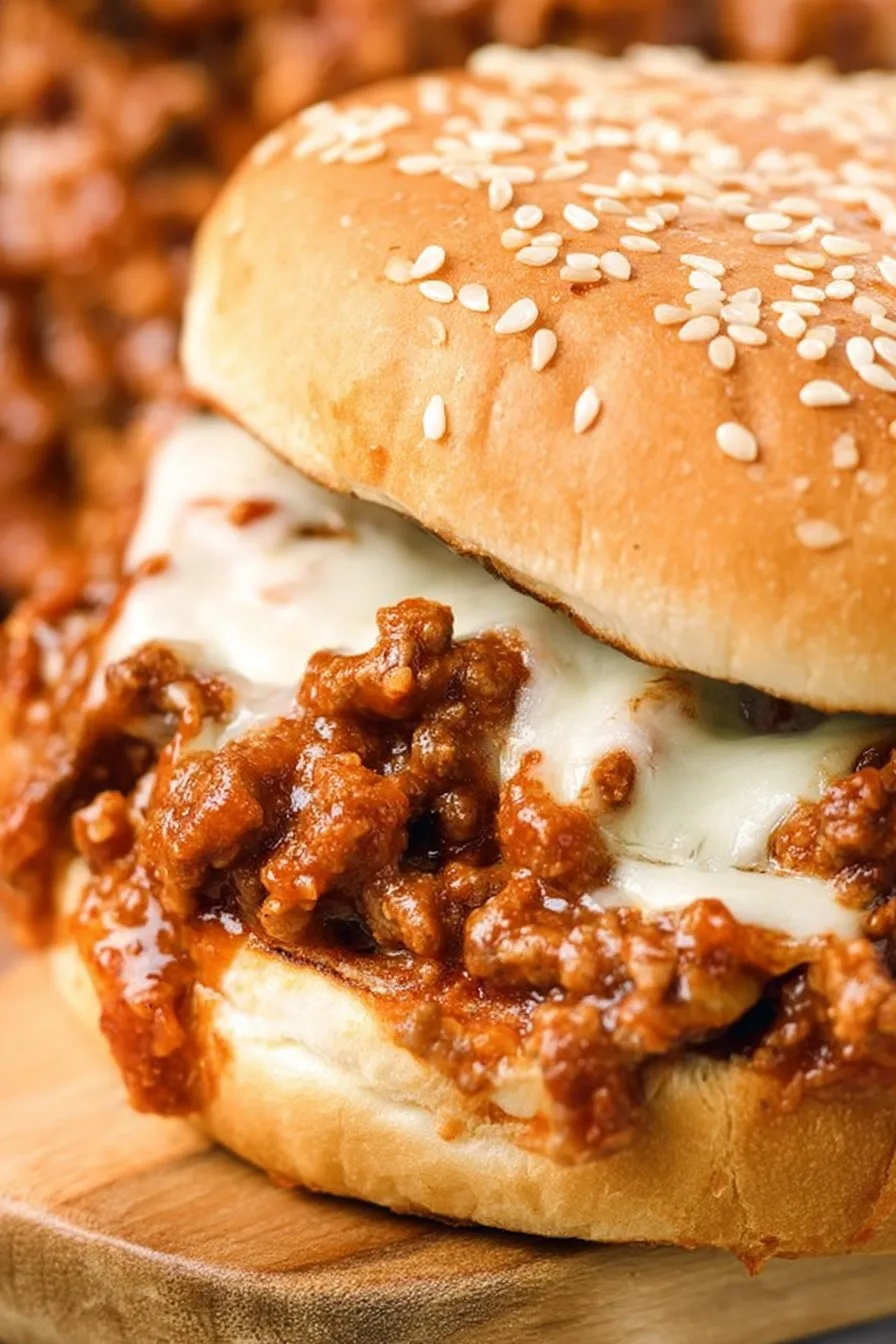
If you popped by my kitchen on a Wednesday when the fridge is being dramatic and everyone’s hungry at the same time, you’d probably catch me making Pizza Sloppy Joes. I started throwing these together in college when I only owned one pan and a wooden spoon that looked like it had seen things. Now my kids call them pizza joes and my neighbor once wandered in, sniffed the air, and stayed for dinner like it was the most natural thing. Honestly, I didn’t argue. Free taste testers.
Quick confession before we get into it. The first time I made these I added way too much sauce and it turned into a saucy slip and slide situation. We still ate it. We are not fancy. But I learned.
Why you’ll probably love this
I make this when we want pizza vibes without waiting on dough to rise. It’s like Friday pizza night moved to a skillet and found a cozy sweater. My family goes a bit bonkers for the pepperoni bits, and I love that it’s one pan, which means fewer dishes. Also, you can sneak extra veg in here and no one complains, which feels like a tiny win. I used to worry about the buns getting soggy but toasting them solved that. Took me ages to twig that, ha.
And if you have a random half jar of marinara lurking in the fridge, this is your sign to rescue it. I’ve done this with pizza sauce and it’s stronger, but I kinda like that on dreary days. Sometimes I go extra cheesy because, well, it’s cheese.
What you need, plus the little swaps I make
- 1 tablespoon olive oil or a small knob of butter
- 1 medium onion, finely chopped
- 1 small green bell pepper, diced I sometimes use a handful of chopped spinach instead when I have to use it up
- 2 to 3 garlic cloves, minced if you are out, a pinch of garlic powder is fine
- 500 g ground beef or turkey beef is richer, turkey is lighter, both work
- 1 cup pizza sauce or marinara my grandmother always insisted on Brand X, but honestly any version works fine
- 1 teaspoon Italian seasoning or 1 teaspoon pizza seasoning if you have it
- A pinch of sugar optional, it softens the acidity a touch
- 1 cup chopped pepperoni I’ve used turkey pepperoni when I’m pretending to be virtuous
- 1 cup shredded mozzarella plus a handful more for melting on top provolone is lovely too
- 4 to 6 soft sandwich buns or brioche rolls I sometimes use toasted English muffins when the bread box is looking sparse
- Salt and pepper to taste and a pinch of red pepper flakes if you like a little zip
- Optional extras a few sliced mushrooms, black olives, a sprinkle of grated Parmesan
Step by step, mostly precise but not too precious
- Warm the olive oil in a large skillet over medium heat. Add the onion and bell pepper. Cook until soft, about 5 to 7 minutes. This is where I usually sneak a taste of the pepper, just to see where it’s headed.
- Stir in the garlic and cook until fragrant, about 30 seconds. Don’t let it brown too much, bitter garlic makes me grumpy.
- Add the ground beef. Break it up with a spoon and cook until no longer pink, about 6 to 8 minutes. Season with a good pinch of salt and pepper. If there’s lots of fat, tilt the pan and spoon off some, or push the meat to one side and soak with a paper towel. Careful, it’s hot.
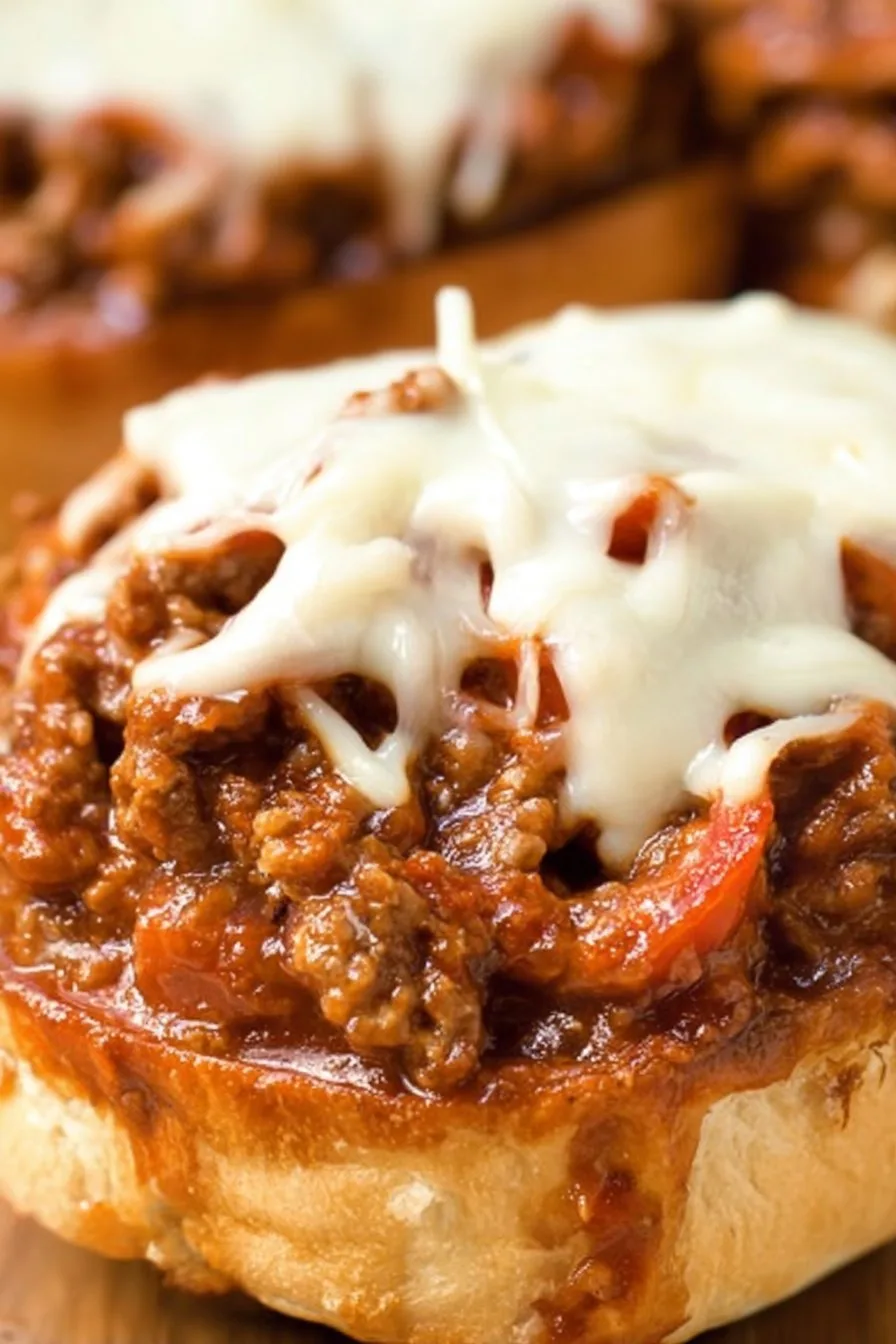
- Pour in the pizza sauce. Sprinkle in the Italian seasoning and that tiny pinch of sugar. Add the chopped pepperoni. Stir, then let it simmer gently 5 to 8 minutes until thick and glossy. Don’t worry if it looks a bit weird at this stage, it always does before it comes together. If it gets too thick, splash in a little water. If it’s too loose, let it bubble another minute or two.
- Stir in 1 cup mozzarella until melty. Taste. Actually, I find it works better if you taste twice, once before cheese and once after, because salt can feel different with cheese involved.
- Toast the buns. Either pop them cut side up under the broiler for 1 to 2 minutes or toast them in a dry pan until golden. If you forget, I won’t tell, but toasted buns hold up better.
- Spoon the saucy meat onto the buns. Add extra mozzarella on top. Slide under the broiler for about 30 to 60 seconds until the cheese melts and gets those tiny bubbly spots. Watch closely. Blink and you’ll have crunchy cheese which, to be fair, some of us love.
On second thought, if you do not want to broil, put the lid on the skillet for a minute and let the residual heat melt the cheese. Low effort, still good.
Notes I wish I knew sooner
- Toasting the buns is not just nice, it’s structural engineering. Soggy bun sadness avoided.
- If your sauce tastes a bit sharp, stir in a teaspoon of butter at the end. It smooths things out quietly.
- Finely chopping the pepperoni helps it distribute so you get a little in every bite. Big chunks are fun, but they slide out like escaping rafts.
- I think this tastes better the next day, but that might be because I eat it standing by the fridge, which adds a certain vibe.
Variations I’ve actually tried
- Veggie version swap in cooked lentils or finely chopped mushrooms for the meat. Add a smidge more oil. Surprisingly hearty.
- Spicy version add diced jalapeño with the onions and a bigger pinch of red pepper flakes. Wake up the taste buds.
- Hawaiian mood stir in a handful of small pineapple tidbits at the end. Sweet and salty, I know some folks are skeptical, but it slaps.
- Chicken twist ground chicken with a spoon of tomato paste added during the simmer for depth.
- One that flopped I tried anchovies thinking it would be umami city. It was salty town instead. Maybe one fillet mashed in would be fine, but I overdid it, whoops.
Gear I reach for
A large skillet is ideal, mine is 30 cm and it gives the meat room to brown instead of steam. A wooden spoon, sheet pan for toasting buns, and a broiler for that final cheesy moment. I call the broiler essential, then sometimes I just cover the skillet and let it melt that way, so take that with a pinch of salt.
If you want to nerd out about toasting buns properly, this piece on Serious Eats is great. For seasoning, I like pizza seasoning, the blend from King Arthur Baking smells like a pizzeria in the best way.
How I store leftovers
Cool the meat mixture, then stash it in an airtight container in the fridge for up to 4 days, buns separate. Reheat gently in a skillet with a splash of water so it loosens up, or microwave in short bursts. Freezer friendly too, up to 2 months. Though honestly, in my house it never lasts more than a day.
How we like to serve it
We do garlic butter buns if we’re feeling a bit extra. A quick green salad or cucumber spears on the side because balance. Tater tots when we want to live a little. On game days, I pile the meat into a shallow dish, scatter cheese, broil, and serve it as a dip with toasted baguette. Our Friday rule is you eat with your hands, napkins at the ready, no one complains.
Pro tips from my many goofs
- I once tried rushing the simmer and regretted it because the sauce stayed watery and soaked the bun instantly. Give it a few minutes to thicken, you’ll thank yourself.
- I’ve also skipped salting the onions early, and they tasted flat later. Season in layers, it matters more than I wanted to admit.
- Cheese on top only is fine, but some inside the mix helps it cling to the bun. Think glue but delicious.
- Small digression I lost my favorite spatula for two weeks, turned up behind the flour bin. No idea how, but it’s back and stirring like a champ.
FAQ I get all the time
Can I make Pizza Sloppy Joes ahead?
Yes. The meat mixture holds well in the fridge. Reheat and assemble just before serving so the buns stay perky. I sometimes make it in the morning, form there the evening is easy.
Pizza sauce or marinara, which is better?
Different moods. Pizza sauce is thicker and spicier, marinara is lighter and more tomato forward. I tend to think pizza sauce tastes more like, well, pizza. If you only have canned tomatoes, simmer them with garlic and seasoning until thick and you’re golden.
Can I make this vegetarian?
Absolutely. Use cooked lentils or crumbled plant based meat. Add a splash of soy sauce for depth. No one at my table noticed until I told them, and by then they were on second helpings.
Is it kid friendly?
Usually yes. Skip the red pepper flakes and maybe dice the peppers small. My niece calls it pizza sandwiches which is adorable and also accurate.
Can I double the recipe?
For sure, but use a wider pan or cook the meat in batches so it browns. Crowded pans steam and that’s fine for some things, not for this. Or do the first half, push it to the side, then add more, kind of a shuffle.
What if I don’t have a broiler?
No worries. Cover the skillet to melt the cheese, or assemble the sandwiches and pop them in a warm oven for a few minutes. Even a toaster oven works. If all else fails, add the cheese to the hot meat off heat and stir until it’s melty and happy.
How salty should it be?
Because pepperoni brings salt, hold back until after you add it. Taste, then add more if needed. This little guide on seasoning to taste by The Kitchn helped me a lot.
Recipe card at a glance
Serves 4 to 6. Active time 20 minutes. Total time about 30 minutes. Skill level easy, with bits of joy.
Ingredients
- 1 tablespoon olive oil
- 1 pound (450 g) lean ground beef
- 1 small onion, finely chopped
- 2 cloves garlic, minced
- 1 cup pizza sauce
- 2 tablespoons tomato paste
- 1 teaspoon Italian seasoning
- 1/2 teaspoon dried oregano
- 1/4 teaspoon crushed red pepper flakes (optional)
- Salt and black pepper to taste
- 4 hamburger buns or slider rolls
- 1 cup shredded mozzarella cheese
- 2 tablespoons grated Parmesan (optional)
- Fresh basil or parsley for garnish (optional)
Instructions
-
1Heat the olive oil in a large skillet over medium heat. Add the chopped onion and cook until softened, about 3–4 minutes.
-
2Add the ground beef to the skillet and cook, breaking it up with a spoon, until browned and no longer pink, about 6–8 minutes. Drain excess fat if necessary.
-
3Stir in the minced garlic and cook for 30 seconds until fragrant. Add pizza sauce, tomato paste, Italian seasoning, oregano, and crushed red pepper flakes. Simmer for 6–8 minutes until sauce thickens. Season with salt and black pepper to taste.
-
4Spoon the pizza-style beef mixture onto the bottom halves of the toasted buns. Sprinkle shredded mozzarella and grated Parmesan over the beef, then return to the skillet covered or place under a broiler briefly until the cheese melts.
-
5Place the top halves of the buns on the sandwiches, garnish with fresh basil or parsley if desired, and serve hot.
CLICK FOR NUTRITION INFO
↑
Approximate Information for One Serving
Serving Size:
1 serving
Calories:
560cal
Protein:
32 gg
Fat:
28 gg
Saturated Fat:
0g
Trans Fat:
0g
Cholesterol:
0mg
Sodium:
0mg
Potassium:
0mg
Total Carbs:
50 gg
Fiber:
0g
Sugar:
0g
Net Carbs:
0g
Vitamin A:
0
Vitamin C:
0mg
Calcium:
0mg
Iron:
0mg
Nutrition Disclaimers
Number of total servings shown is approximate. Actual number of servings will depend on your preferred portion sizes.
Nutritional values shown are general guidelines and reflect information for 1 serving using the ingredients listed, not including any optional ingredients. Actual macros may vary slightly depending on specific brands and types of ingredients used.
To determine the weight of one serving, prepare the recipe as instructed. Weigh the finished recipe, then divide the weight of the finished recipe (not including the weight of the container the food is in) by the desired number of servings. Result will be the weight of one serving.
Did you make this recipe?
Please consider Pinning it!!