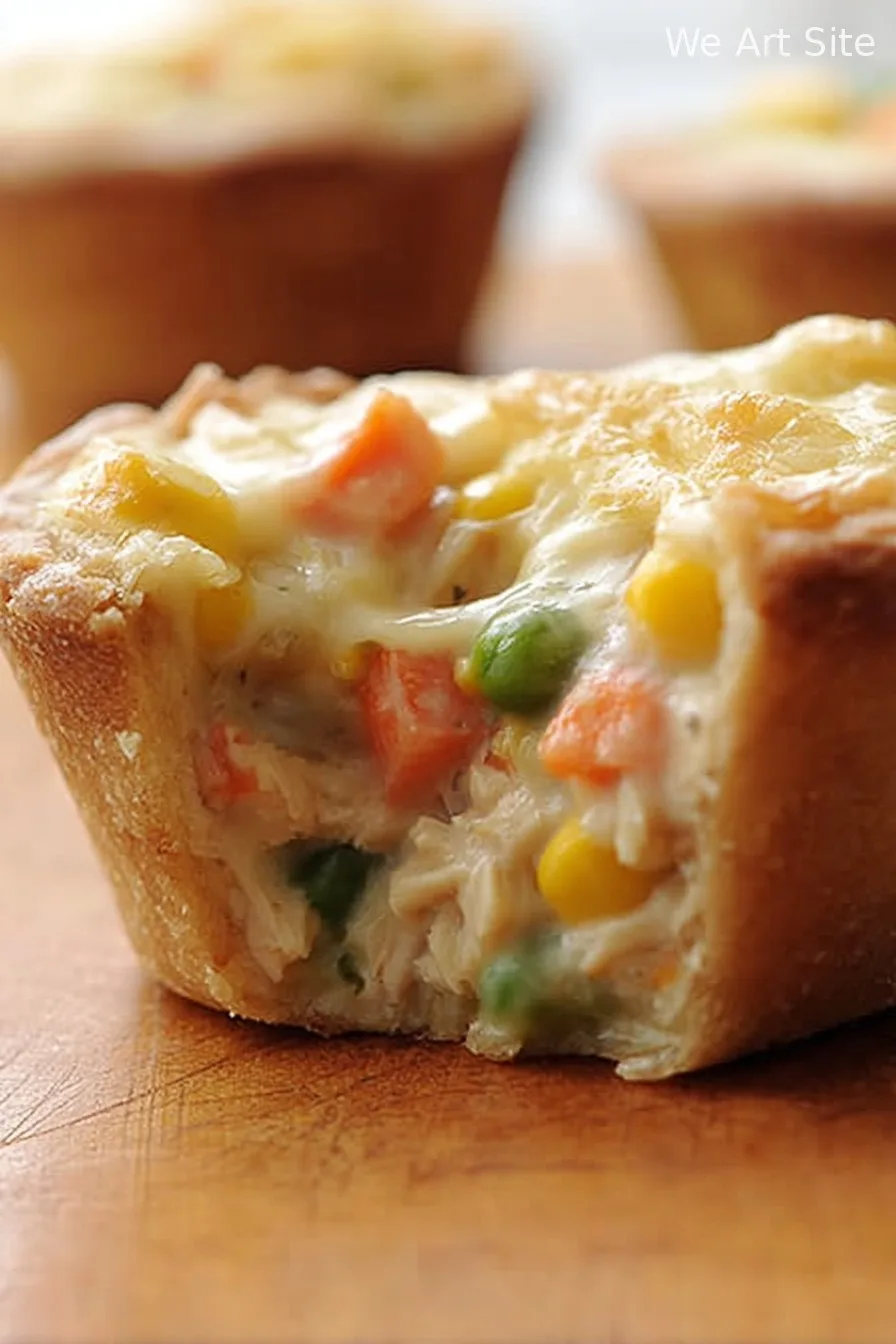
Hey y’all! If you’re on the hunt for the ultimate comfort food that’s as easy as it is adorable, you’ve got to try these Mini Chicken Pot Pies. With golden, flaky crusts and a creamy, savory chicken filling, they’re perfect for family dinners, potlucks, or even a cozy night in. Whether you’re making dinner more fun for kids or looking for a hearty party appetizer, these pies deliver on taste and convenience. Let’s get cooking!
Why You’ll Love This
- Perfectly portioned for individual servings—no messy slicing required.
- Creamy, flavorful filling with tender chicken and vibrant veggies in every bite.
- Quick to prepare using store-bought pie crust and rotisserie chicken.
- A fun, crowd-pleasing dish for gatherings or busy weeknights.
- Easily customizable with your favorite vegetables or seasonings.
Ingredients
- 1 1/2 cups cooked chicken breast, diced (rotisserie works great)
- 2 refrigerated pie crusts (1 box), at room temperature
- 1 cup frozen mixed vegetables, thawed
- 1/2 cup frozen peas, thawed
- 1/3 cup unsalted butter
- 1/3 cup all-purpose flour
- 1 1/2 cups low sodium chicken broth
- 2/3 cup whole milk
- 1/2 teaspoon garlic powder
- 1/2 teaspoon salt
- 1/4 teaspoon black pepper
- 1/2 teaspoon dried thyme
- 1 large egg, beaten (for egg wash)
- Cooking spray or butter for greasing muffin tin
Directions
Prep Work
- Preheat your oven to 400°F (200°C). Lightly grease a 12-cup muffin tin with cooking spray or butter.
Prepare the Filling
- In a medium saucepan, melt 1/3 cup butter over medium heat. Whisk in the flour and cook for 1 minute until bubbly.
- Slowly add chicken broth and milk, whisking constantly, until the mixture thickens (about 3–4 minutes).
- Stir in garlic powder, salt, pepper, and thyme. Add cooked chicken, mixed vegetables, and peas. Mix until everything is combined, then remove from heat.
Assemble the Mini Pot Pies
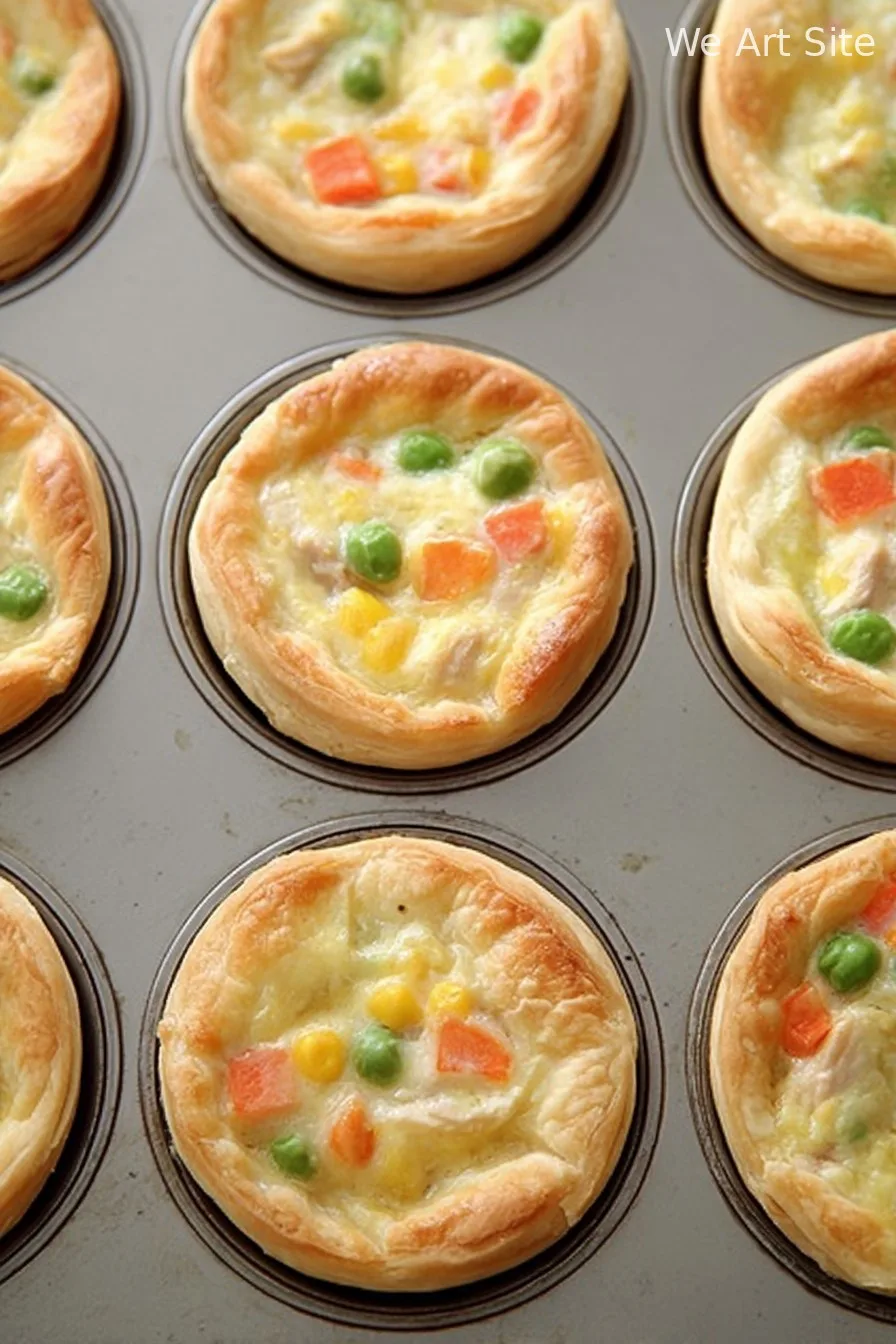
- Roll out the pie crusts and use a round cutter (about 3.5 inches) to cut out 12 circles for the muffin tin bases. Gently press into each muffin cup.
- Spoon chicken filling evenly into each crust-lined cup.
- Cut 12 smaller circles (about 2.5 inches) from the remaining dough for the tops. Place over the filling and gently crimp the edges to seal. Cut a small slit in each pie top for steam to escape.
- Brush tops with beaten egg for a golden finish.
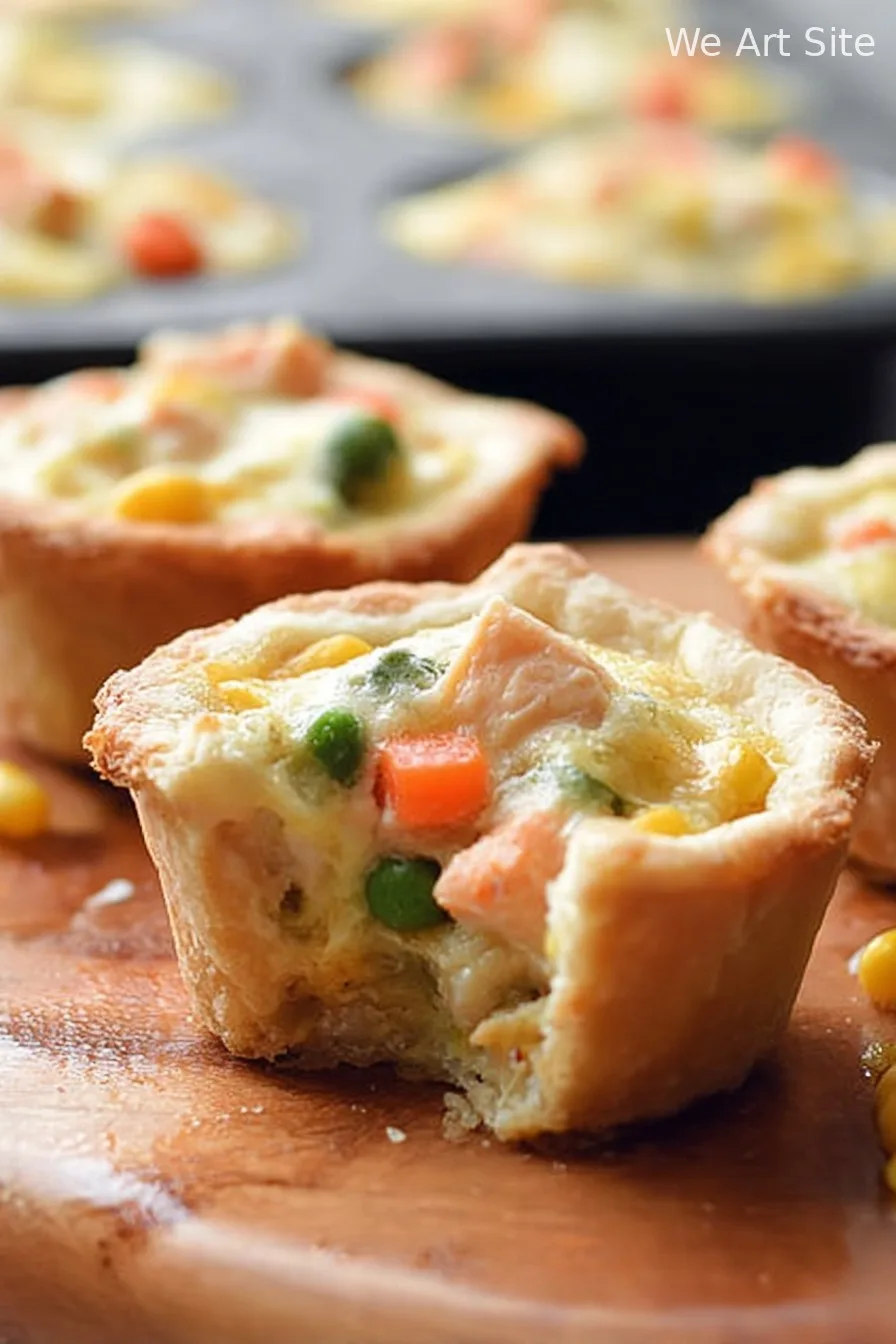
Bake
- Bake in the preheated oven for 20–25 minutes, or until tops are deeply golden and filling is bubbling.
- Let mini pies cool for 5–10 minutes, then remove from the muffin tin using a knife to help release the edges. Serve warm!
Notes
- Make sure the pie crusts are at room temperature before rolling; they’re easier to work with.
- Let the filling cool for a few minutes before assembling so the crust doesn’t get soggy.
- If using homemade cooked chicken, season it well for more flavor.
Variations
- Turkey Pot Pies: Swap cooked turkey for chicken—perfect for Thanksgiving leftovers.
- Veggie Pot Pies: Replace chicken with extra veggies or canned chickpeas for a meatless version.
- Cheesy Pot Pies: Stir in 1/2 cup shredded cheddar cheese into the filling before assembling.
Required Equipment
- 12-cup muffin tin
- Medium saucepan
- Whisk
- Circle pastry cutter or glass
- Rolling pin
- Pastry brush
Storage Instructions
- Let the mini pot pies cool completely before storing.
- Store in an airtight container in the fridge for up to 4 days.
- To reheat, bake in a preheated 350°F (175°C) oven for 10–15 minutes until heated through.
- Freeze up to 2 months; thaw overnight in the fridge and reheat as above.
Serving Suggestions
- Serve with a crisp green salad or a light coleslaw for balance.
- Pair with creamy mashed potatoes or roasted veggies for extra comfort.
- Enjoy as a hearty snack or as the main dish alongside a bowl of soup.
Pro Tips
- Don’t overfill the muffin cups to prevent spills while baking.
- For extra flakiness, chill filled pies in the fridge for 10 minutes before baking.
- Add a pinch of smoked paprika or fresh herbs for a flavor boost.
FAQ
- Can I make these mini pot pies ahead of time?
Yes! Assemble and refrigerate them up to 24 hours before baking—just add a couple of extra minutes to the baking time. - Can I use leftover cooked vegetables or beef instead of chicken?
Absolutely! This recipe is super flexible—use whatever protein or veggies you have on hand. - How do I prevent the crust from getting soggy?
Let the filling cool a bit before assembling, and avoid using overly wet vegetables.
Ingredients
- 1 1/2 cups cooked chicken breast, diced (rotisserie works great)
- 2 refrigerated pie crusts (1 box), at room temperature
- 1 cup frozen mixed vegetables, thawed
- 1/2 cup frozen peas, thawed
- 1/3 cup unsalted butter
- 1/3 cup all-purpose flour
- 1 1/2 cups low sodium chicken broth
- 2/3 cup whole milk
- 1/2 teaspoon garlic powder
- 1/2 teaspoon salt
- 1/4 teaspoon black pepper
- 1/2 teaspoon dried thyme
- 1 large egg, beaten (for egg wash)
- Cooking spray or butter for greasing muffin tin
Instructions
-
1Preheat your oven to 400°F (200°C). Lightly grease a 12-cup muffin tin with cooking spray or butter.
-
2In a medium saucepan, melt 1/3 cup butter over medium heat. Whisk in the flour and cook for 1 minute until bubbly.
-
3Slowly add chicken broth and milk, whisking constantly, until the mixture thickens (about 3–4 minutes).
-
4Stir in garlic powder, salt, pepper, and thyme. Add cooked chicken, mixed vegetables, and peas. Mix until everything is combined, then remove from heat.
-
5Roll out the pie crusts and use a round cutter (about 3.5 inches) to cut out 12 circles for the muffin tin bases. Gently press into each muffin cup.
-
6Spoon chicken filling evenly into each crust-lined cup.
-
7Cut 12 smaller circles (about 2.5 inches) from the remaining dough for the tops. Place over the filling and gently crimp the edges to seal. Cut a small slit in each pie top for steam to escape.
-
8Brush tops with beaten egg for a golden finish.
-
9Bake in the preheated oven for 20–25 minutes, or until tops are deeply golden and filling is bubbling.
-
10Let mini pies cool for 5–10 minutes, then remove from the muffin tin using a knife to help release the edges. Serve warm!
CLICK FOR NUTRITION INFO
↑
Approximate Information for One Serving
Serving Size:
1 serving
Calories:
220 caloriescal
Protein:
8gg
Fat:
12gg
Saturated Fat:
0g
Trans Fat:
0g
Cholesterol:
0mg
Sodium:
0mg
Potassium:
0mg
Total Carbs:
20gg
Fiber:
0g
Sugar:
0g
Net Carbs:
0g
Vitamin A:
0
Vitamin C:
0mg
Calcium:
0mg
Iron:
0mg
Nutrition Disclaimers
Number of total servings shown is approximate. Actual number of servings will depend on your preferred portion sizes.
Nutritional values shown are general guidelines and reflect information for 1 serving using the ingredients listed, not including any optional ingredients. Actual macros may vary slightly depending on specific brands and types of ingredients used.
To determine the weight of one serving, prepare the recipe as instructed. Weigh the finished recipe, then divide the weight of the finished recipe (not including the weight of the container the food is in) by the desired number of servings. Result will be the weight of one serving.
Did you make this recipe?
Please consider Pinning it!