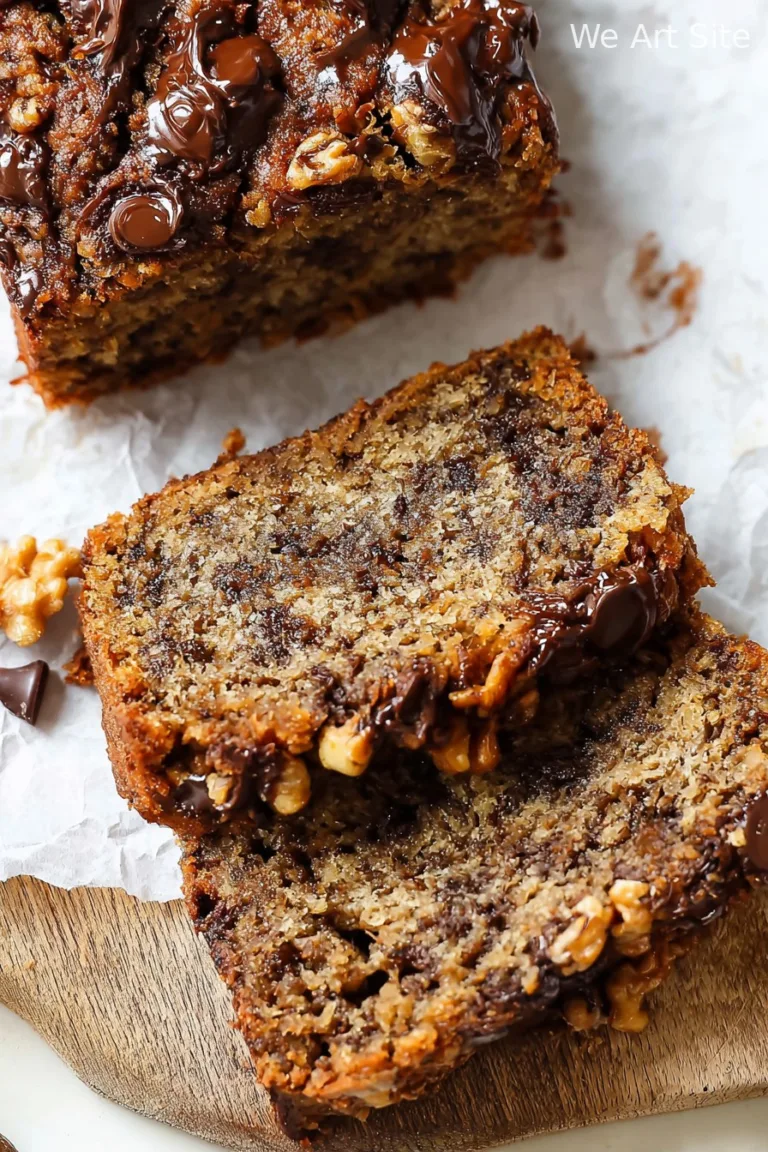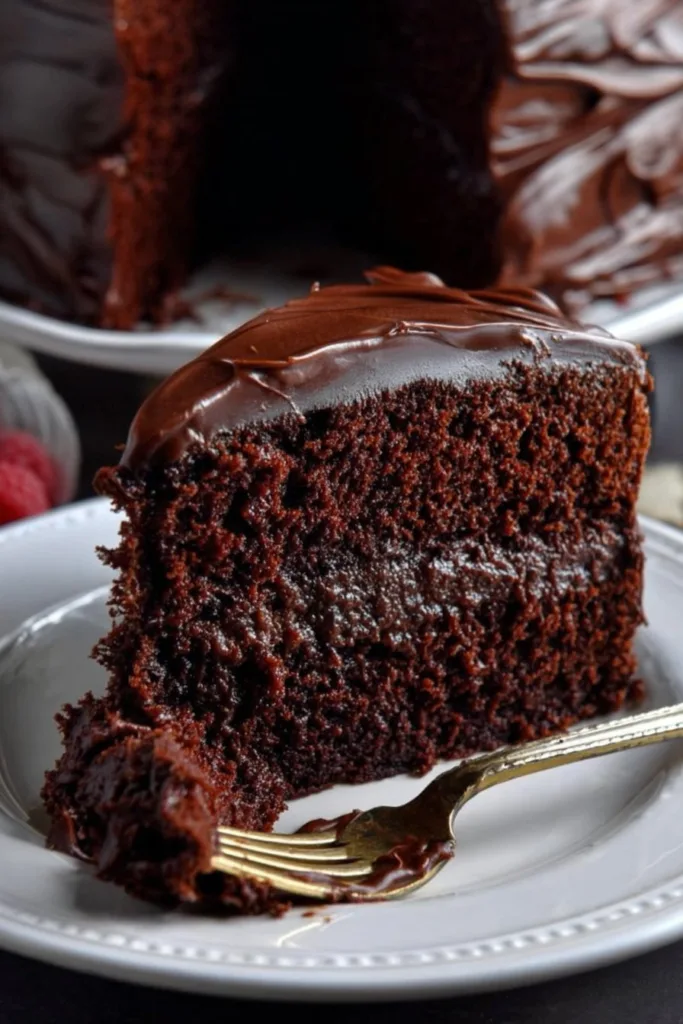
Look, if you didn’t immediately picture that scene from Matilda—yes, that one, with Bruce and the legendary chocolate cake—are you even a nineties kid? I swear, the first time I made this cake, I half expected Miss Trunchbull to burst in. My younger brother tried to eat the whole thing himself, but (spoiler) he didn’t make it past the second slice. Funny story: Once, I baked this for a cousin’s birthday, only to realize halfway through that we’d run out of cocoa powder. My dad suggested hot chocolate mix as a swap. (It was… interesting. Not recommended unless you’re desperate. But, hey, it was still edible with lots of ice cream.)
Why You’ll Love This Messy, Marvelous Cake
I usually break this one out when someone’s had a rubbish week or when the weather’s gone all grey and dreary (which is, let’s be honest, pretty often here). My lot goes wild for it—especially when it’s still warm and a bit gooey in the middle. If you’ve ever struggled with dry cakes, rest easy, friend; this one is so rich it borders on sinful. Actually, if you don’t like chocolate, maybe just skip this and go make some scones? (But really, Sally’s Baking Addiction has a good deep-dish version too.)
A Mishmash of Ingredients (Go On, Improvise)
- 200g (about 1 cup) unsalted butter (sometimes I just use salted if that’s all I’ve got—just skip the pinch of salt later)
- 200g dark chocolate, at least 70% cocoa (honestly, the cheap supermarket stuff works, but I save the fancy Lindt for birthdays)
- 325g (1 1/2 cups) sugar (I like a mix of brown and white—gives it a bit more depth)
- 3 large eggs (at room temp, or just stick them in some warm water for a bit if you forgot)
- 2 tsp vanilla extract (my gran swears by the cheap imitation stuff. I can’t tell the difference, really)
- 125g (1 cup) plain flour (I’ve even used self-raising once by accident; it puffs a bit, but still tastes banging)
- 50g (about half a cup) cocoa powder (unsweetened, but in a pinch—see above story—hot chocolate mix will do if you’re desperate)
- 1/2 tsp baking powder
- Pinch of salt (skip this if you used salted butter)
- 120ml (1/2 cup) sour cream or Greek yogurt (I’ve even used plain yogurt—makes it a bit lighter)
- Optional: a handful of chocolate chips or chopped chocolate for extra gooey-ness
How I (Usually) Throw This Cake Together
- Preheat your oven to 180°C/350°F. Line a 9-inch round cake tin with parchment or just butter and flour it if you can’t find the parchment. (I’ve been known to skip the lining and just hope for the best. Only regretted it once or twice.)
- Melt the butter and chocolate together in a biggish saucepan over low heat. I just stand there, stirring occasionally, pretending I’m on Bake Off. When it’s all glossy and smooth, turn off the heat and let it cool for a few minutes—otherwise, you’ll scramble your eggs, and trust me, that’s not the vibe.
- Whisk in the sugar while it’s still warm (this is where I sneak a taste; don’t judge). Then add your eggs, one at a time, stirring well after each. If it looks like it’s split, don’t panic—just keep mixing, it’ll come together. Add vanilla.
- Gently fold in the flour, cocoa powder, baking powder, and salt. No need to sift unless you’re feeling fancy; honestly, I’ve never noticed a difference. Then stir in the sour cream or yogurt until just combined. Add the extra chocolate chips if you’re feeling decadent.
- Pour the batter into your prepared tin. It should be thick but still spreadable—like the world’s glossiest mud. Smooth the top, or don’t; rustic is charming!
- Bake for about 30–35 minutes. It should wobble just a little in the middle when you jiggle the tin. If you want it set all the way through, give it closer to 40 minutes, but then, why are you here?
- Let it cool in the tin for at least 15 minutes (if you can wait that long), then run a knife around the edge and turn out onto a rack. Or just scoop it straight from the tin with a spoon. Who’s judging?
Some Notes (Because I’ve Messed It Up Before)
- If you overbake, it goes a bit fudgey but less moist. Still delicious, but not as Matild-y.
- Actually, I find it works better if you err on the underbaked side; the middle sets up as it cools.
- If you want a taller cake, use a smaller tin, but watch the baking time. Learned this one the hard way—burnt edges, gooey middle. Still ate it though.
Weird Variations I’ve Tried (And One Dud)
- Add a swirl of peanut butter before baking. My nephew loved this… my mum, not so much.
- Chopped walnuts or hazelnuts for a bit of crunch. Totally optional, but not a bad shout.
- One time, I tried adding orange zest. It tasted a bit like a Terry’s Chocolate Orange, which is delightful… but maybe not what you’re after if you want the classic Matilda version.
- Don’t try subbing all the sugar for honey. It just doesn’t work. Trust me on this.
Kit You (Sort of) Need
- 9-inch round cake tin (Or, honestly, any oven-safe dish that’s roughly the same size. I’ve even used a lasagna dish—just watch the baking time.)
- Mixing bowls, spoon or spatula, whisk, and a saucepan. If you don’t have a whisk, a fork and some elbow grease will do—my arms were sore for a week, though.
- Oven (obviously, sorry)
Storing (Not That You’ll Have Leftovers)
Technically, it keeps for 3–4 days in an airtight tin at room temp. Or you can stick it in the fridge if your house is warm; it’ll go a bit dense, which I actually like. But honestly, in my house it never lasts more than a day! If you do have leftovers, you can warm a slice in the microwave for 10 seconds—so good.
How I Like Serving It
My favourite way? Still just-warm, with a scoop of vanilla ice cream and a drizzle of salted caramel sauce (homemade if I’m feeling ambitious, but BBC Good Food’s version is grand). Sometimes, I let it cool fully and dust it with cocoa powder or icing sugar—makes it look slightly less homemade, if that’s your thing. Tea or coffee on the side is practically a must in our house.
Pro Tips (AKA, Mistakes I’ve Made So You Don’t Have To)
- Don’t rush the cooling. I once tried cutting into it straight out of the oven; ended up with a chocolate lava lake. Delicious but impossible to serve.
- Actually, wait until it’s barely warm for the best slices. Patience, grasshopper.
- Oh, and don’t skip the parchment paper unless you’re living dangerously. Wasn’t fun scraping burnt bits form the tin that one time.
Some Questions I’ve Been Asked (I Swear They’re Real!)
- Can I make this gluten-free?—Yep, just swap in a decent GF flour blend. It might be a tad more crumbly, but still lush.
- Do I need dark chocolate?—Well, I prefer the richness, but you can use milk chocolate if you want it sweeter. Maybe just reduce the sugar a smidge.
- What if my cake sinks?—Honestly, it happens. Usually means it’s extra gooey. Just cover with ice cream and call it a fondant, yeah?
- Can I freeze it?—Absolutely! I slice it first, wrap individually, and freeze. Defrost overnight. It’s never quite as glossy, but still hits the spot.
And, because someone will ask: No, I haven’t tried making this in an air fryer yet. But if you do, please, let me know how it goes.
Anyway, that’s my not-so-perfect, totally indulgent Matilda Chocolate Cake. If you want to geek out even more on chocolate cakes (and who doesn’t?), King Arthur Baking’s chocolate cake deep-dive is a wild rabbit hole. Happy baking—let me know if you have any disasters or brilliant tweaks!

Ingredients
- 2 cups all-purpose flour
- 2 cups granulated sugar
- 3/4 cup unsweetened cocoa powder
- 2 teaspoons baking powder
- 1 1/2 teaspoons baking soda
- 1 teaspoon salt
- 1 cup buttermilk, at room temperature
- 1/2 cup vegetable oil
- 2 large eggs
- 2 teaspoons vanilla extract
- 1 cup hot water
- Chocolate frosting, for topping
Instructions
-
1Preheat the oven to 350°F (175°C). Grease and flour two 9-inch round cake pans.
-
2In a large bowl, whisk together flour, sugar, cocoa powder, baking powder, baking soda, and salt.
-
3Add buttermilk, vegetable oil, eggs, and vanilla extract to the dry ingredients. Mix until well combined.
-
4Gradually add hot water to the batter, mixing until smooth. The batter will be thin.
-
5Divide the batter evenly between the prepared pans. Bake for 35-40 minutes or until a toothpick inserted in the center comes out clean.
-
6Let cakes cool in pans for 10 minutes, then turn out onto wire racks to cool completely. Frost with chocolate frosting before serving.
CLICK FOR NUTRITION INFO
↑
Approximate Information for One Serving
Serving Size:
1 serving
Calories:
420 caloriescal
Protein:
5 gg
Fat:
18 gg
Saturated Fat:
0g
Trans Fat:
0g
Cholesterol:
0mg
Sodium:
0mg
Potassium:
0mg
Total Carbs:
62 gg
Fiber:
0g
Sugar:
0g
Net Carbs:
0g
Vitamin A:
0
Vitamin C:
0mg
Calcium:
0mg
Iron:
0mg
Nutrition Disclaimers
Number of total servings shown is approximate. Actual number of servings will depend on your preferred portion sizes.
Nutritional values shown are general guidelines and reflect information for 1 serving using the ingredients listed, not including any optional ingredients. Actual macros may vary slightly depending on specific brands and types of ingredients used.
To determine the weight of one serving, prepare the recipe as instructed. Weigh the finished recipe, then divide the weight of the finished recipe (not including the weight of the container the food is in) by the desired number of servings. Result will be the weight of one serving.
Did you make this recipe?
Please consider Pinning it!!