So, these brownies surprised me too
The first time I made Fudgy Black Bean Brownies, my neighbor peeked over my shoulder and said, beans in brownies, you feeling alright there mate. I laughed, then I watched him take a bite, look suspicious, then go back for a second piece before even swallowing the first. That was the moment I knew I had something good. Also, fun fact, I once forgot to rinse the beans and the whole house smelled a bit like burrito shop meets bakery. Do not recommend that mash up.
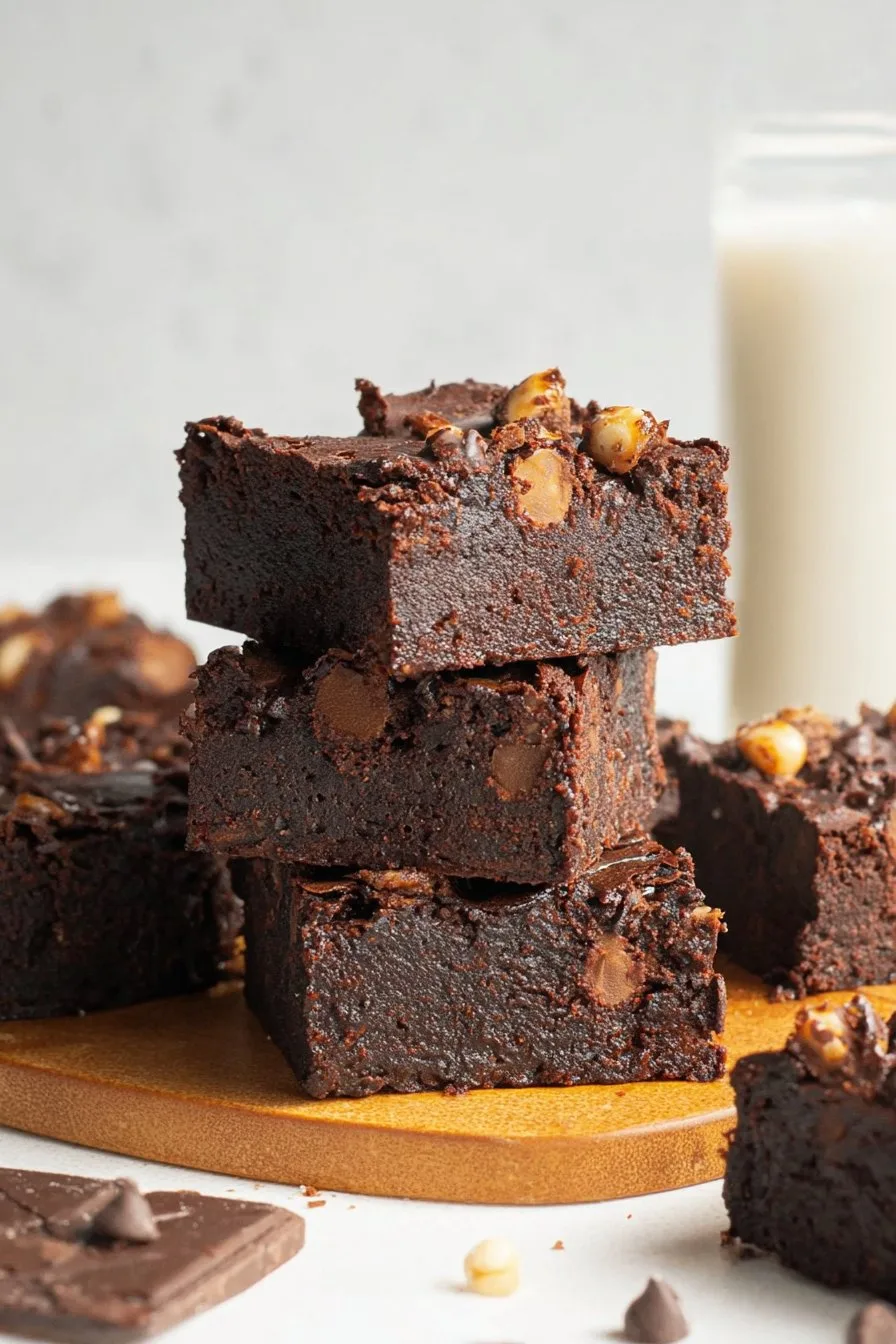
I make these when I want a chocolate fix that feels a little stealthy, like I snuck something wholesome in without making a whole speech about it. They are fudgy, they slice into neat squares when chilled, and they vanish fast. Sometimes I even pack one for a walk and yes, I have absolutely eaten a brownie on a park bench at 9 a.m. Who among us has not.
Quick detour, unrelated but true. I collect mugs with tiny chips in the rim. They pour coffee at funny angles and it makes me oddly happy; the brownies taste better out of the chipped mug crowd, and I cannot explain that, but there we are.
Why you will love this little pan of fudge
- I make this on random Tuesdays when I am low on butter and patience. Pantry friendly and done in about half an hour.
- My family goes wild for the shiny top and the melty bits. The I swear there are beans in here moment makes us all giggle.
- When I want chocolate without fuss, this is it. No melting bars, just cocoa and a blender or processor. And if you are thinking, is it too bean forward. No. Not if you rinse properly.
- I used to overbake because the center looks a wee bit wobbly. Learned my lesson. Pull it earlier and let it finish in the pan; you get that fudgy slice everyone asks for.
What you need, with my usual swaps
- 1 can black beans, 15 ounces, drained and very well rinsed. I sometimes use home cooked beans when I have them, about 260 g drained. My grandmother always insisted on a certain brand, but honestly any version works fine.
- 2 large eggs. For vegan, use 2 flax eggs made with 2 tbsp ground flax plus 5 tbsp water, rested 10 minutes.
- 80 ml maple syrup or honey. If I am short, I top up with a spoon of white sugar.
- 60 g brown sugar, packed. Coconut sugar works, it is a touch less moist though.
- 60 ml neutral oil or melted butter. Olive oil is nice, slightly fruity.
- 60 ml strong coffee or milk, optional but I like the extra moisture and flavor.
- 2 tsp vanilla extract. I have gone heavier and lived to tell the tale.
- 50 g natural cocoa powder, about 1 half cup. If you want to nerd out on cocoa types, I like the guidance here King Arthur cocoa notes.
- 0.5 tsp baking powder
- 0.25 tsp baking soda
- 0.5 tsp fine salt
- 85 g chocolate chips or chopped chocolate, about 0.5 cup, plus a little handful for the top
- Pinch espresso powder or cinnamon, optional. I tend to toss in a pinch of both when I remember.
- Flaky salt for finishing, optional but lovely
Note on cocoa and chocolate bloom if you are curious, the science is a fun rabbit hole and helped me get shinier tops actually. This explainer is great Serious Eats chocolate science.
How I make them most days
- Heat the oven to 175 C or 350 F. Grease an 8 inch square pan and line it with a sling of parchment for easy lifting. If you skip parchment, just grease well and dust with cocoa.
- Rinse the beans until the water runs clear. Really rinse. If you want a trick, swirl them in a bowl of water first, then rinse under the tap. This tip saved me form the burrito bakery situation. More bean rinsing help here if you like a deep dive Bon Appetit on rinsing beans.
- In a food processor, blitz the beans, eggs, maple syrup, brown sugar, oil, coffee, and vanilla until completely smooth and glossy. Scrape down the sides. This is where I usually sneak a taste, and yes it is safe if you used flax eggs, otherwise just trust the process.
- Add the cocoa, baking powder, baking soda, and salt. Pulse a few times until just combined. Do not overmix once the dry stuff is in or the texture tightens.
- Fold in the chocolate chips by hand. If you process them they melt and vanish, ask me how I know.
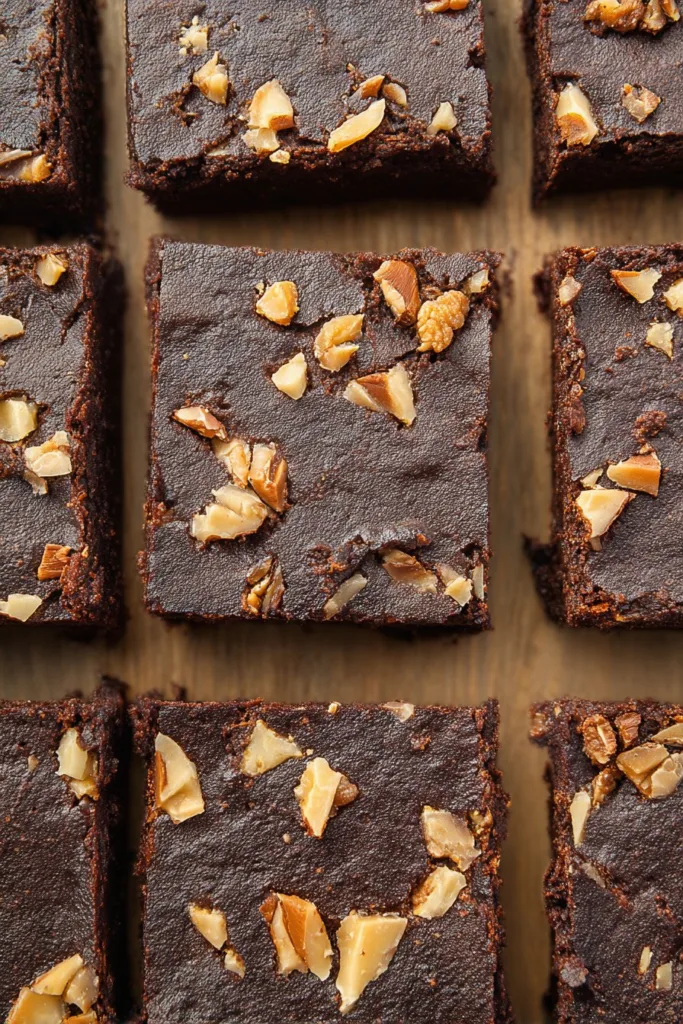
- Scrape into the pan, smooth the top, sprinkle on the extra chips and a pinch of flaky salt.
- Bake 20 to 24 minutes until the top is set, the edges are just pulling away, and the center still has the slightest wiggle. If a toothpick comes out with a smear of batter and melty chocolate, that is okay. Crumbs are perfect.
- Cool in the pan at least 20 minutes. For the cleanest slices, chill 30 minutes. Then lift out and cut into 9 or 16 squares with a warm knife.
Do not worry if it looks a bit weird at the glossy stage, it always does. Let the batter rest 2 minutes before baking so it can do it is thing. On second thought, three minutes is even better.
Little notes I picked up the messy way
- If you can, use room temp eggs and beans. Cold batter bakes unevenly for me.
- Underbaked is better than overbaked here. They set as they cool.
- A teaspoon of instant espresso makes the chocolate feel deeper without coffee flavor, probably my favorite add in.
- Want a slightly cakier bite, add 2 tbsp oat flour. But then bake closer to 24 minutes.
- Salt matters. A tiny extra pinch wakes up the cocoa.
Variations I have tried, plus one dud
- Peanut butter swirl. Dollop 3 tbsp peanut butter on top, swirl with a knife. Gorgeous streaks.
- Tahini sesame vibe. Same idea as peanut butter. A sprinkle of sesame seeds looks fancy for zero effort.
- Minty. Add half a teaspoon peppermint extract. Any more and it tastes like toothpaste, learned that the hard way.
- Orange chocolate. Zest one orange into the batter. So good with dark chips.
- Chili kick. A pinch of cayenne wakes things up in a cozy way.
- The flop. I swapped all the sugar for mashed banana once. Gummy city. Sweet but strange, would not repeat.
Gear I use, and what to do if you do not have it
- Food processor. I call it essential for the smoothest texture. Actually, a blender works fine if you stop and scrape a few times. In a pinch, mash by hand until very smooth. You will get tiny specks of bean, not the end of the world.
- 8 inch square pan. A 9 inch pan works, just shave a couple minutes off bake time.
- Rubber spatula. Helps get every last bit out.
- Kitchen scale. I love the consistency, but cups are absolutely ok if that is what you have.
- Parchment. No parchment, no problem, grease and dust with cocoa.
How to store them
Room temp in an airtight container for 2 days. Fridge for up to 5 days, they get extra fudgy, which I think is dreamy. Freeze up to 2 months. Layer with parchment so they do not stick. Honestly, in my house they never last more than a day.
How we like to serve
- Warm with a scoop of vanilla ice cream and a coffee. Afternoon bliss.
- Cold from the fridge, little squares with a sprinkle of flaky salt. I nibble while answering emails.
- Breakfast treat with a dollop of yogurt and berries. I will not tell if you will not.
Pro tips I wish I knew sooner
- I once rushed the rinsing step and regretted it because the finished brownies had a faint savory edge. Rinse until bored, then rinse once more.
- I tried to cut them straight out of the oven. Chocolate skid marks everywhere. Cool first, then slice with a warm knife, wipe between cuts.
- Opening the oven too early made the center collapse. Peek through the oven window instead and wait for the top to look set.
- Adding chips too early in the processor made them vanish. Fold by hand at the end for gooey pockets.
Questions you have actually asked me
Do they taste like beans
No, not if you rinse well and bake until set. They taste like fudgy chocolate brownies. Bean flavor hides in the background doing good textural work.
Can I make them vegan
Yes. Use flax eggs and maple syrup. Bake a minute or two longer if needed since flax sets a touch slower.
Can I use dutch processed cocoa
Yep, it works. The leavening is small here, so either cocoa type is fine. I find natural cocoa gives a slightly brighter chocolate note.
Can I reduce the sugar
A little, sure. Cut the brown sugar to 40 g and keep the liquid sweetener the same. Any less and the texture gets dry.
What about using dried beans I cooked myself
Go for it. Cook until very soft and measure about 260 g drained. No salt in the cooking water if you can help it.
Can I double the recipe
Yes, bake in a 9 by 13 pan for about 24 to 28 minutes. Start checking early. Rotate the pan for even baking.
Why is my top not shiny
Shiny tops come from sugar dissolving and some starch interactions. Make sure the batter is smooth before adding cocoa, and do not skimp on the sugar. That linked cocoa article above explains a lot, truly helpful.
Do I have to use coffee
Nope. Milk or water works. Coffee deepens chocolate flavor without making it taste like coffee.
How do I get clean slices
Chill a bit, then use a warm knife, wipe between cuts. I know, waiting is rude, but it pays off.