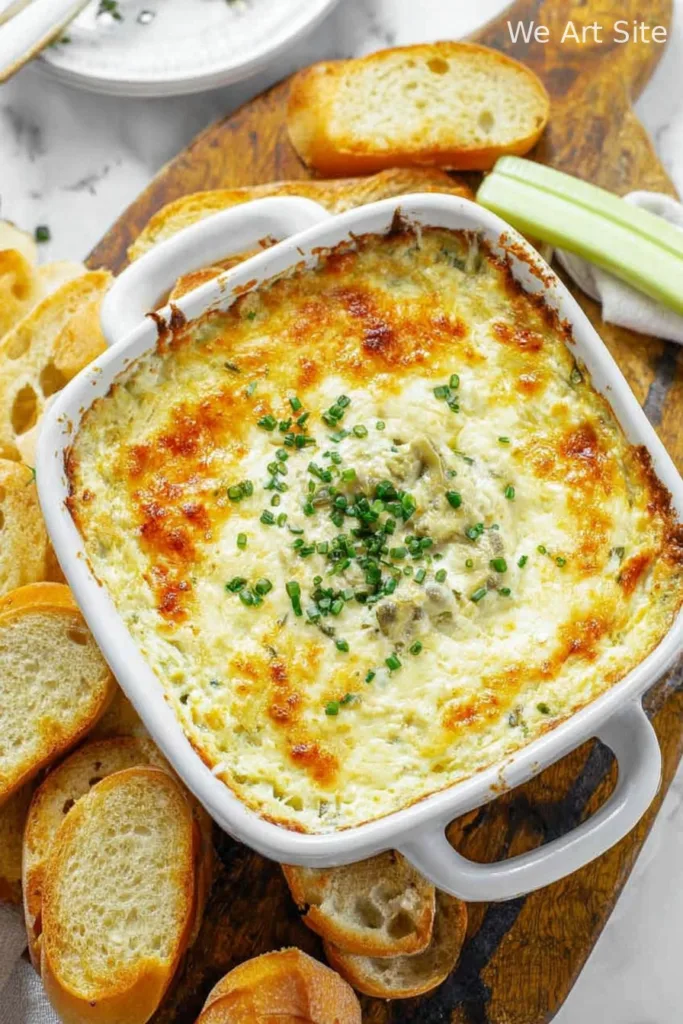
You Gotta Try This: My Casual Love Letter to Pepperoncini Dip
Alright, friend, gather ’round. Let me tell you the tale of the Easy Baked Pepperoncini Dip that basically became a legend at my cousin’s game night. No joke. I’d planned to make something “fancy,” but, well, the universe had other ideas (mainly, I left half my groceries at the store and had to improvise with what I could find in the fridge). One thing led to another, and this gloriously tangy, cheesy situation ended up outshining the actual game. I guess it’s technically an appetizer, but honestly, I’ve eaten it for lunch, sprawled on the couch, trying not to spill any on the dog. The dog usually wins.
Why You’ll Love This—And Maybe Your Family Will Too
I whip this up when I’m short on time, or just craving something snack-y that makes you want to scoop up another bite… and another. (I never said this was a low-calorie kind of dip, just to clarify.) My family totally loses their minds over it—my sister says it’s “the only reason” she comes over. If I ever forget the pepperoncini? Oh, man, you’d think I’d burned the house down. And sometimes, honestly, I use the pre-shredded cheese even though it doesn’t melt as beautifully. It used to drive me nuts when it didn’t come out as smooth as the first time, until I realized: nobody actually cares except me.
Stuff You’ll Need (and Some Stuff You Probably Have)
- 1 package cream cheese (about 8 oz—I’ve swapped for Neufchâtel in a pinch. Couldn’t really tell the difference.)
- 1 cup shredded mozzarella (half the time I use cheddar, and it’s… different, but not bad.)
- 1/2 cup mayo (my gran always used Duke’s; I just grab what’s in the fridge, honestly)
- 3/4 cup chopped pepperoncini (I like the mild ones from a jar, but I’ve used the spicy dudes once—regretted it all weekend)
- 1/4 cup grated parmesan (if you only have the stuff in the green canister, no judgment—it still works)
- 2 cloves garlic, minced (or a big ol’ spoonful of the jarred kind if you’re feeling lazy)
- Cracked black pepper (just sprinkle until your ancestors whisper “enough!”)
- Optional: Green onions or chives for the top (sometimes I skip this and nobody notices)
So Here’s What You Do: Directions, Mostly In Order
- Preheat your oven to 375 F—or, actually, if you forget and only realize after mixing, that’s fine; the dip takes a minute to assemble anyway.
- In a big bowl (I say big, but any bowl will do as long as you don’t mind a little splatter), dump in your cream cheese, mayo, and most of the mozzarella. Mix ’til pretty smooth—some lumps are okay. This is when I usually sneak a taste. Quality control, you know?
- Stir in your chopped pepperoncini (give ’em a little squeeze to get rid of extra juice first, or else your dip might go kinda soupy—I speak from experience). Throw in the garlic and parmesan too.
- Spread all that into a small-ish baking dish (8×8 works for me, but I’ve used a weird oval one that I bought at a car boot sale once. Ended up looking fancy.)
- Chuck the rest of your mozzarella on top and a good scatter of black pepper (I probably go overboard, but I love it peppery!)
- Bake uncovered for about 22–28 minutes. You want it bubbling silghtly and starting to brown in spots. Don’t panic if it gets a little too brown around the edges; that’s my favorite part, actually.
- Let it cool for, I dunno, 8 or 9 minutes? Just don’t burn your mouth like I always do because of impatience.
- Optional: garnish with green onions or chives. Or not. Serve hot, warm, or honestly, it’s not half-bad cold the next day either.
Notes That I Wish I Knew Earlier
- Once I doubled it for a party and forgot to double the pepperoncini. Tasted like pure cheese. Not ideal.
- If your cream cheese is too cold, it’ll fight you. Give it 20 seconds in the microwave.
- Bought off-brand pepperoncini once—literally couldn’t taste a difference. Save your money.
- The world won’t end if you skip the parmesan.
Variations That Actually Work (and One That Didn’t)
- Provolone instead of mozzarella gives it this deli vibe, though it doesn’t melt quite the same.
- I added a handful of cooked bacon bits once—wow. Game changer, probably not health food though.
- Herbed cream cheese? Actually, pretty tasty, but it was a bit too much when I tried garlic & chive plus garlic cloves. Sometimes less is more!
- Once swapped in pickled jalapenos… it was wild. Not for the faint-hearted. I prefer the mild peppers myself.
Tools: What You Really Need (Or Not)
- Baking dish—mine is 8×8 but honestly, I’ve used a pie tin before. Came out fine.
- A sturdy spoon, or a fork if that’s all you’ve got. I even used my hands once (don’t tell my mom).
- Knife for the pepperoncini. Or kitchen scissors, which are underrated (if slightly dangerous if you’re distracted).
- Oven—sure, essential, but I once tried popping it in my toaster oven. Worked (kind of). The edges got super crispy, which I love, actually.

If You Have Any Left Over (Not Likely…)
Chuck it in a covered bowl in the fridge, and it’ll keep for about 3 days. Though honestly, in my house it never lasts more than a day. I reheated it in the microwave once, but I actually think it tastes better the next day, cold, chips in one hand, giant jar of pickles in the other. Wild, but true.
How I Serve This—And My Personal Favorite Snack Pairings
Always with a gigantic pile of crunchy tortilla chips. Sometimes pita chips if I’m feeling “classy.” My uncle likes it with celery sticks, but look, I like celery as much as the next person, but who reaches for that when there are chips? If you wanna be fancy, try toasting some mini naan and ripping them up to scoop—my cousin calls this “dipping like a boss.”
Oh, and there was one holiday where, for some reason, we ate it with saltines, which worked in a pinch. I mean, they’re just salty enough to do the job. For more party ideas on what to serve for snacks, I’ve found this Serious Eats party dip roundup handy—they’ve got everything from classic queso to super weird beet dips!
Lil’ Pro Tips—The Hard-Learned Kind
- I tried to rush the mixing step once—big mistake. Lumps of cold cream cheese never really melt, and you end up with cheesy pockets that just don’t taste quite right. Be patient, let everything come to room temp, and you’ll thank me.
- Don’t skip squeezing the pepperoncini dry (unless you like runny dip… I don’t, but you do you).
- And, for whatever reason, the edges always get toastier than the middle. I consider those the cook’s treat (totally fair, right?).
You Asked—I Answered: Off-the-Cuff FAQs
- Q: Can I make this ahead?
A: Yep, absolutely! Actually, I think it tastes a bit better after sitting in the fridge a while; just cover and chill. Pop it in the oven when ready. If you’re in a rush—microwave works, just doesn’t look as nice for serving. - Q: What’s the best chip for this?
A: I’m partial to sturdy tortilla chips. Pita chips too. But, hey, Fritos scoops do the job if you’re feeling nostalgic! (My neighbor used crackers… not my thing, but she loved it.) - Q: Can I use low-fat cream cheese?
A: You can, sure, but if it gets a little watery don’t blame me—maybe add a pinch less mayo, just in case. Full fat definitely wins the taste test, though. - Q: How spicy is this?
A: Not very, especially if you go for the mild pepperoncini. If you want more heat, try adding a dash of hot sauce like Frank’s RedHot or some crushed red pepper flakes. Accidentally used hot pickled peppers once… cleared my sinuses right out! - Q: Can I skip the garlic?
A: I mean, if you want! No garlic police here; it’ll still taste delicious. Or try garlic powder if you’re out of fresh—the universe will balance itself out.
Okay, wow, I went on a real ramble there. Oh! One last thing: if you’re the kind of person who wants to learn a little more about pepperoncini (like where they’re grown, or why they’re so good?), this Spruce Eats guide is a fun and quick read. Not vital for the dip, but hey, it might win you some trivia points.
Enjoy, and if you try it, let me know how it turns out! Or, just invite me over. I’ll bring the chips.

Ingredients
- 8 oz cream cheese, softened
- 1 cup shredded mozzarella cheese
- 1/2 cup mayonnaise
- 1/2 cup chopped pepperoncini peppers (drained)
- 1/4 cup grated Parmesan cheese
- 1/2 teaspoon garlic powder
- 1/4 teaspoon black pepper
- 2 tablespoons chopped fresh parsley (optional, for garnish)
Instructions
-
1Preheat oven to 375°F (190°C). Lightly grease a small baking dish.
-
2In a mixing bowl, combine cream cheese, mozzarella cheese, mayonnaise, Parmesan cheese, garlic powder, and black pepper. Mix until smooth.
-
3Fold in the chopped pepperoncini peppers until evenly distributed.
-
4Spread the mixture evenly into the prepared baking dish.
-
5Bake for 18-20 minutes, or until hot and bubbly and the top is lightly golden.
-
6Remove from oven, garnish with fresh parsley if desired, and serve warm with crackers, bread, or veggies.
CLICK FOR NUTRITION INFO
↑
Approximate Information for One Serving
Serving Size:
1 serving
Calories:
210 caloriescal
Protein:
7gg
Fat:
17gg
Saturated Fat:
0g
Trans Fat:
0g
Cholesterol:
0mg
Sodium:
0mg
Potassium:
0mg
Total Carbs:
4gg
Fiber:
0g
Sugar:
0g
Net Carbs:
0g
Vitamin A:
0
Vitamin C:
0mg
Calcium:
0mg
Iron:
0mg
Nutrition Disclaimers
Number of total servings shown is approximate. Actual number of servings will depend on your preferred portion sizes.
Nutritional values shown are general guidelines and reflect information for 1 serving using the ingredients listed, not including any optional ingredients. Actual macros may vary slightly depending on specific brands and types of ingredients used.
To determine the weight of one serving, prepare the recipe as instructed. Weigh the finished recipe, then divide the weight of the finished recipe (not including the weight of the container the food is in) by the desired number of servings. Result will be the weight of one serving.
Did you make this recipe?
Please consider Pinning it!!