Let Me Tell You About These Pizza Roll Ups…
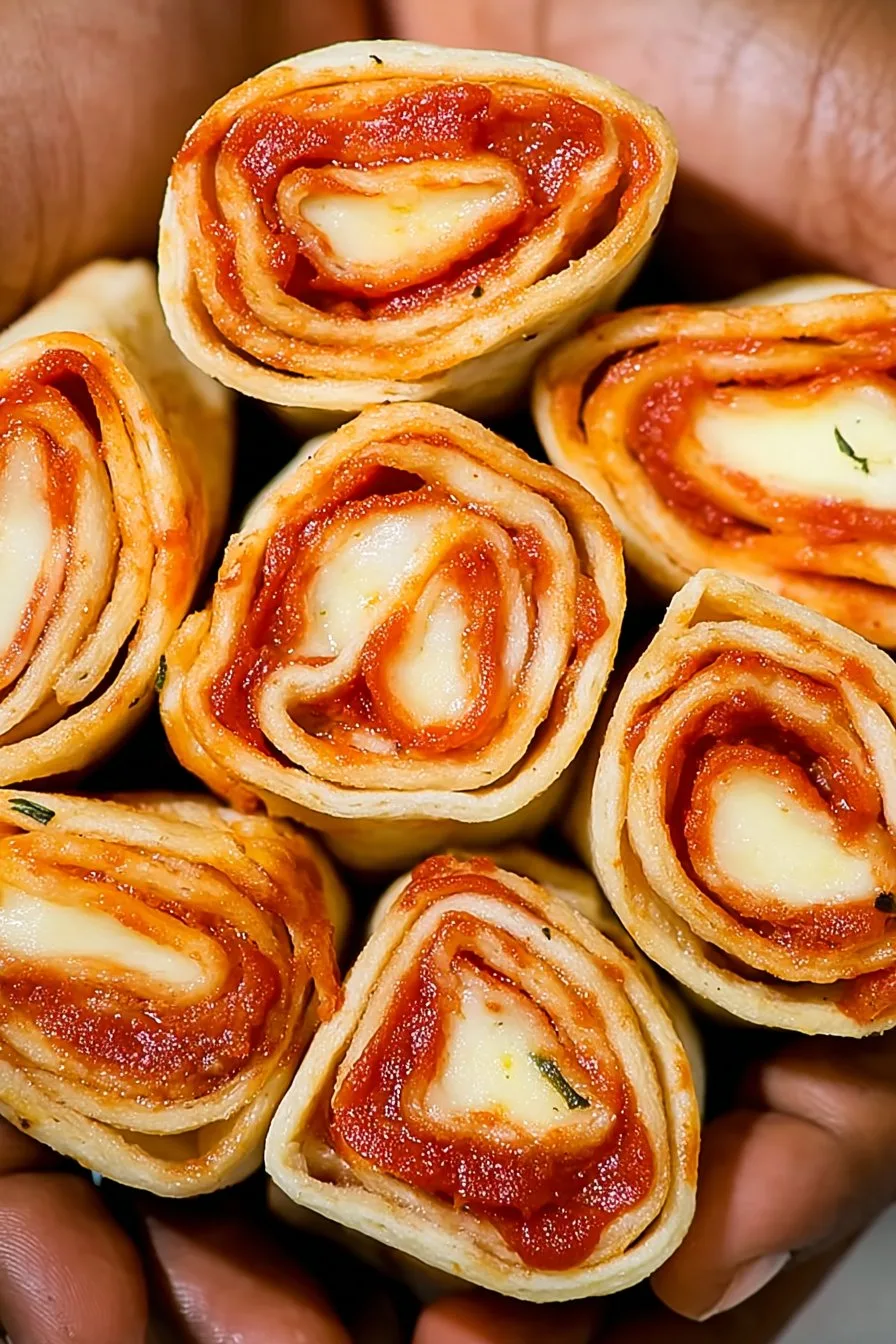
Alright, so, you know how sometimes you just want something gooey, cheesy, and a little bit nostalgic? That’s what these Easy Air Fryer Pizza Roll Ups are for me. First time I made them, it was actually after a total kitchen disaster (don’t ask about the burnt lasagna). My kids were starving, I was out of patience, and I just grabbed whatever was in the fridge. Next thing you know, pizza roll ups appeared and—honestly—they vanished faster than a cold pint on a hot Saturday arvo. There’s something about rolling up all that pizza goodness in bread that just feels, I dunno, a bit cheeky but totally satisfying. Plus, using the air fryer means less mess and more time for catching up on my favorite cooking shows (have you seen Bon Appétit lately?).
Why I Keep Making These (And You’ll Probably Want To, Too)
I make these when I’ve got, like, 15 minutes and the hangry mob is about to riot! My family goes absolutely bonkers for them because, well, they taste like mini pizza dreams. (Even my picky one, who’d usually turn his nose up at anything not shaped like a dinosaur nugget.) Also, if you’ve ever had the joy of cleaning up flour after homemade pizza dough, you’ll appreciate that this recipe dodges that bullet entirely. Oh, and if I’m being honest, I’ve tried to make the fancy version with artisan bread and imported cheese—everyone still prefers the good ol’ supermarket stuff. Go figure.
What You’ll Need (And How I Sometimes Improvise)
- 8 slices sandwich bread (white, wheat, honestly whatever’s lurking in the bread bin—my grandma swore by Wonderbread, but I use store brand all the time)
- 1 cup shredded mozzarella (sometimes I swap in a cheddar blend if the fridge is looking sad)
- 16 slices pepperoni (or ham, salami, or just skip it for veggie vibes—my friend once used turkey, and it worked fine)
- 1/2 cup pizza sauce (marinara, passata, or even a splash of ketchup in emergencies… don’t judge!)
- 2 tablespoons melted butter (olive oil if you’re out—been there)
- Optional: sprinkle of garlic powder, Italian seasoning, or chili flakes for a bit of flash
Here’s How I Throw Them Together
- First, take the bread slices and flatten them out as best you can. Use a rolling pin or, honestly, the side of a mug has saved me more than once.
- Spread a little pizza sauce on each slice—don’t go wild or you’ll end up with a soggy mess. (This is where I usually sneak a taste, because who can resist?)
- Sprinkle cheese, then lay down the pepperoni. If the slices don’t fit, just tear ‘em up. Perfection is overrated.
- Roll them up gently—if they split a bit, it’s totally fine. I just squish the ends closed.
- Brush the tops with melted butter or a bit of oil. Sprinkle with garlic powder or seasoning if you like a little zing.
- Preheat your air fryer to 370°F (that’s 190°C, but who’s counting?).
- Pop the roll ups in the basket, seam side down. Don’t crowd them (they need their personal space, just like my kids). Cook for about 6-8 minutes, or until golden and crispy. If they look a bit weird halfway through—don’t panic! They always come right in the end.
Notes From My Not-So-Perfect Kitchen
- If your cheese leaks out, that’s basically a snack for the cook—don’t sweat it.
- Actually, I find it works better if you let them cool a minute before slicing; otherwise, molten cheese goes everywhere (I learned the hard way… twice).
- Once, I tried using rye bread. Wouldn’t recommend it, unless you like your pizza roll ups with a side of confusion.
Variations That Actually (Mostly) Worked
- Swapped pepperoni for cooked mushrooms and spinach once—surprisingly good, though my youngest insisted it needed more cheese.
- Breakfast version: scrambled eggs, bacon bits, and a sprinkle of cheddar (not technically pizza, but hey, breakfast is flexible).
- I tried a sweet version with Nutella and banana. It… didn’t go over well. Maybe don’t try that unless you’re feeling experimental and don’t mind weird glares.
What If I Don’t Have An Air Fryer?
So, I know I said the air fryer is a must-have, but actually, you can totally use an oven if you’re in a pinch. Just bake at 400°F for about 10-12 minutes, flipping halfway through. Or if you’re feeling brave, a frying pan with a bit of oil isn’t the worst idea (just watch ‘em closely). My mate Dave swears by the oven method—and he’s right, it does work, just not as crispy.
Keeping Leftovers (If You Somehow Have Any…)
Store these in an airtight container in the fridge for up to 2 days, though honestly, in my house it never lasts more than a day! They reheat pretty well—just pop ‘em back in the air fryer for a couple minutes. My daughter claims they taste even better cold, but I’m not convinced.
Serving Them Up (My Family’s Favourite Way)
We usually serve these with a little bowl of extra pizza sauce for dipping (kids love double-dipping, much to my horror). Sometimes I throw together a quick side salad if I’m feeling responsible, but more often, it’s just roll ups and a movie night. Highly recommend with a chilled glass of Pepsi Max, by the way—classic combo.
Lessons I Learned The Hard Way
- If you rush the rolling, you’ll end up with pizza explosion in the air fryer. Take your time—seriously.
- I once tried stacking them to fit more in. Bad idea. They stuck together and turned into a mutant pizza loaf. Funny, but not great for dipping.
Real Questions I’ve Actually Gotten About These
- Can I make these ahead? You can, but I think they’re best fresh. If you do, just keep ‘em in the fridge and air fry to reheat. Don’t freeze, though—makes the bread weird.
- Do I have to use butter? Nope, olive oil works (I sometimes use spray oil because it’s faster).
- Can I use gluten-free bread? Haven’t tried it myself, but a friend did and said they held up fine. Maybe a bit more crumbly, but still tasty.
- Why not just buy frozen pizza rolls? Ha! You could, but where’s the fun in that?
- Any tricks for rolling really soft bread? Try chilling it for five minutes. Or just be gentle—it’s more forgiving than you’d think.
Oh, before I forget—if you’re ever looking for more air fryer snacks, check out Skinnytaste’s Air Fryer Recipes. I found them when I was in a rut and now I’m obsessed. Anyway, let me know if you try these! Or if you invent a version that finally gets the kids to eat their veggies, I’d love to hear about it.
Ingredients
- 4 large flour tortillas
- 1/2 cup pizza sauce
- 1 cup shredded mozzarella cheese
- 24 slices pepperoni
- 2 tablespoons grated Parmesan cheese
- 1 tablespoon olive oil
- 1/2 teaspoon dried Italian seasoning
- Nonstick cooking spray
Instructions
-
1Preheat the air fryer to 375°F (190°C) and lightly coat the basket with nonstick cooking spray.
-
2Lay out the flour tortillas on a flat surface. Spread about 2 tablespoons of pizza sauce evenly over each tortilla.
-
3Sprinkle mozzarella cheese over the sauce, then layer 6 slices of pepperoni on each tortilla.
-
4Roll up each tortilla tightly and brush the outside lightly with olive oil. Sprinkle with Parmesan cheese and Italian seasoning.
-
5Place the roll ups seam-side down in the air fryer basket. Cook for 7-8 minutes, turning halfway through, until golden and crispy.
-
6Let cool slightly, then slice and serve warm with extra pizza sauce for dipping if desired.
Approximate Information for One Serving
Nutrition Disclaimers
Number of total servings shown is approximate. Actual number of servings will depend on your preferred portion sizes.
Nutritional values shown are general guidelines and reflect information for 1 serving using the ingredients listed, not including any optional ingredients. Actual macros may vary slightly depending on specific brands and types of ingredients used.
To determine the weight of one serving, prepare the recipe as instructed. Weigh the finished recipe, then divide the weight of the finished recipe (not including the weight of the container the food is in) by the desired number of servings. Result will be the weight of one serving.
Did you make this recipe?
Please consider Pinning it!!


