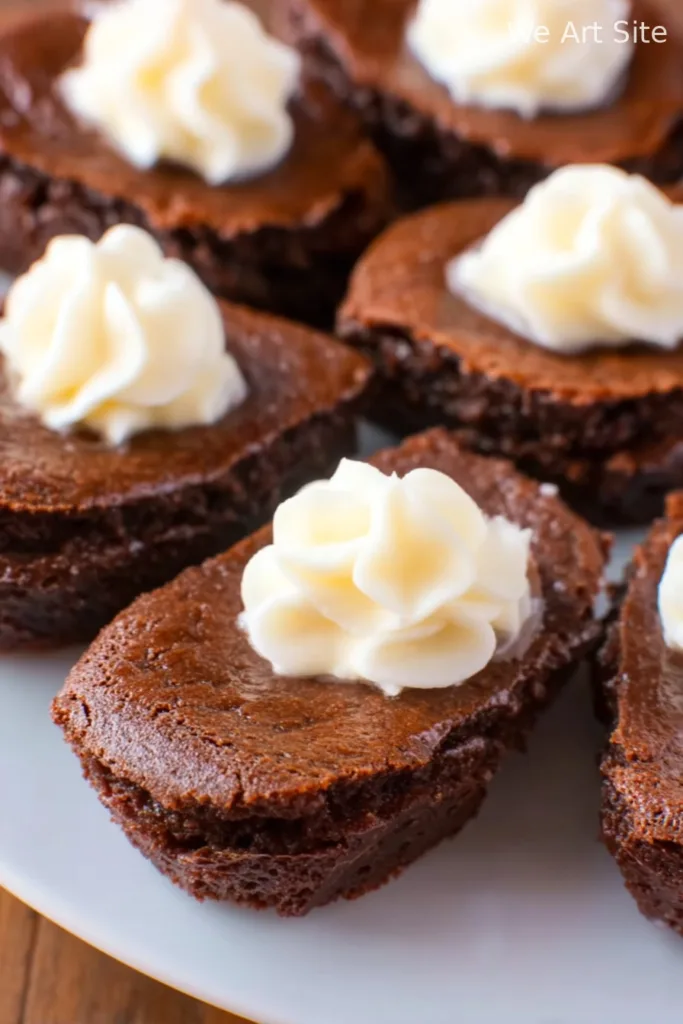
Hey y’all! If you’re searching for a treat that’s both fun and decadently delicious, these Deviled Brownies are about to become your favorite new bake. Imagine rich, fudgy brownie “eggs” with a luscious, fluffy marshmallow-cream cheese filling—perfect for celebrations, potlucks, or whenever you want to add a bit of whimsy to dessert time. Whether you’re baking for Easter, a birthday, or just because, this crowd-pleasing recipe brings together the best of classic brownies and playful presentation. Let’s get cooking!

Why You’ll Love This
- Combines rich, fudgy brownies with a creamy, tangy filling for an unbeatable flavor combo.
- Fun, egg-shaped treats are perfect for holidays, parties, and bake sales.
- Easy to make using your favorite box brownie mix, saving time without sacrificing taste.
- Customizable with your favorite sprinkles or decorative toppings for a playful twist.
- Perfect make-ahead dessert that keeps beautifully in the fridge for several days.
Ingredients
- 18.3 oz brownie mix and ingredients to make brownies (usually water, oil, and eggs)
- 8 oz cream cheese, softened
- 7 oz marshmallow cream
- Sprinkles, optional
Directions
Step 1: Prep Your Oven and Batter
Preheat your oven to 350°F (175°C). Follow the instructions on your brownie mix package to prepare the brownie batter, combining the mix with the recommended amounts of water, oil, and eggs. Stir until no dry spots remain for a smooth batter.
Step 2: Prepare Molds and Fill
Generously coat egg-shaped silicone molds with nonstick cooking spray to ensure the brownies release easily. Using a 2-tablespoon scoop, fill each cavity with brownie batter, leaving a little space at the top for the brownies to rise.
Step 3: Bake Brownies
Place the filled molds on a sturdy baking sheet and bake for 24 to 26 minutes. To check doneness, insert a toothpick into the center of one brownie—when it comes out clean or with a few moist crumbs, they’re ready.
Step 4: Create the Filling Well
Right after removing brownies from the oven and while they’re still warm, use a 1/2 teaspoon to gently press into the center of each brownie, forming a shallow divot for the filling. Be careful not to press all the way through.
Step 5: Cool and Unmold
Allow brownies to cool completely in the molds—this helps them firm up and prevents crumbling. Only attempt unmolding when they’re fully cooled. Gently peel back the silicone molds and invert to release the brownies intact.
Step 6: Flatten Bases
If your brownie eggs are a bit rounded on the bottom, lightly press each one on a flat surface to flatten so they sit nicely for decorating.
Step 7: Prepare the Filling
In a mixing bowl, beat the softened cream cheese and marshmallow cream together with a hand mixer until the mixture is smooth and fluffy, scraping down the sides as needed for a uniform filling.
Step 8: Pipe and Decorate
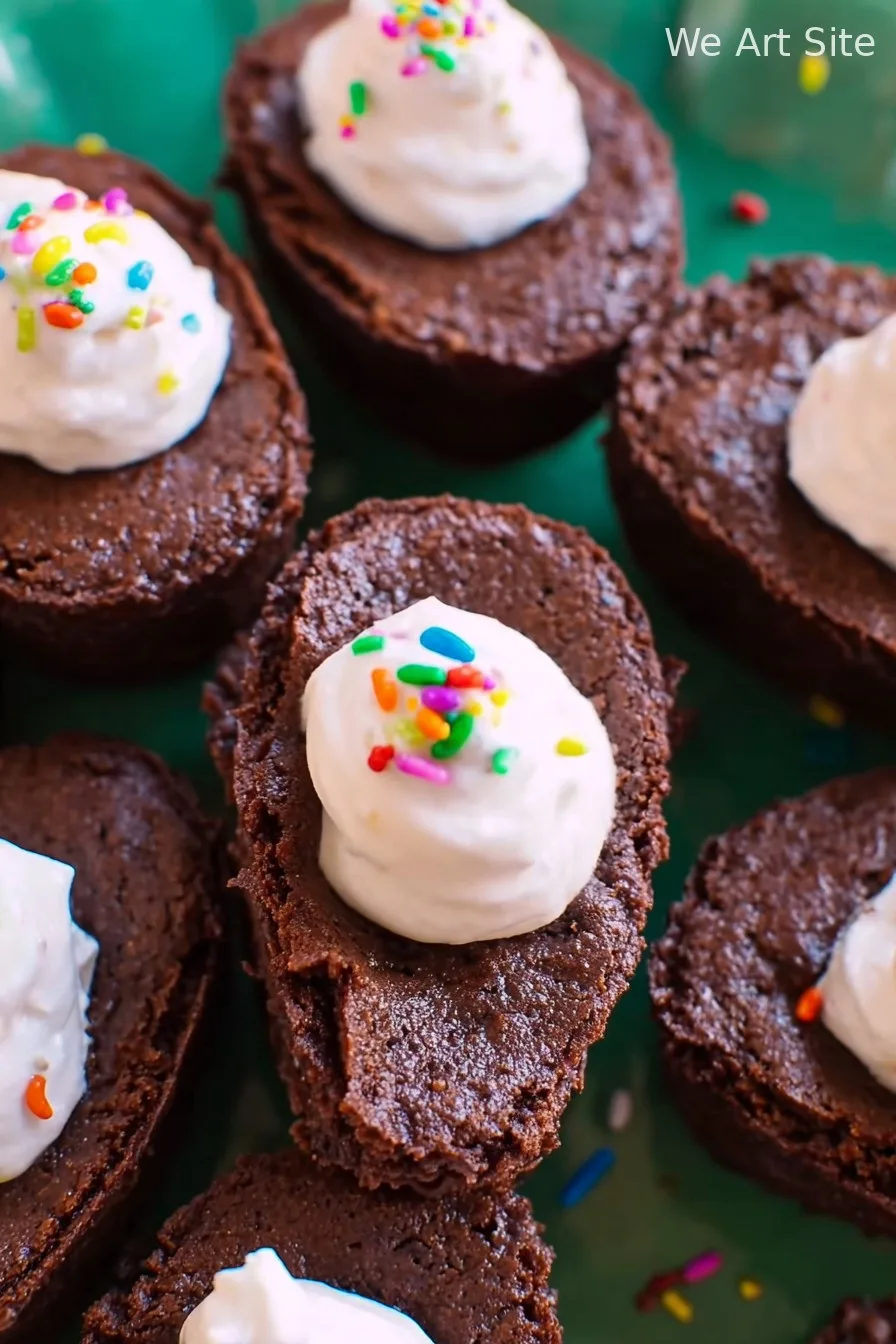
Transfer the creamy filling into an 18-inch pastry bag fitted with a 1M star tip. Pipe generous swirls of filling into each brownie well. If desired, add sprinkles on top for a festive finish.
Step 9: Chill and Serve
Refrigerate the deviled brownies until you’re ready to serve. Chilling helps set the filling and makes them easy to handle.
Notes
- Don’t rush cooling—removing brownies too soon may cause them to break apart.
- If you don’t have egg-shaped molds, mini muffin tins work as a great substitute.
- For the smoothest filling, ensure the cream cheese is fully softened before mixing.
Variations
- Chocolate Ganache Filling: Swap the marshmallow cream for chocolate ganache for a richer twist.
- Peanut Butter Swirl: Add a dollop of peanut butter in the brownie batter before baking for a nutty surprise.
- Gluten-Free: Use a certified gluten-free brownie mix to cater to dietary needs.
Required Equipment
- Egg-shaped silicone molds (or mini muffin tin)
- 2-tablespoon scoop
- 1/2 teaspoon measuring spoon
- Mixing bowls
- Hand or stand mixer
- 18-inch pastry bag with 1M piping tip
- Baking sheet
Storage Instructions
Store deviled brownies in an airtight container in the refrigerator. They remain fresh and delicious for up to 4 days. For longer storage, wrap them well and freeze for up to 2 months—thaw in the fridge overnight before serving.
Serving Suggestions
- Serve chilled as a charming dessert at parties or potlucks.
- Pair with fresh berries for a pop of color and a hint of tartness.
- Enjoy alongside a cup of coffee, hot chocolate, or cold milk for a comforting treat.
Pro Tips
- For clean piping, make sure your pastry bag is firmly twisted at the top before filling.
- Chill your mixing bowl and ingredients for a firmer, fluffier filling.
- Add a touch of vanilla extract to the filling for extra flavor depth.
FAQ
1. Can I make these ahead of time?
Absolutely! Prepare deviled brownies up to 2 days in advance and refrigerate until served.
2. Can I use homemade brownie batter?
Yes, your favorite homemade brownie recipe works perfectly—just ensure the consistency is thick enough for molds.
3. What if I don’t have a piping bag?
You can use a zip-top bag with the corner snipped off to pipe the filling as a quick and easy alternative.
Ingredients
- 18.3 oz brownie mix and ingredients to make brownies (usually water, oil, and eggs)
- 8 oz cream cheese, softened
- 7 oz marshmallow cream
- Sprinkles, optional
Instructions
-
1Preheat your oven to 350°F (175°C). Follow the instructions on your brownie mix package to prepare the brownie batter, combining the mix with the recommended amounts of water, oil, and eggs. Stir until no dry spots remain for a smooth batter.
-
2Generously coat egg-shaped silicone molds with nonstick cooking spray to ensure the brownies release easily. Using a 2-tablespoon scoop, fill each cavity with brownie batter, leaving a little space at the top for the brownies to rise.
-
3Place the filled molds on a sturdy baking sheet and bake for 24 to 26 minutes. To check doneness, insert a toothpick into the center of one brownie—when it comes out clean or with a few moist crumbs, they’re ready.
-
4Right after removing brownies from the oven and while they’re still warm, use a 1/2 teaspoon to gently press into the center of each brownie, forming a shallow divot for the filling. Be careful not to press all the way through.
-
5Allow brownies to cool completely in the molds—this helps them firm up and prevents crumbling. Only attempt unmolding when they’re fully cooled. Gently peel back the silicone molds and invert to release the brownies intact.
-
6If your brownie eggs are a bit rounded on the bottom, lightly press each one on a flat surface to flatten so they sit nicely for decorating.
-
7In a mixing bowl, beat the softened cream cheese and marshmallow cream together with a hand mixer until the mixture is smooth and fluffy, scraping down the sides as needed for a uniform filling.
-
8Transfer the creamy filling into an 18-inch pastry bag fitted with a 1M star tip. Pipe generous swirls of filling into each brownie well. If desired, add sprinkles on top for a festive finish.
-
9Refrigerate the deviled brownies until you’re ready to serve. Chilling helps set the filling and makes them easy to handle.
CLICK FOR NUTRITION INFO
↑
Approximate Information for One Serving
Serving Size:
1 serving
Calories:
310 caloriescal
Protein:
3 gg
Fat:
14 gg
Saturated Fat:
0g
Trans Fat:
0g
Cholesterol:
0mg
Sodium:
0mg
Potassium:
0mg
Total Carbs:
44 gg
Fiber:
0g
Sugar:
0g
Net Carbs:
0g
Vitamin A:
0
Vitamin C:
0mg
Calcium:
0mg
Iron:
0mg
Nutrition Disclaimers
Number of total servings shown is approximate. Actual number of servings will depend on your preferred portion sizes.
Nutritional values shown are general guidelines and reflect information for 1 serving using the ingredients listed, not including any optional ingredients. Actual macros may vary slightly depending on specific brands and types of ingredients used.
To determine the weight of one serving, prepare the recipe as instructed. Weigh the finished recipe, then divide the weight of the finished recipe (not including the weight of the container the food is in) by the desired number of servings. Result will be the weight of one serving.
Did you make this recipe?
Please consider Pinning it!