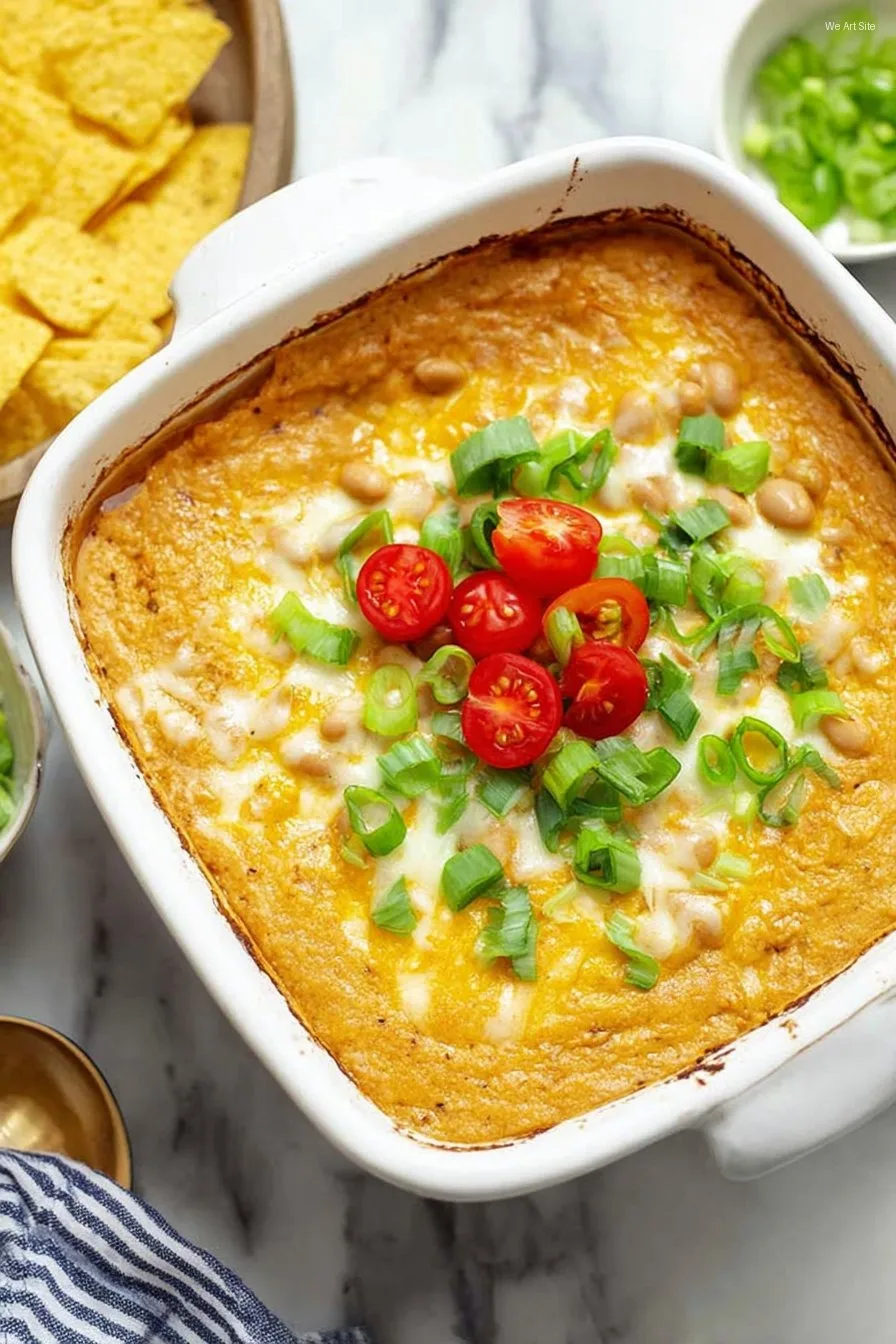
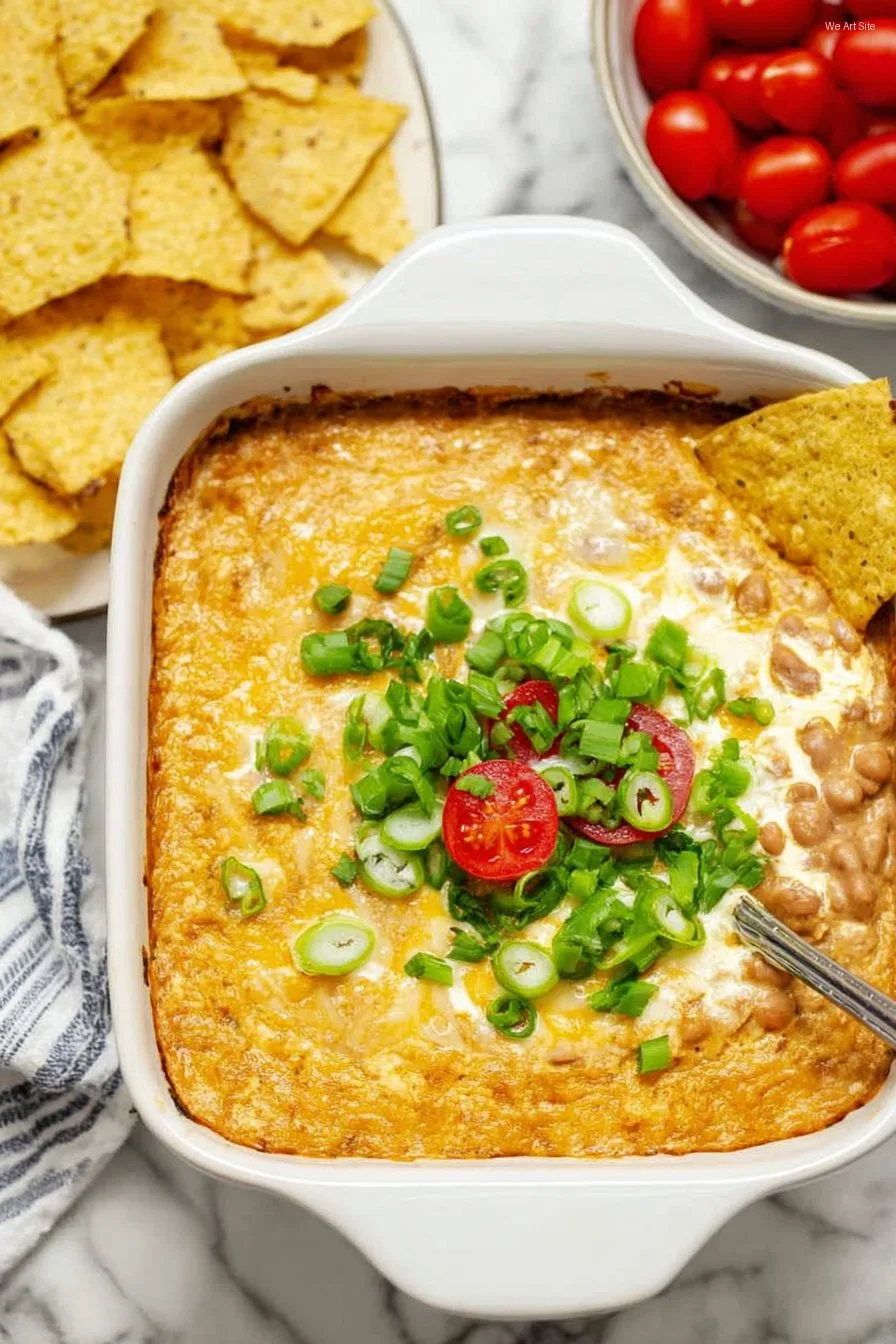
So Here’s the Deal With My Cheesy Bean Dip
If you’ve ever needed a snack that’s equal parts crowd-pleaser and pure comfort food, this Cheesy Bean Dip is it. Seriously, I started making this back when my college roommates and I (shoutout to Jamie and her infamous microwave disasters) used to huddle around a questionable coffee table and demolish a whole bowl in one episode of Friends. I brought it to my family parties too, and there are still stories told about the time my cousin set off the smoke alarm trying to broil the cheese a little too enthusiastically (it adds flavor, right?).
Why I Keep Coming Back to This Dip
I make this when my day’s been a bit sideways or when people show up unexpectedly at my door—my family basically demands it for game night. Actually, if I ever don’t make it, my aunt gets this look like I’ve betrayed her. It’s cheesy, warm, and you can make it as spicy or as mild as you want. What’s not to love? Plus, it’s nearly impossible to mess up (except maybe that one time I forgot the cheese, but we don’t talk about that).
Your Grocery List (But With Wiggle Room)
- 1 can (15oz) refried beans (I use the vegetarian kind, but honestly, whatever’s in the pantry)
- 1 cup shredded cheese (cheddar, Monterey Jack, pepper jack—heck, I even tossed in some leftover Swiss once, and nobody complained)
- 1/2 cup sour cream (Greek yogurt works in a pinch if you’re out)
- 1/4 cup cream cheese, softened (skip this if you’re not a fan or swap with a big dollop of cottage cheese—my granny swears by it, I’m iffy though)
- 1 tsp taco seasoning (I usually make my own with cumin, paprika, and chili powder, but the envelope kind is fine. Don’t stress.)
- Pinch of salt and pepper (taste as you go)
- 1-2 tbsp chopped jalapeños (optional, or swap for a splash of hot sauce if you like living on the edge)
How I Actually Make It (Messy Steps Included)
- Preheat your oven to about 180°C (350°F)—if you even remember. If not, you’ll just need to bake it until it bubbles (yep, I’ve done that more than once).
- In a decently sized bowl, mix the refried beans with the sour cream and cream cheese. Use a fork, a spoon, or your hand mixer if you can be bothered. It looks a bit gross at this point but hang tight—it gets better.
- Add in most of the shredded cheese (save a handful for the top), taco seasoning, salt and pepper, and jalapeños. I usually sneak a taste here to see if needs more heat (or if I just want a snack, let’s be honest).
- Spoon the whole mess into a smallish baking dish. Scatter the rest of the cheese on top. Or add more. There’s no law against it.
- Bake for about 20 minutes, or until everything’s melted, bubbly, and starting to brown at the edges. If you’re feeling wild, stick it under the broiler for 2-3 minutes—but keep an eye on it! I once left mine in and ended up with a cheese volcano, which is less fun than it sounds.
Bits I Wish I’d Known Sooner (Notes)
- This gets spicier as it sits, so warn the spice-shy. Or, you know, don’t and watch their faces (kidding… mostly).
- If you’re out of cream cheese, I’ve swapped in a dollop of mayo and it’s… surprisingly not awful. On second thought, maybe only do that in emergencies.
- Sometimes I add a splash of beer to loosen up the texture (and because I rarely finish the whole can myself).
My Dip Experiments and Tangents (Variations)
- Black beans instead of refried—works, but you’ll want to mash them a bit more and maybe add a smidge of olive oil to help meld everything.
- I threw in buffalo sauce once and it was legendary but probably too intense for the grandparents.
- Learned the hard way: trying to make it with low-fat cheese just made a sad, rubbery dip. So, full fat for the win.
- Add corn, sliced olives, or chopped tomatoes for some bonus texture (or because you need to use them up).
About That Equipment List
Honestly, a baking dish and something to mix with is all you need. A hand mixer makes the blending smoother, but a fork’s fine! Don’t have an oven? I actually microwaved the whole thing in a glass dish for 4 minutes once and nobody suspected it. (But don’t use a metal pan. Learned the hard way!)
Storage: If You Have Any Left
It’ll keep in the fridge for about three days, covered. But, hand on heart, it never makes it past the next morning in my house. If you do have leftovers, spread it on a burrito or toast. You’re welcome.
How I Like to Serve It
I’m all about the classic tortilla chips, but sometimes I’ll cut veggies—carrots, peppers, or celery—for dipping (especially if I’m pretending to be healthy). Oh, and during the holidays, I’ll top it with sliced jalapeños arranged like a festive wreath. My mum thinks I’m extra. She’s right. Serve warm for best results—here’s a solid guide to tortilla chips if you’re picky like me.
Lessons Learnt & Pro Tips
- Once, I tried to rush things by not softening the cream cheese first. Disaster. Lumpy dip is a sad dip. Take a minute—let it soften.
- Mix well, don’t just swirl. There’s nothing worse than biting into a cheese pocket that’s still cold.
FAQ: Actual Questions From Actual Humans
- Can I make this Cheesy Bean Dip recipe ahead of time?
- Yep, go ahead and assemble it—cover and chill, then bake fresh when you need it (but add a few mins to the baking time, straight form the fridge).
- Is there a way to make it dairy free?
- Sure thing! I’ve swapped in vegan cheese and coconut yogurt before—tasted good but just not quite as melty. Still, it works if you’re avoiding dairy. If you want more ideas, Minimalist Baker has a good dairy-free bean dip recipe.
- What should I do if my dip’s too thick?
- Honestly, stir in a splash of salsa, milk, or even water. It thickens up as it cools, so don’t panic.
- Why did my cheese get greasy on top?
- That’s just the cheese gods at work. Mix your cheese well into the beans before baking for less grease—plus, using full-fat cheese (rather than super pre-shredded stuff) helps too.
And there you go! Cheesy bean dip, just the way I make it—messy, comforting, always gone in a flash. If you try a new twist, drop me a line. Maybe next time I’ll tell you about the time I forgot to put the beans in entirely (it’s a long story, maybe after another dip or two). Happy snacking!
Ingredients
- 1 (16 oz) can refried beans
- 1 cup shredded cheddar cheese
- 1 cup shredded Monterey Jack cheese
- 1/2 cup sour cream
- 1/4 cup cream cheese, softened
- 1/2 cup salsa
- 1 teaspoon chili powder
- 1/2 teaspoon garlic powder
- Salt and pepper, to taste
- 2 tablespoons sliced green onions (for garnish)
- Tortilla chips, for serving
Instructions
-
1Preheat your oven to 350°F (175°C). Grease a medium baking dish.
-
2In a large bowl, mix together refried beans, cream cheese, and sour cream until smooth and well combined.
-
3Add in salsa, chili powder, garlic powder, salt, and pepper. Stir until evenly mixed.
-
4Fold in half of the cheddar cheese and half of the Monterey Jack cheese.
-
5Spread the mixture evenly into the prepared baking dish. Top with the remaining cheddar and Monterey Jack cheese.
-
6Bake for 20 minutes, or until the dip is bubbly and the cheese is melted. Garnish with sliced green onions and serve warm with tortilla chips.
CLICK FOR NUTRITION INFO
↑
Approximate Information for One Serving
Serving Size:
1 serving
Calories:
210 caloriescal
Protein:
9gg
Fat:
13gg
Saturated Fat:
0g
Trans Fat:
0g
Cholesterol:
0mg
Sodium:
0mg
Potassium:
0mg
Total Carbs:
13gg
Fiber:
0g
Sugar:
0g
Net Carbs:
0g
Vitamin A:
0
Vitamin C:
0mg
Calcium:
0mg
Iron:
0mg
Nutrition Disclaimers
Number of total servings shown is approximate. Actual number of servings will depend on your preferred portion sizes.
Nutritional values shown are general guidelines and reflect information for 1 serving using the ingredients listed, not including any optional ingredients. Actual macros may vary slightly depending on specific brands and types of ingredients used.
To determine the weight of one serving, prepare the recipe as instructed. Weigh the finished recipe, then divide the weight of the finished recipe (not including the weight of the container the food is in) by the desired number of servings. Result will be the weight of one serving.
Did you make this recipe?
Please consider Pinning it!!