Hey y’all! Looking for a simple, fuss-free, and utterly scrumptious breakfast or brunch idea? Baked Eggs In A Muffin Tin are your new kitchen superstar—packed with protein, ready in no time, and delightfully versatile. From hectic mornings to weekend brunch spreads, these eggs are a guaranteed crowd-pleaser. Let’s get cooking!

Why You’ll Love This
- Super easy to make with minimal prep and clean-up.
- Perfect for meal prep—just bake and store for quick breakfasts all week.
- Deliciously customizable with your favorite add-ins and toppings.
- Great for feeding a crowd at brunches or family gatherings.
- Consistently produces perfectly cooked, tender eggs.
Ingredients
- Non-stick cooking spray or 1 tablespoon butter (to grease pan)
- 6 large eggs
- 1/4 teaspoon salt
- 1/8 teaspoon freshly ground black pepper
- 2 tablespoons chopped fresh chives (optional)
Directions
Step 1: Preheat and Prepare
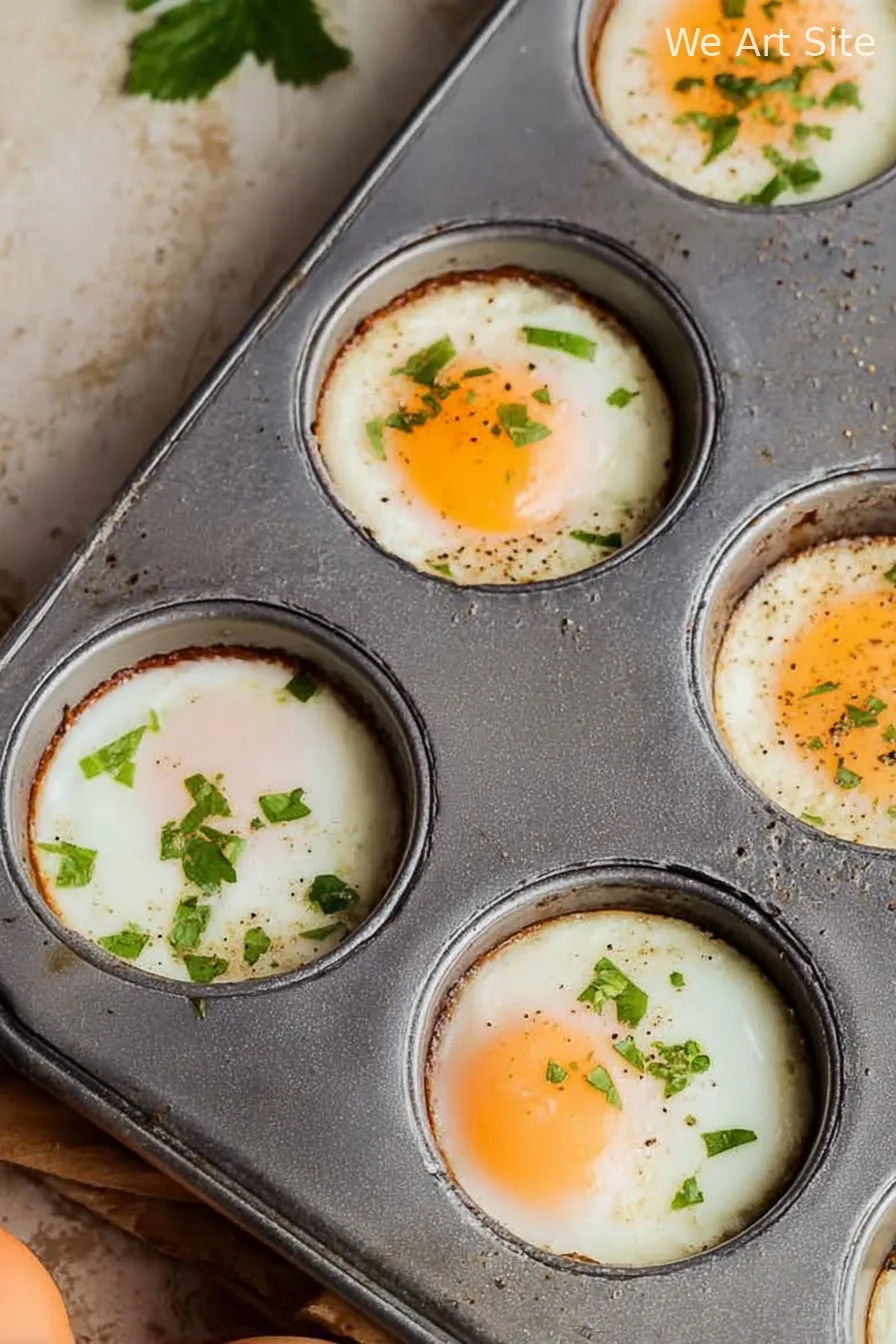
Preheat your oven to 350°F (175°C). Lightly grease a 6-cup muffin tin with non-stick spray or butter to prevent sticking.
Step 2: Add the Eggs
Crack one egg into each muffin cup, being careful not to break the yolk.
Step 3: Season the Eggs
Sprinkle a pinch of salt and black pepper over each egg. Add chopped chives if you like a fresh, herby kick.
Step 4: Bake
Place the muffin tin in the preheated oven and bake for 12-15 minutes, depending on your desired yolk consistency. For soft-set yolks, aim for 12 minutes; for fully set, about 15 minutes.
Step 5: Cool and Serve
Remove the muffin tin from the oven. Let eggs cool for 2-3 minutes, then gently loosen each egg with a silicone spatula and serve warm.

Notes
- For easier egg removal, run a knife or silicone spatula around the edge of each cup.
- Feel free to add cooked bacon bits, diced veggies, or shredded cheese before baking for extra flavor.
- For more servings, simply double the ingredients and use a 12-cup muffin tin.
Variations
- Cheesy Baked Eggs: Sprinkle each egg with 1 tablespoon shredded cheddar or mozzarella before baking.
- Veggie-Packed: Add 1 tablespoon chopped spinach, bell pepper, or mushrooms to each cup before adding the egg.
- Meaty: Line each muffin cup with a slice of cooked ham or prosciutto before cracking in the egg.
Required Equipment
- 6-cup muffin tin (non-stick preferred)
- Non-stick spray or pastry brush (for buttering)
- Silicone spatula or knife
- Measuring spoons
Storage Instructions
Allow baked eggs to cool completely, then store in an airtight container in the refrigerator for up to 4 days. To reheat, microwave for 20–30 seconds or until just warmed through. Not recommended for freezing, as egg texture may change.
Suggested Pairings & Serving Recommendations
- Delicious atop avocado toast for a hearty breakfast.
- Pair with crispy bacon, sausage, or a fresh fruit salad.
- Serve alongside roasted potatoes or sautéed greens for a complete brunch plate.
Pro Tips
- Use room-temperature eggs for more even baking.
- Don’t overbake if you like runny yolks—check at the 12-minute mark!
- Garnish with fresh herbs or a sprinkle of paprika for extra flavor and color.
FAQ
Can I use a silicone muffin pan?
Absolutely! Silicone pans work great and make removal even easier—just adjust baking time if necessary.
How do I make them ahead for meal prep?
Bake as directed, cool completely, then refrigerate in an airtight container. Reheat for a quick, nutritious breakfast!
Can I add milk or cream to make baked eggs fluffier?
This recipe works best with whole eggs, but you can whisk the eggs with a splash of milk and pour them into the cups for a more soufflé-like texture, closer to egg muffins or mini frittatas.
Ingredients
- Non-stick cooking spray or 1 tablespoon butter (to grease pan)
- 6 large eggs
- 1/4 teaspoon salt
- 1/8 teaspoon freshly ground black pepper
- 2 tablespoons chopped fresh chives (optional)
Instructions
-
1Preheat your oven to 350°F (175°C). Lightly grease a 6-cup muffin tin with non-stick spray or butter to prevent sticking.
-
2Crack one egg into each muffin cup, being careful not to break the yolk.
-
3Sprinkle a pinch of salt and black pepper over each egg. Add chopped chives if you like a fresh, herby kick.
-
4Place the muffin tin in the preheated oven and bake for 12-15 minutes, depending on your desired yolk consistency. For soft-set yolks, aim for 12 minutes; for fully set, about 15 minutes.
-
5Remove the muffin tin from the oven. Let eggs cool for 2-3 minutes, then gently loosen each egg with a silicone spatula and serve warm.
CLICK FOR NUTRITION INFO
↑
Approximate Information for One Serving
Serving Size:
1 serving
Calories:
80 caloriescal
Protein:
6gg
Fat:
5gg
Saturated Fat:
0g
Trans Fat:
0g
Cholesterol:
0mg
Sodium:
0mg
Potassium:
0mg
Total Carbs:
1gg
Fiber:
0g
Sugar:
0g
Net Carbs:
0g
Vitamin A:
0
Vitamin C:
0mg
Calcium:
0mg
Iron:
0mg
Nutrition Disclaimers
Number of total servings shown is approximate. Actual number of servings will depend on your preferred portion sizes.
Nutritional values shown are general guidelines and reflect information for 1 serving using the ingredients listed, not including any optional ingredients. Actual macros may vary slightly depending on specific brands and types of ingredients used.
To determine the weight of one serving, prepare the recipe as instructed. Weigh the finished recipe, then divide the weight of the finished recipe (not including the weight of the container the food is in) by the desired number of servings. Result will be the weight of one serving.
Did you make this recipe?
Please consider Pinning it!