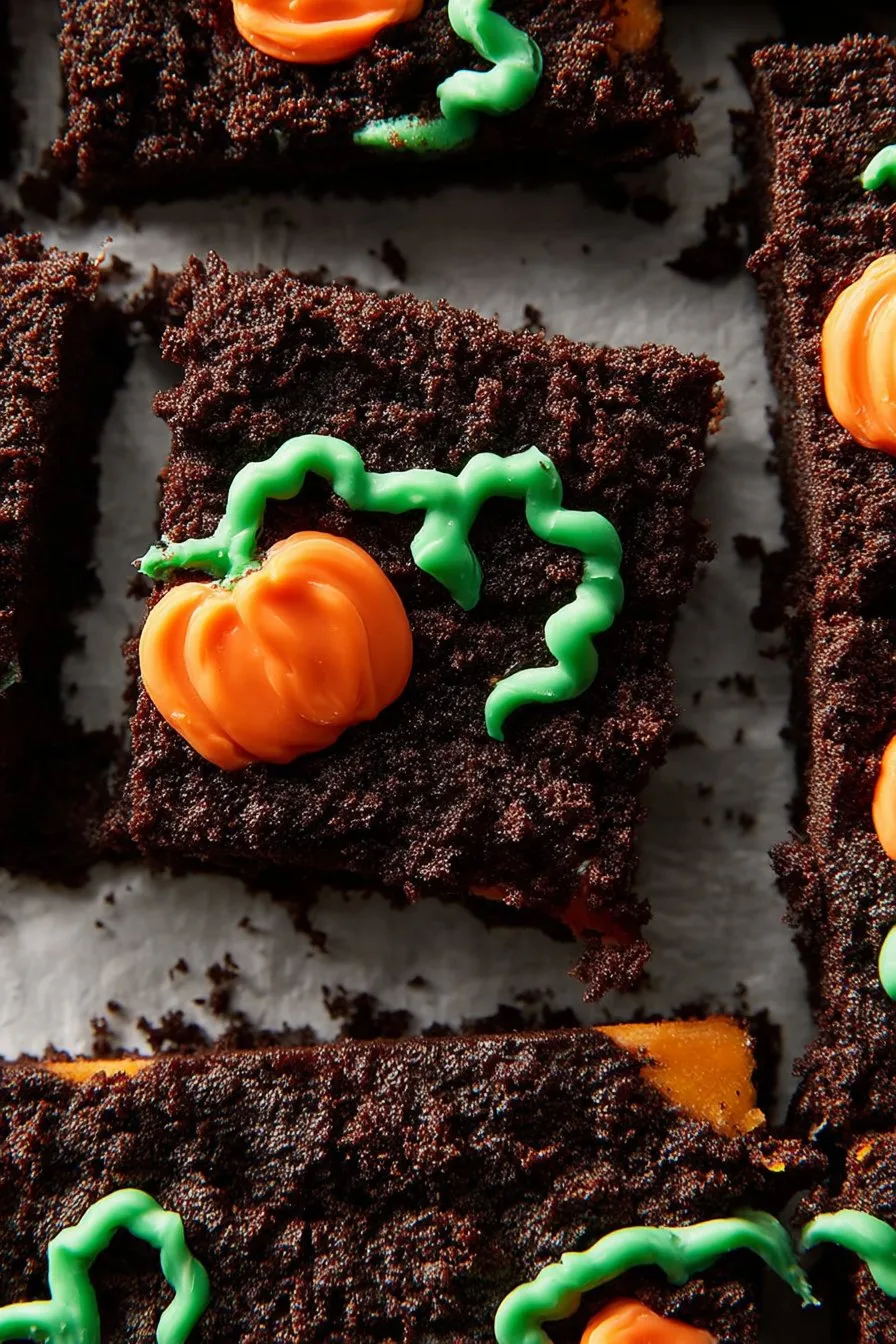
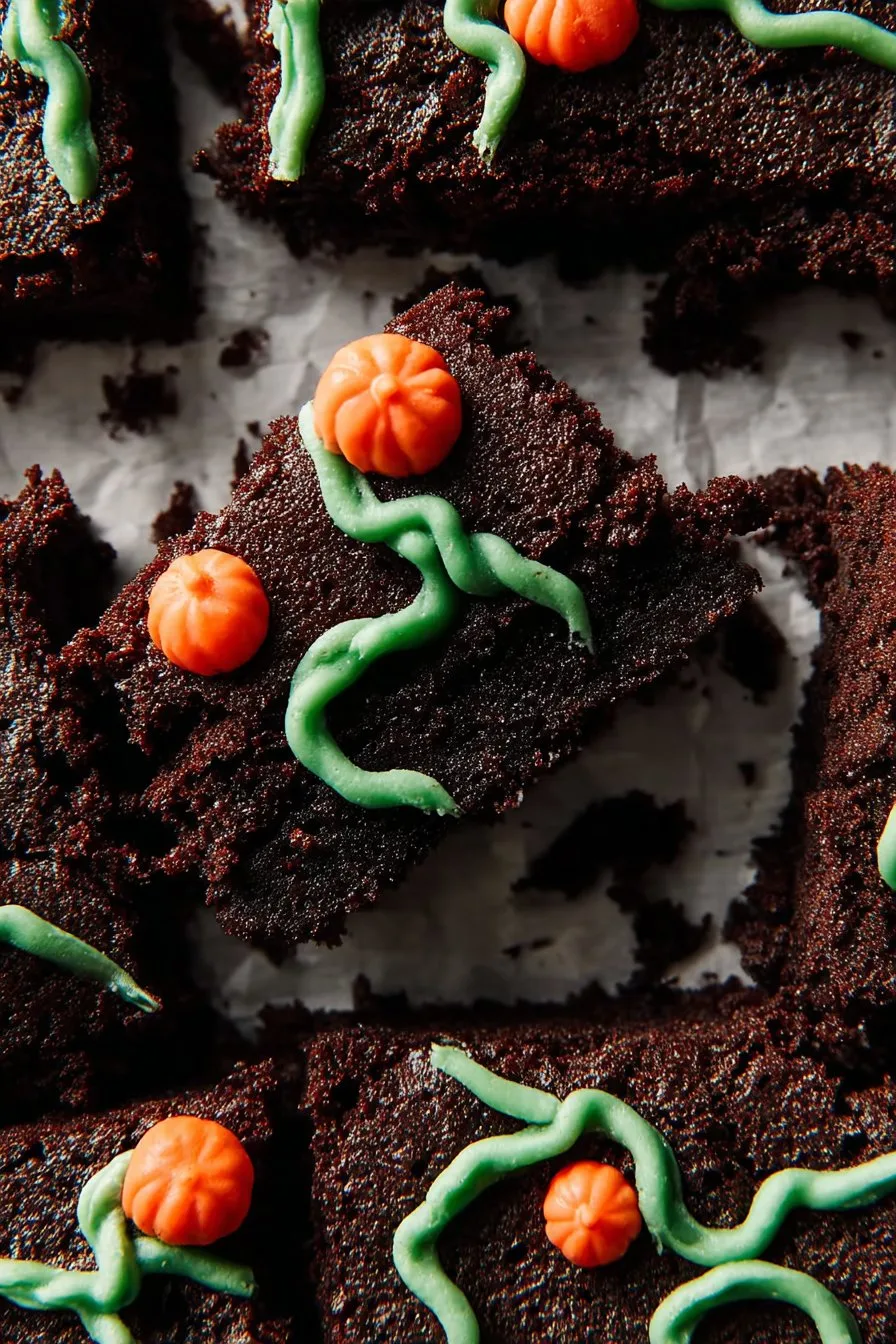
Let Me Tell You About Pumpkin Patch Brownies…
Okay, so last October, my neighbor dropped off a huge bag of those tiny sugar pumpkins and I immediately thought – brownies! Well, actually, first I thought I’d roast one and forget it in the oven (which I did, and my smoke alarm let the whole street know). But eventually, this twisty, pumpkin-chocolatey dream was born out of my kitchen chaos. If you’ve ever wanted your brownies to taste like autumn hugged you, this is it. And if yours come out a little lopsided or gooey in the center, trust me, you’re in good company (I call that ‘homey charm’). I always make these when I’m in need of a little comfort or just want to make the house smell like a fancy bakery.
Why You’ll Love This One
I make these Pumpkin Patch Brownies whenever my family is in “something sweet but not boring” mode (which, honestly, is pretty often). My kids practically fight over the corners—personally, I’m a center piece person because it stays gooey. My husband claims he doesn’t like pumpkin, but somehow these disappear overnight. Maybe it’s the swirl of pumpkin and chocolate. Or it’s just sugar magic. (Also, I used to mess up the marbling part, but now I just call it “rustic.” No shame!)
What You’ll Need (And a Few Swaps)
- 1 box of brownie mix (I use Ghirardelli if I’m feeling fancy, but the store brand is totally fine – my grandmother would be scandalized, but oh well)
- 2 eggs (sometimes I only have 1, and it still works – just a bit fudgier)
- 1/3 cup vegetable oil (or melted coconut oil if you like a hint of coconut, which is surprisingly good)
- 3/4 cup pumpkin puree (canned is fine – I’ve roasted my own and honestly, I can’t taste the difference – here’s how to make it from scratch if you’re curious)
- 1/4 cup brown sugar (loosely packed – give or take, I’ve eyeballed it before)
- 1 tsp pumpkin pie spice (sometimes I just mix cinnamon, nutmeg, and a pinch of clove)
- 1/2 tsp vanilla extract (I splash in a bit more – oops?)
- Pinch salt (don’t skip it, even if you’re feeling rebellious)
- Optional: Handful of chocolate chips, pecans, or even some mini marshmallows on top if you’re feeling wild
How To Whip These Up (With My Usual Commentary)
- Preheat your oven to 350°F (or 175°C). Grease an 8×8 pan. If you don’t have that, a loaf tin works, though you get thicker brownies – not a bad thing.
- In one bowl, mix the brownie batter: box mix, 1 egg (or 2), oil, and whatever the box says. I always sneak a spoonful at this stage – yes, there’s raw egg, but I’m still here.
- In another bowl, combine pumpkin puree, brown sugar, pumpkin pie spice, vanilla, pinch of salt, and the other egg. Stir well – this part smells incredible. Try not to eat it all.
- Pour about two-thirds of the brownie batter into the pan. Then spread the pumpkin mix on top. Dollop the rest of the brownie mix over that. Now, use a butter knife to swirl it all together. Don’t go wild or you’ll lose the nice patches – I’ve made this mistake before and ended up with muddy-looking brownies (still tasty though).
- Scatter chocolate chips or whatever else you’re using on top. Bake for about 30-35 minutes. If a toothpick in the center comes out with gooey bits, that’s perfect. Don’t panic if the pumpkin part looks softer – it’ll firm up as it cools.
- Let them cool. Or don’t. I usually can’t wait and burn my tongue, every time.
Things I’ve Learned (The Hard Way)
- Don’t over-swirl – it looks pretty in pictures, but in real life, less is more.
- If you use homemade pumpkin, make sure it’s not too watery, or you’ll get, um, pudding brownies (still tasty, just messy).
- And actually, parchment paper makes life easier when lifting them out, but if you don’t have it, just grease really well.
Variations I’ve Tried (And a Fail)
- Add a layer of cream cheese swirl – it’s rich, almost too rich, but big thumbs up from my cousin.
- Once I tried adding chai spice instead of pumpkin pie spice – not bad, a bit more “grown-up.”
- I once tried using sweet potato instead of pumpkin. It… wasn’t my favorite, but maybe you’ll like it?
About That Equipment…
I use a hand mixer for the pumpkin part sometimes, but a whisk or even a fork works fine if you don’t want to clean more dishes. The 8×8 pan is ideal, but I’ve also used a round cake tin in a pinch. Once, I even tried a muffin tin for brownie “cups.” They were adorable, but kind of a pain to clean.
How To Keep ‘Em (If You Can)
Store these brownies in an airtight container (if you have any left). They’ll keep for up to 3 days at room temp, or pop them in the fridge for a fudgier texture. But honestly, in my house, they never last more than a day, so I wouldn’t worry too much about it.
Serving Ideas & Traditions
We usually eat these warm, sometimes with a scoop of vanilla ice cream (my daughter likes whipped cream on top – she’s got good taste). For fall parties, I cut them into smaller squares so no one feels guilty eating two (or five). Hot tip: they’re great with coffee the next morning. Or for breakfast, I mean, they’ve got pumpkin?
What I Learned the Hard Way (Yep, Pro Tips)
- I once rushed the cooling time and tried to slice them hot – big puddly mess. Now I force myself to wait (okay, at least 20 minutes).
- Don’t skip the salt, even just a pinch – it wakes up the flavors, trust me.
- On second thought, if you forget the oil, the brownies are more cake-like. Not bad, but not what I’m after.
Got Questions? I’ve Heard a Few
- Do I have to use canned pumpkin? Nah, you can totally roast your own. But if you’re short on time (or patience) like me, grab the can.
- Can I make these gluten-free? Absolutely, just use a GF brownie mix. I’ve used King Arthur’s and it turned out grand.
- How do I know when they’re done? The toothpick trick works, but I think it’s better when there’s still a bit stuck to it. Fudgy is life.
- What if my swirl isn’t pretty? Who cares! They’ll taste like autumn regardless. My swirls look like a toddler helped most days.
- Can I freeze these? Yep, wrap ‘em up tight and they’ll freeze for a month. But honestly, they rarely make it that long in my house.
One Last Tangent
Did I mention these are a hit at book club? Last time, someone asked if I’d used fancy French chocolate (nope, just supermarket stuff). Goes to show, it’s not always about the fanciest ingredients. Sometimes it’s the love (and chaos) you pour in.
Happy baking—and if you try a weird twist, let me know how it goes (unless it’s broccoli, then maybe don’t).
Ingredients
- 1 cup unsalted butter, melted
- 2 cups granulated sugar
- 4 large eggs
- 1 teaspoon vanilla extract
- 1 cup all-purpose flour
- 1 cup unsweetened cocoa powder
- 1/2 teaspoon salt
- 1 cup pumpkin puree
- 1/2 cup cream cheese, softened
- 1 cup powdered sugar
- Orange and green food coloring
- Chocolate sandwich cookies, crushed (for ‘dirt’)
- Pumpkin-shaped candies (for decoration)
Instructions
-
1Preheat the oven to 350°F (175°C). Grease and line a 9×13-inch baking pan with parchment paper.
-
2In a large bowl, whisk together melted butter and granulated sugar until smooth. Add eggs and vanilla extract, mixing well.
-
3Sift in flour, cocoa powder, and salt. Stir until just combined. Pour the batter into the prepared pan and smooth the top.
-
4Bake for 30-35 minutes or until a toothpick inserted in the center comes out with a few moist crumbs. Let cool completely.
-
5For the pumpkin frosting, beat together pumpkin puree, cream cheese, and powdered sugar until creamy. Tint with orange food coloring.
-
6Spread the pumpkin frosting over cooled brownies. Sprinkle crushed chocolate cookies on top for ‘dirt’ and decorate with pumpkin-shaped candies and green food coloring for vines.
CLICK FOR NUTRITION INFO
↑
Approximate Information for One Serving
Serving Size:
1 serving
Calories:
320 caloriescal
Protein:
4gg
Fat:
15gg
Saturated Fat:
0g
Trans Fat:
0g
Cholesterol:
0mg
Sodium:
0mg
Potassium:
0mg
Total Carbs:
45gg
Fiber:
0g
Sugar:
0g
Net Carbs:
0g
Vitamin A:
0
Vitamin C:
0mg
Calcium:
0mg
Iron:
0mg
Nutrition Disclaimers
Number of total servings shown is approximate. Actual number of servings will depend on your preferred portion sizes.
Nutritional values shown are general guidelines and reflect information for 1 serving using the ingredients listed, not including any optional ingredients. Actual macros may vary slightly depending on specific brands and types of ingredients used.
To determine the weight of one serving, prepare the recipe as instructed. Weigh the finished recipe, then divide the weight of the finished recipe (not including the weight of the container the food is in) by the desired number of servings. Result will be the weight of one serving.
Did you make this recipe?
Please consider Pinning it!!