Let’s Talk Air Fryer Chicken Breast (Yes, Again!)
Okay, so first off—can I just say that my air fryer is the only kitchen gadget that hasn’t ended up in the Land of Forgotten Appliances (looking at you, juicer from 2016). I started making air fryer chicken breast one Tuesday when we were absolutely starving and dinner needed to happen fast—like, ‘kids are melting down’ fast. Honestly, I wasn’t even sure it would work the first time. But holy smokes, it’s so juicy. Plus, no need to babysit the pan, which is a win in my book (and my feet).
Actually, there was this one time I accidentally left it a minute too long and we ended up with something closer to chicken jerky, but hey, even that was edible once I drenched it in ranch. Live and learn.
Why You’ll Love This (Or At Least Not Hate It)
I make this when I’ve got, like, 20 minutes and only one clean hand (don’t ask). My family goes bananas for it, especially when I use that smoked paprika. The best part? No greasy mess everywhere. I used to dread pan-frying chicken because, let’s be honest, the splatter is a real mood killer. But the air fryer keeps it all contained—hallelujah. And if you’re the type who forgets to thaw chicken, this actually works okay from frozen (not that I’d ever do that… ahem).
It’s also reliable. I’m notorious for overcooking chicken—seriously, my husband used to joke that I was prepping it for a NASA mission. But this method? Foolproof, mostly. Just don’t wander off to fold laundry. Again, live and learn.
What You’ll Need (And What You Can Swap)
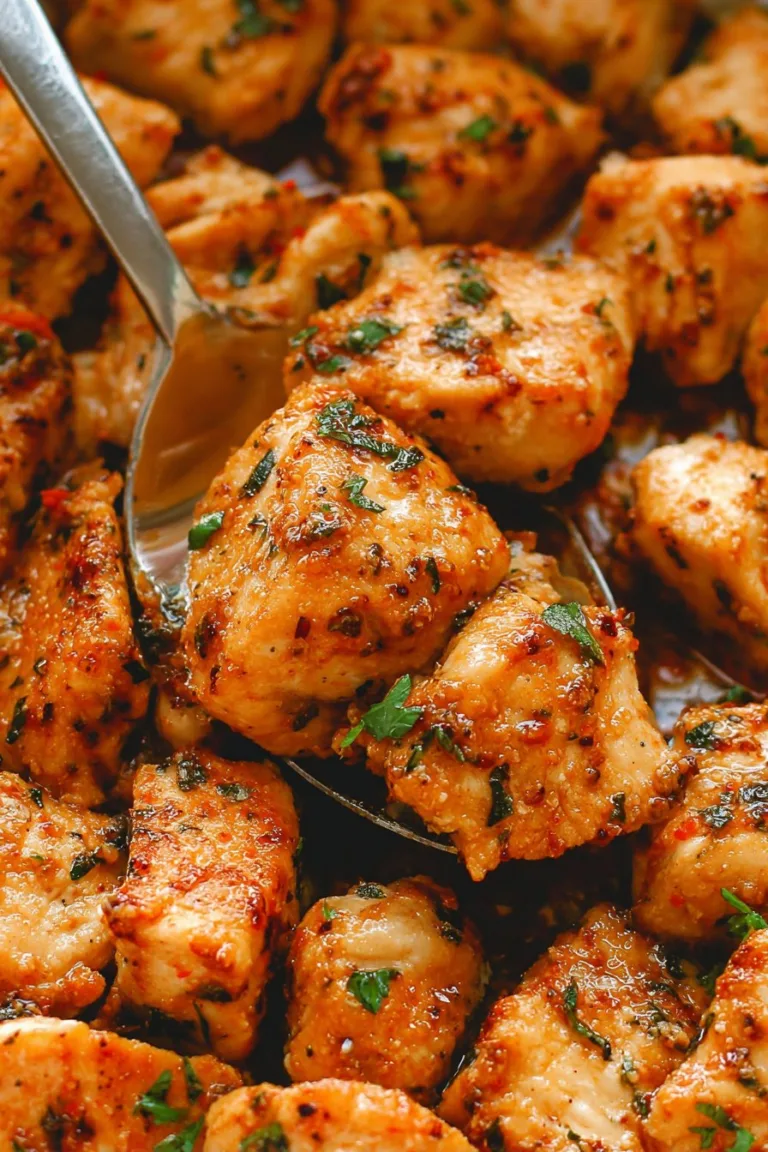
- 2 boneless, skinless chicken breasts (about 250g each)—sometimes I just grab whatever’s on sale, honestly.
- 1 tablespoon olive oil (I do use avocado oil sometimes if I’m feeling fancy; grandma swears by sunflower oil, but I can’t taste the difference.)
- 1 teaspoon garlic powder (or just a crushed clove if you like real bits—your call!)
- 1 teaspoon smoked paprika (regular paprika is fine, but smoked is the bee’s knees)
- 1/2 teaspoon salt (sea salt, table salt… probably don’t use bath salts though)
- 1/2 teaspoon black pepper
- Optional: pinch of chili flakes for heat, squeeze of lemon juice, Italian seasoning, whatever’s dying in your spice rack
How I Actually Do It (Don’t Stress the Details)
- If your chicken breasts are massive, butterfly them or pound them a bit flatter with a rolling pin—makes everything cook more evenly (I’ve tried skipping this when rushed and regretted it).
- Pat the chicken dry with some paper towel—this is where I usually get chicken juice everywhere and remember why I need more tea towels.
- Toss chicken in a bowl with olive oil, garlic powder, smoked paprika, salt, pepper, and any extras. There’s no need to be fussy—just mix it up so the chicken looks well coated. Sometimes I do this in a zip-top bag if I’m feeling organized, which is basically never.
- Preheat your air fryer to 195°C (about 385°F) for a couple of minutes. (Some people skip preheating, but actually, I find it works better if you don’t skip; the chicken cooks way more evenly.)
- Pop the chicken breasts in the basket in a single layer—don’t squish them too much. Cook for 8 minutes. This is where I usually sneak a taste of the seasoning if there’s any left over…
- Flip the chicken over (awkward tongs dance, beware) and cook 6-8 more minutes, depending on thickness. If they look a bit weird at this stage—kind of pale on the bottom—don’t panic. They’ll even out.
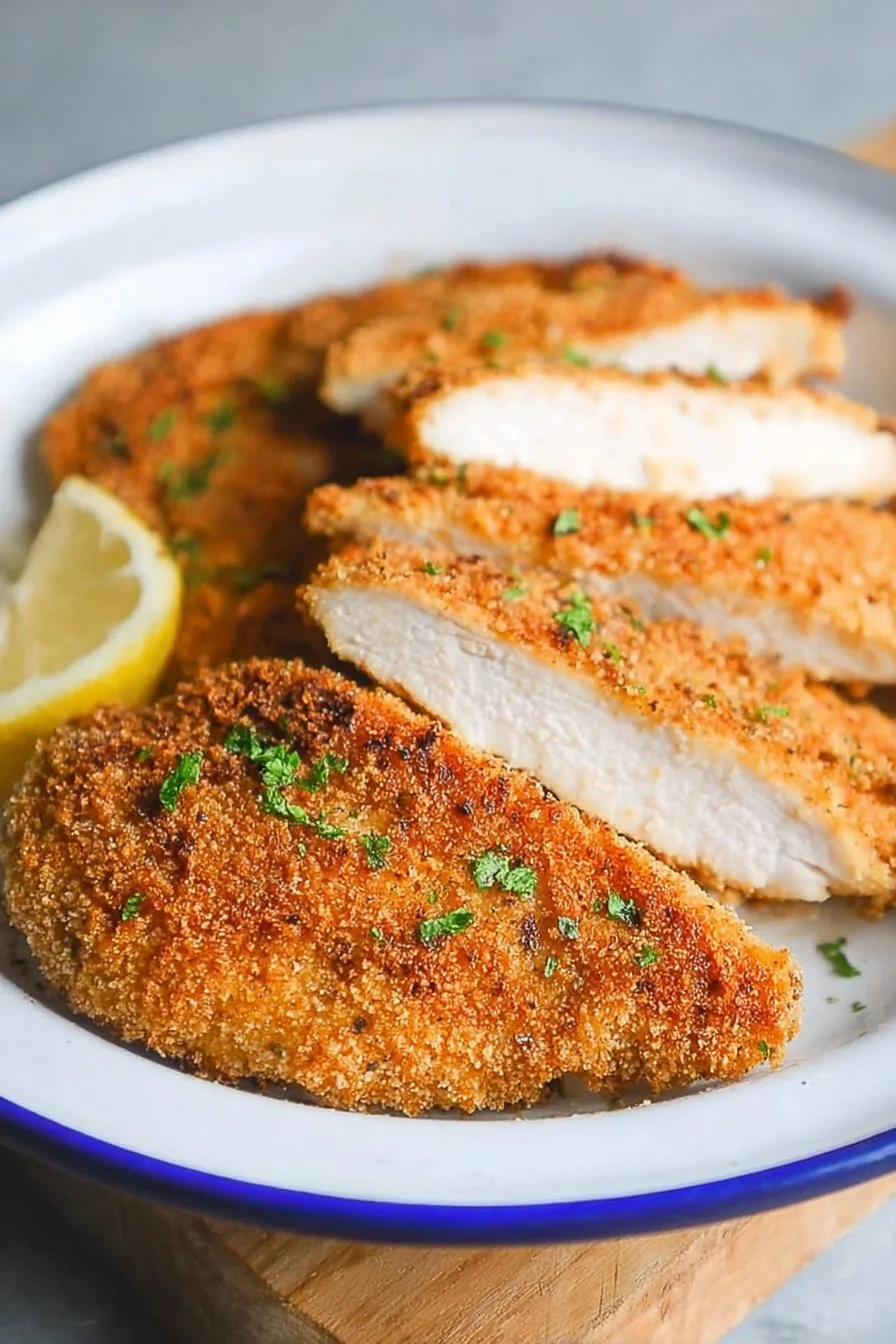
- Check for doneness: You want 75°C (165°F) in the thickest part. I sometimes just slice in and peek (not very chef-y, but it works for me).
- Let it rest for 5-ish minutes before slicing. Yes, you’ll want to dive in, but trust me, it’s juicier if you wait.
What I’ve Learned (a.k.a. Notes)
- If you skip the oil, the spices don’t stick as well and you get a sort of dusty chicken. Not great.
- Actually, boneless thighs work too, just reduce the cook time by a couple minutes.
- The smoke alarm has never gone off with this recipe! (Huge win in my book.)
- Don’t stress if you mess up the seasoning measurements. I rarely measure and it always turns out, as long as you don’t make it a salt lick.
Some Experiments—What Worked and What Didn’t
- I tried marinating the chicken in yogurt and curry spices once—awesome flavor, though the air fryer basket was a pain to clean.
- Once used maple syrup and mustard—tasty, but the sugar made it brown too quickly. Maybe add it right at the end if you go sweet.
- Lemon zest sounded great, but honestly, I couldn’t taste a difference. Probably user error.
What You Need (But Workarounds Exist, Promise)
- Air fryer (obviously), but if you don’t have one, a really hot oven (220°C/425°F-ish) plus a wire rack on a baking sheet works in a pinch. Not quite the same, but gets the job done.
- Tongs for flipping (or a fork and nerves of steel)
- Meat thermometer is handy, but sometimes I just cut and look. Don’t tell the food police.
How to Store It (If There’s Any Left)
Wrap leftovers up and keep in the fridge for up to 3 days. I find it’s actually better the next day in a sandwich—though honestly, in my house it never lasts more than a day! If you’re super organized, you can freeze sliced chicken for meal prep.
How We Eat It (And Maybe You Will Too)
We usually slice it up and pile onto salads, or serve with whatever veg is lurking in the crisper. Sometimes I’ll do a big bowl with rice, roasted broccoli, and a dollop of sriracha mayo—so good. My kids love it with ketchup (of course). Oh, and for a proper dinner, just add mashed potatoes and a quick gravy. Budget Bytes has some fun meal ideas if you want to jazz things up. Or, check out Skinnytaste’s version for other seasoning combos.
Lessons I’ve Learned (a.k.a. Pro Tips)
- I once tried rushing the flip because I was late for soccer pickup—big mistake. Flip at the halfway mark or you risk weird, soggy spots.
- Don’t crowd the basket. I did that once to save time, and half the chicken was steamed, not crispy.
- Letting it rest seems pointless, but the one time I skipped it, the juices ran everywhere and the chicken was kind of dry.
Real Questions I’ve Actually Gotten (FAQ)
- Can I use frozen chicken breasts? Yep—you’ll need to add a few minutes. It’s not ideal, but I’ve done it in a pinch. Just double check that it’s cooked all the way through.
- What if I don’t have paprika? No worries, just use whatever spices you like—cajun seasoning, Italian, or even taco seasoning. Honestly, it’s hard to mess up.
- How do I stop it getting dry? Biggest thing is not to overcook. If you’re nervous, start checking a couple minutes early! Or just slather with sauce if all else fails.
- Do I need to preheat my air fryer? I used to skip this, but actually, it does make a difference. Chicken turns out juicier and more evenly cooked in my experience.
- What should I serve with it? Anything! Salads, roast veggies, pasta, even just a big chunk of bread. I’ve even crammed leftovers into a wrap for lunch; not fancy, but it works.
And there you have it—my very real, somewhat rambling, slightly imperfect guide to air fryer chicken breast. If you try it, let me know how it goes, or if you find an even lazier way to do it, I’m all ears!
Ingredients
- 4 boneless, skinless chicken breasts
- 2 tablespoons olive oil
- 1 teaspoon garlic powder
- 1 teaspoon paprika
- 1/2 teaspoon dried oregano
- 1/2 teaspoon salt
- 1/2 teaspoon black pepper
- 1/2 teaspoon onion powder
Instructions
-
1Preheat the air fryer to 380°F (193°C) for 3 minutes.
-
2Pat the chicken breasts dry with paper towels. Brush both sides with olive oil.
-
3In a small bowl, mix together garlic powder, paprika, dried oregano, salt, black pepper, and onion powder.
-
4Sprinkle the seasoning mixture evenly over both sides of the chicken breasts.
-
5Place the chicken breasts in a single layer in the air fryer basket. Cook for 8 minutes, flip, and cook for another 7 minutes or until the internal temperature reaches 165°F (74°C).
-
6Remove from the air fryer and let rest for 5 minutes before slicing and serving.
Approximate Information for One Serving
Nutrition Disclaimers
Number of total servings shown is approximate. Actual number of servings will depend on your preferred portion sizes.
Nutritional values shown are general guidelines and reflect information for 1 serving using the ingredients listed, not including any optional ingredients. Actual macros may vary slightly depending on specific brands and types of ingredients used.
To determine the weight of one serving, prepare the recipe as instructed. Weigh the finished recipe, then divide the weight of the finished recipe (not including the weight of the container the food is in) by the desired number of servings. Result will be the weight of one serving.
Did you make this recipe?
Please consider Pinning it!!