Let Me Tell You About My Go-To Peach Breakfast Bake
Okay, so you know how there are some mornings where you just want something warm and a little bit sweet, but also not, like, a total sugar bomb? That’s exactly why I started making this Peach Breakfast Bake. Actually, the first time I made it was after a neighbor left a whole “peach avalanche” (her words, not mine) on my porch, and I needed to use them up fast. I had a mishmash of stale bread, some eggs, and zero patience for a complicated recipe. It turned out so good, I keep tinkering with it, but honestly, it’s one of those ‘dump, bake, and hope for the best’ recipes that somehow always works out. I once tried making it with canned peaches and—surprisingly—it still tasted like a summer morning, which is saying something for a rainy Tuesday in March.
Why You’ll Love This (Or, at Least, Why I Do)
I make this when I want my kitchen to smell like an actual bakery, but I don’t want to wear anything besides pajamas. My family goes crazy for it because it’s basically peach pie in breakfast form (but you’re totally allowed to eat it before 9am). And if you’re a fan of not washing a million dishes (same), this one’s a winner. I used to struggle with breakfast bakes that turned out either too soggy or just sad and dry, but this one’s pretty forgiving. Plus, if you get distracted and leave it in the oven a tad too long, it just gets a bit crispier—so maybe that’s a happy accident?
What You’ll Need (But Don’t Stress About Perfection)
- 5–6 ripe peaches, sliced (I sometimes use canned if that’s all I’ve got—just drain ’em first. Frozen works too, in a pinch.)
- 6 cups cubed bread (any bread works, honestly. My gran insisted on brioche, but regular sandwich bread or even a stale baguette is fine. I once used hot dog buns. No regrets.)
- 4 large eggs
- 1 1/2 cups whole milk (or almond milk—oat milk is also dreamy here)
- 1/3 cup granulated sugar (brown sugar makes it a bit more ‘caramelly’)
- 2 teaspoons vanilla extract
- 1 teaspoon cinnamon (go wild with nutmeg or cardamom if you’re feeling fancy)
- Pinch of salt
- 2 tablespoons melted butter (I’ve forgotten this step before and, honestly, it was still tasty)
- Optional: A handful of chopped pecans or almonds on top, for crunch
How I Actually Put This Together (The Lazy Way)
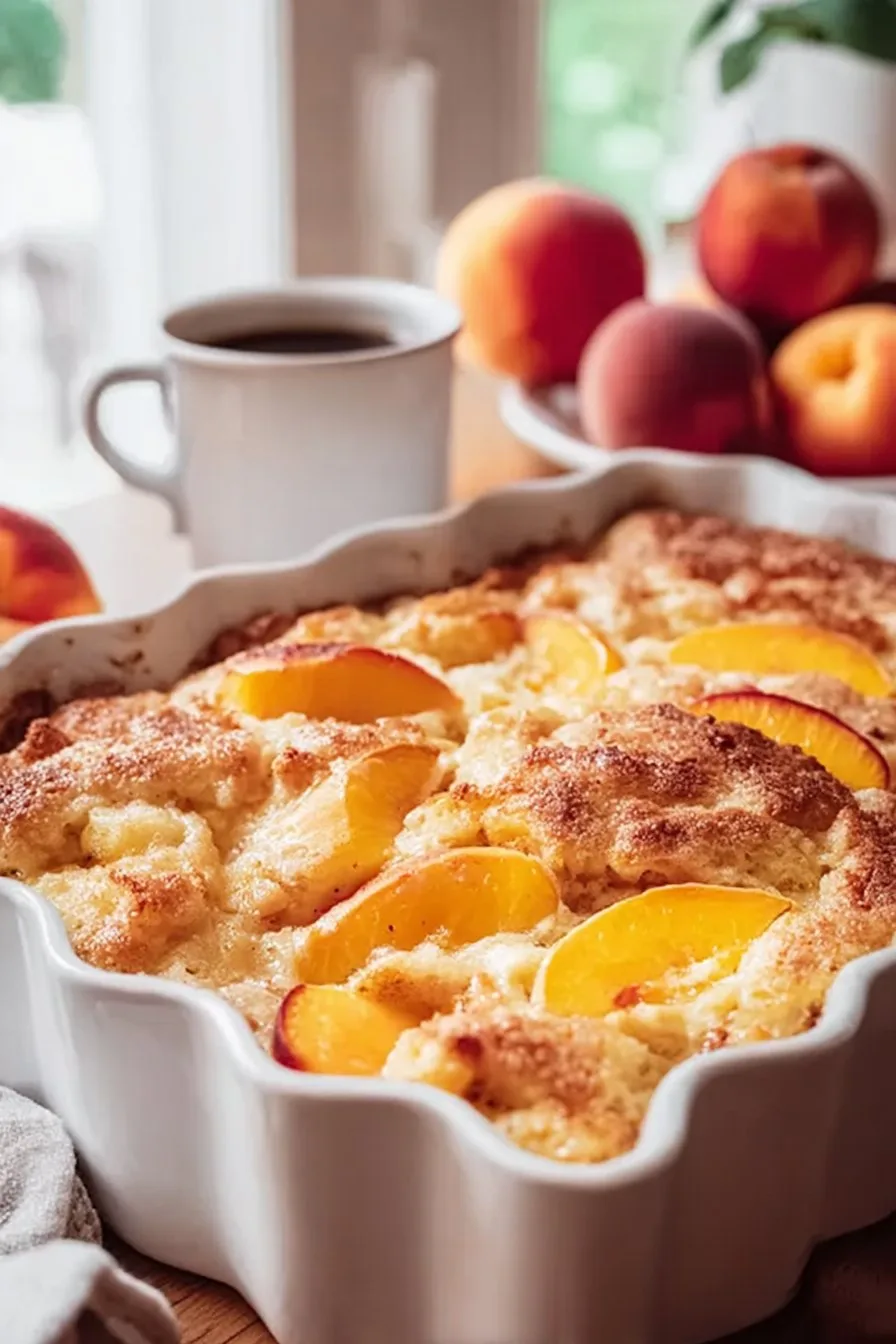
- Preheat your oven to 350°F (about 180°C, if you’re on that side of the pond). Grease a 9×13-inch baking dish—or whatever pan you have; I’ve done this in a cast iron skillet and even a cake pan when I couldn’t find the “right” one.
- Layer the bread cubes in the dish, and scatter your peach slices over the top. This is where I usually sneak a peach or two—quality control, obviously.
- In a big bowl, whisk together the eggs, milk, sugar, vanilla, cinnamon, and salt. Pour this mixture evenly over the bread and peaches. If it looks like it won’t all fit, just pour slowly and let it soak in a bit.
- Drizzle the melted butter over the whole shebang. Sprinkle your nuts on top if you’re feeling extra.
- Let it sit for about 10 minutes so the bread can soak up all that custardy goodness. (On second thought, if you’re in a rush, you can just bake it right away. I’ve done both, and it’s never a disaster.)
- Bake for 40–50 minutes, until the top is golden and the middle doesn’t jiggle too much. Don’t worry if it looks a bit weird at first—trust the process.
- Let it rest for 5–10 minutes before diving in. I never wait that long, but it’s less lava-hot if you do.
Little Notes from My (Messy) Kitchen
- If your bread is super fresh, let it sit out for an hour or toss it in the oven for a few minutes to dry out—it soaks up the custard way better that way.
- I once tried using only egg whites to be “healthy” (don’t do it, it was bland and sad).
- Forgotten the butter? Actually, it still works, but the top might not get as toasty.
Things I’ve Tried to Mix It Up (And One That Flopped)
- Berries: Tossed in a handful of blueberries once—instant hit!
- Apple slices: Pretty good, but honestly, nothing beats peaches for me.
- Chocolate chips: My kids loved it; I felt it was a bit much for breakfast (but hey, you do you).
- Gluten-free bread: Worked fine, just a bit more crumbly.
- Once tried with stale croissants: Next-level delicious, but pretty decadent. Wouldn’t do it every time.
- Adding cream cheese blobs: Too heavy. Maybe I just did it wrong?
What You Need (But Don’t Panic If You’re Missing Something)
- 9×13″ baking dish (or a deep cake pan, or even a Dutch oven if that’s what you’ve got—just don’t use a cookie sheet, trust me.)
- Big mixing bowl (though I once used a large salad bowl—no harm done)
- Whisk or fork (I always lose my whisk, so a fork is my go-to)
If you want to see some fun kitchen gadgets I love, I recommend checking out Serious Eats’ kitchen tools guide—I have opinions, but that list is pretty thorough.
How to Store This (If You Even Have Leftovers)
This keeps in the fridge for about 2–3 days. I just cover the whole dish with cling film or shove it into a big container. Reheat slices in the microwave or oven. Though honestly, in my house it never lasts more than a day, unless I hide a piece at the back of the fridge behind something scary—like that jar of pickled onions.
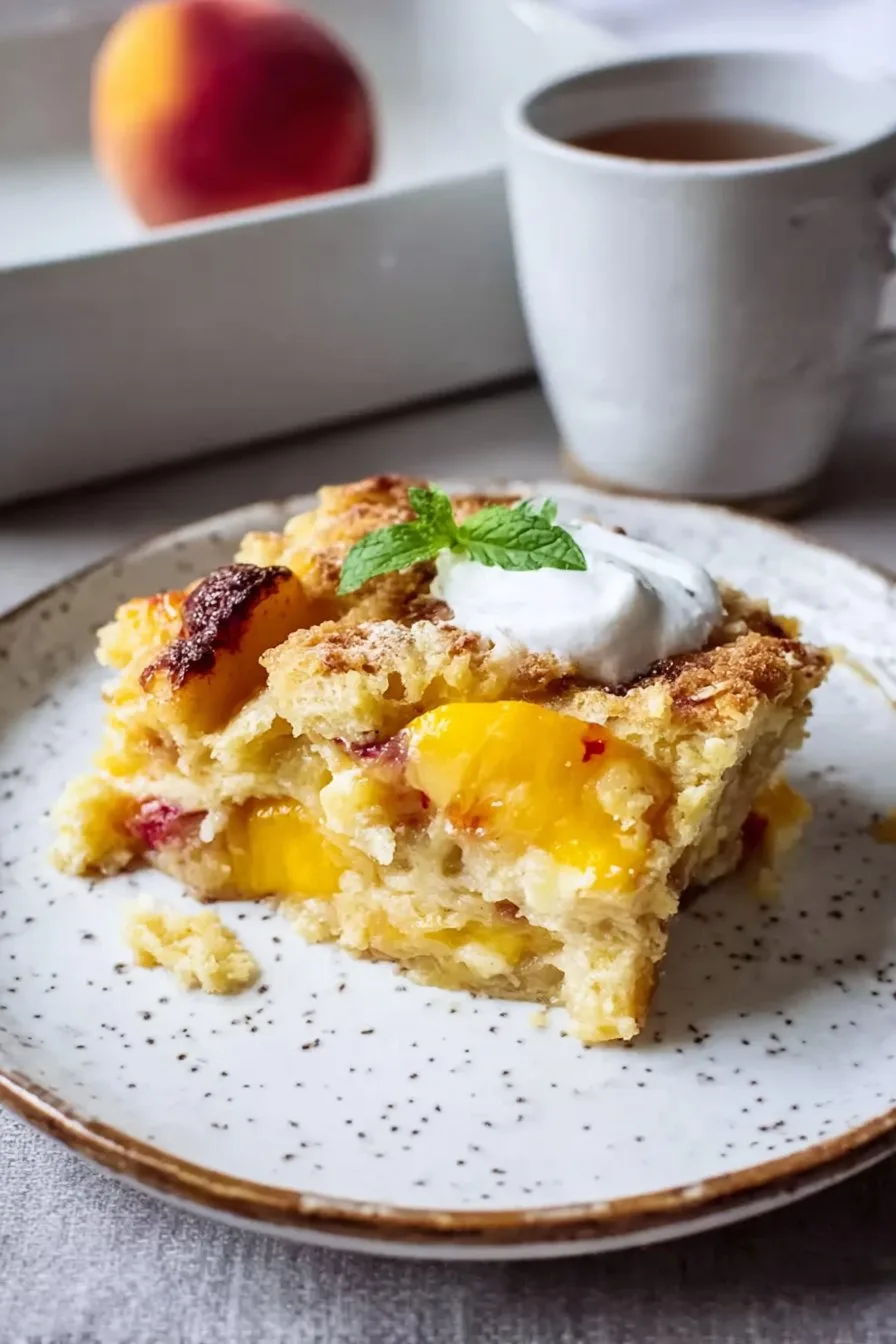
How I Like to Serve It (And a Family Quirk)
I love this warm, topped with a dollop of Greek yogurt, but my kids swear by a dusting of powdered sugar. On Sundays, we sometimes drizzle a bit of maple syrup on top, then argue about who gets the crustiest corner piece. It’s also pretty good cold the next day, if you’re into that sort of thing (I am).
Lessons I’ve Learned the Hard Way (Pro Tips)
- I once tried rushing the soaking step and regretted it because the bottom turned out dry—so give it a few minutes, it’s worth it.
- Don’t add too much fruit, or it’ll get soggy. Actually, I find it works better if you keep a good bread-to-peach ratio—maybe 1 peach for every cup of bread?
- Let it sit before slicing, or you’ll be chasing runaway bread cubes around your plate.
Your Questions (And My Not-So-Perfect Answers)
- Can I make this ahead? Absolutely! I sometimes assemble it the night before—just cover and chill, then bake in the morning. If it seems too dry when you pop it in the oven, drizzle a bit more milk on top.
- Can I use nectarines instead of peaches? Yep, I’ve done it, and honestly couldn’t tell the difference (I mean, unless you’re a peach expert, who is?).
- What if I’m out of eggs? I’ve heard you can use flaxseed “eggs” (https://minimalistbaker.com/how-to-make-a-flax-egg/) in baked goods, but I haven’t tried it here. If you do, let me know how it goes!
- Can I freeze this? Sure, but the texture gets a bit mushier after thawing. Not my favorite, but totally edible.
- Is it sweet enough for dessert? Oh, for sure. Add a scoop of ice cream and call it a day!
And hey, if you’re looking for more cozy breakfast ideas, I love browsing King Arthur’s baking recipes for inspiration. Fair warning, you might end up with a longer breakfast wishlist than you bargained for.
Anyway, let me know if you try this Peach Breakfast Bake, or if you come up with some wild new twist I need to try. Happy baking, mate!
Ingredients
- 4 cups cubed day-old bread
- 2 cups sliced fresh peaches (or drained canned peaches)
- 4 large eggs
- 1 1/2 cups milk
- 1/2 cup granulated sugar
- 1 teaspoon vanilla extract
- 1/2 teaspoon ground cinnamon
- 2 tablespoons unsalted butter, melted
Instructions
-
1Preheat the oven to 350°F (175°C). Grease a 9×13-inch baking dish.
-
2Spread the cubed bread evenly in the prepared baking dish. Top with sliced peaches.
-
3In a large bowl, whisk together eggs, milk, sugar, vanilla extract, and cinnamon until well combined.
-
4Pour the egg mixture evenly over the bread and peaches. Gently press down to soak the bread.
-
5Drizzle melted butter over the top. Bake for 40 minutes, or until golden and set.
-
6Let cool slightly before serving. Enjoy warm.
Approximate Information for One Serving
Nutrition Disclaimers
Number of total servings shown is approximate. Actual number of servings will depend on your preferred portion sizes.
Nutritional values shown are general guidelines and reflect information for 1 serving using the ingredients listed, not including any optional ingredients. Actual macros may vary slightly depending on specific brands and types of ingredients used.
To determine the weight of one serving, prepare the recipe as instructed. Weigh the finished recipe, then divide the weight of the finished recipe (not including the weight of the container the food is in) by the desired number of servings. Result will be the weight of one serving.
Did you make this recipe?
Please consider Pinning it!!