Let Me Tell You About This Brussels Sprouts and Bacon Thing…
Okay, so I first made this when I was literally out of ideas and the fridge was like, hey, remember me? All I had was a sad bag of Brussels sprouts and some bacon (you know, the survival kit). I figured, why not? Worst case, I’d have something to snack on while I microwaved pizza. Turns out, this dish is the opposite of a flop. Now it’s my go-to when I need something that tastes like actual effort, but takes about as much brainpower as tying my shoes (and sometimes, honestly, that’s questionable too).
Why You’ll Love This (Or At Least Not Hate It)
I make this when I want to look fancy without doing, well, fancy things. My family goes a bit bonkers for it, especially when the sprouts get those crispy, almost burnt bits — you know what I mean? (If you don’t, you will.) Also, if you’re the type who usually dreads Brussels sprouts, trust me, bacon changes everything. I used to be in your shoes. Oh, and if you’ve ever had someone whinge about veggie dishes, this’ll silence them — at least while they’re chewing.
What You’ll Need (And What I Sometimes Swap In)
- 500g (about a pound) Brussels sprouts (I’ve used frozen in a pinch — they work, just not as crispy)
- 4-6 slices of streaky bacon (I’ve tried turkey bacon; it’s alright, but not the same)
- 1 tablespoon olive oil or whatever oil you’ve got — honestly, I’ve used melted butter too, because why not?
- Salt and black pepper to taste (My gran swore by Maldon salt, but table salt is fine, no judgment)
- 1-2 cloves garlic, minced (optional, but yum — or use garlic powder if you can’t be bothered with chopping)
- A small squeeze of lemon (optional, but I like the zing)
- Handful of grated parmesan (sometimes I skip this if I’m feeling lazy or out of cheese)
How I Throw This Together (Method-ish)
- Preheat your oven to 200°C (about 400°F). If you forget, don’t panic, just tack on a few minutes later.
- Give those Brussels sprouts a quick rinse, trim the ends (sometimes I just snap them off with my fingers if I’m in a hurry), and halve them. If they’re massive, quarter ‘em.
- Slice your bacon into strips. I use kitchen scissors because I’m lazy and it’s faster, but a knife works too.
- Toss the sprouts and bacon on a baking tray. Drizzle with olive oil, sprinkle with salt, pepper, and garlic (if you’re doing it). Get your hands in there and mix it all up — this is where I usually sneak a little taste of the bacon. (Don’t judge!)
- Spread everything out so it’s in one layer. If it’s a bit crowded, use two trays — trust me, crowded sprouts steam instead of crisp. And nobody wants soggy sprouts.
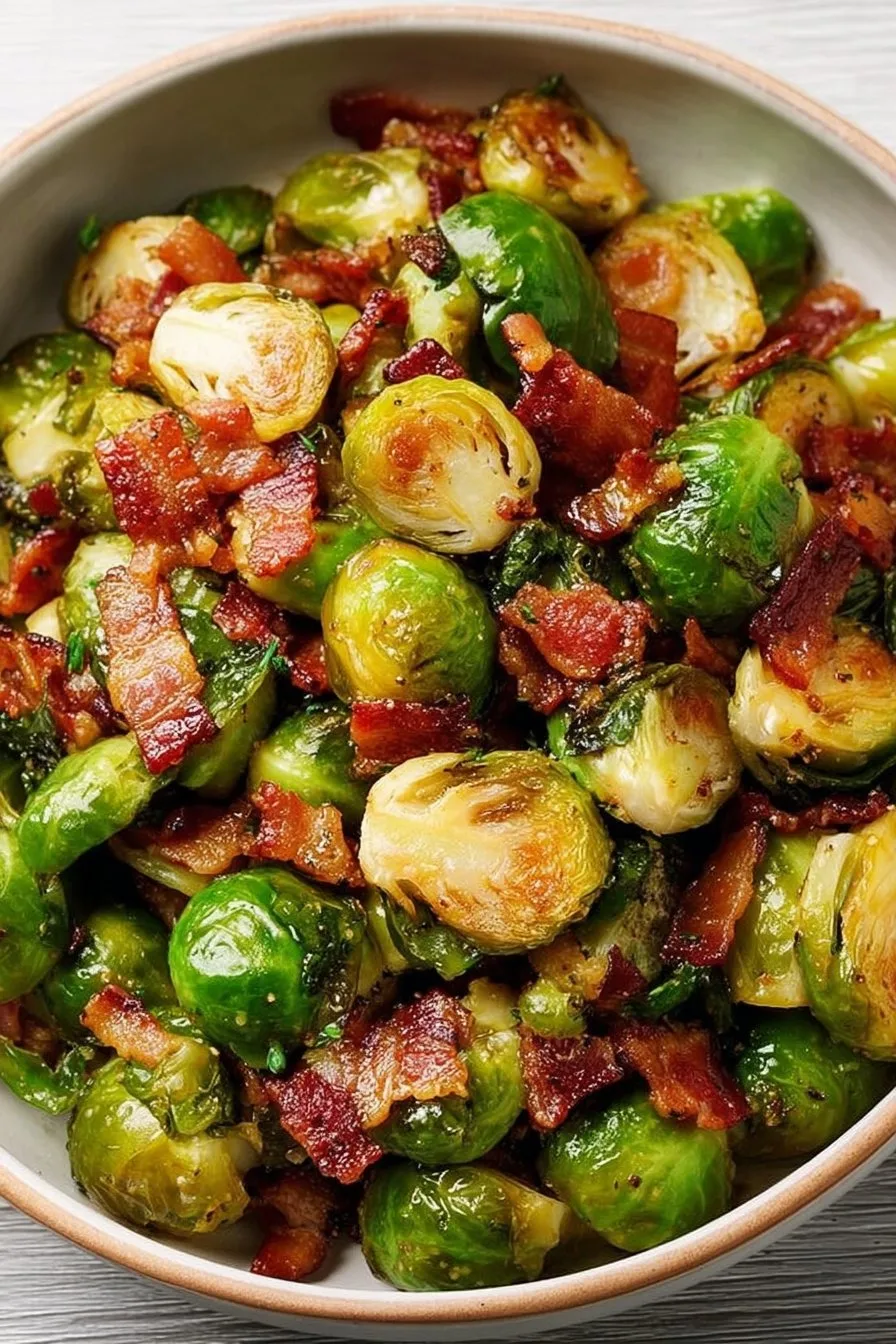
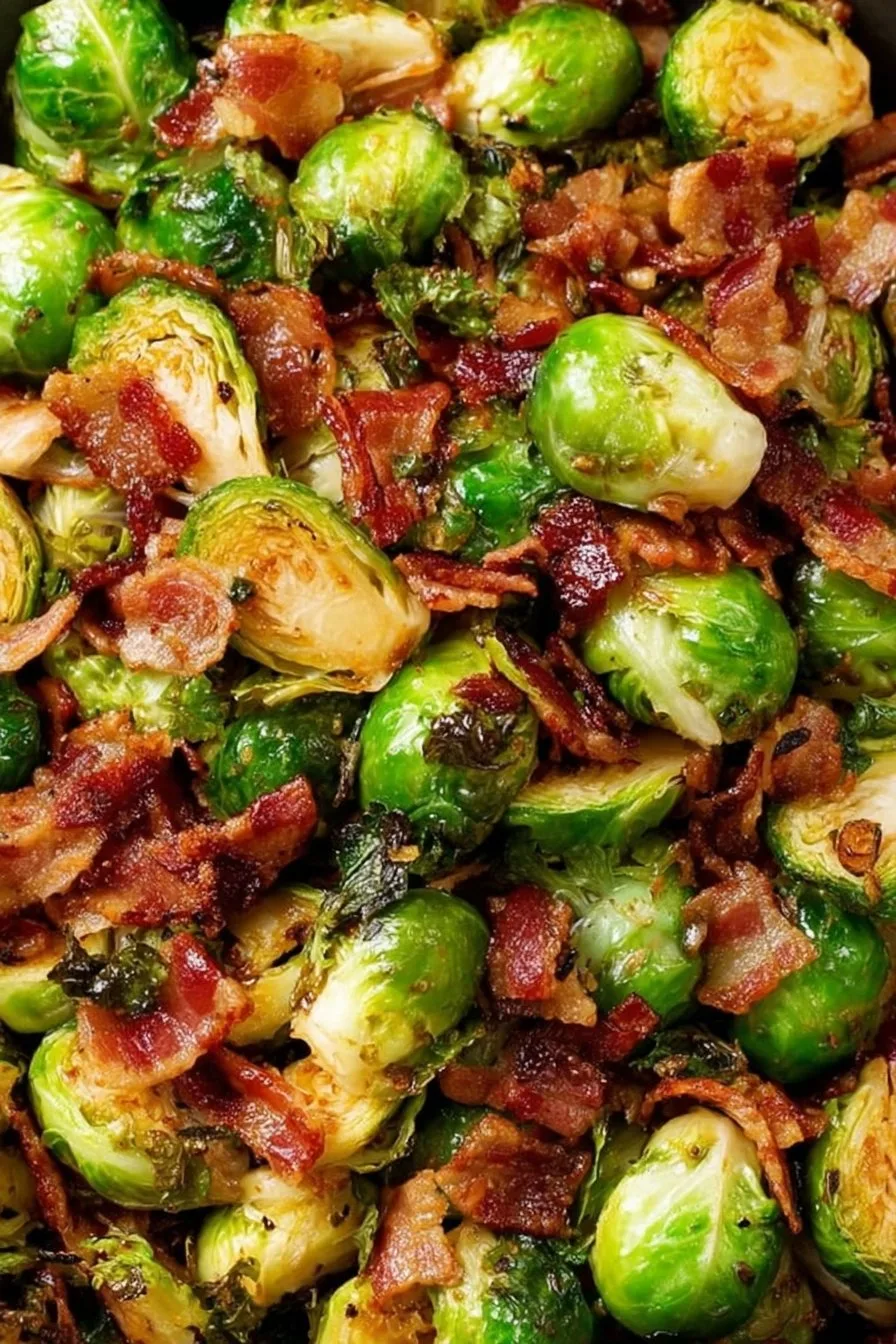
- Roast for about 20 to 25 minutes. Give it a good shake or stir halfway through — if you forget, it’s not the end of the world. You want the bacon crispy and the sprouts golden with those dark, almost burnt bits. If you like them very crispy, leave them in for another 5 mins.
- Pull them out, add a squeeze of lemon and a handful of parmesan, if you’re feeling cheffy. Toss it all together. Done!
Bits I’ve Learned (Probably More Than You Need to Know)
- If you accidentally overcrowd the tray, just accept they’ll be softer. Still tasty, just, not AS good. Lesson learned the hard way.
- Once I forgot to pat my sprouts dry; they steamed. Don’t do that. Dry them like you mean it.
- Don’t overdo the salt — bacon is already salty (ask me how I know…)
Here’s What I’ve Tried (The Good, the Bad, the Weird)
- Add Nuts: Chopped walnuts or pecans, toasted on top. Crunchy, v. nice.
- Spicy Kick: Sprinkle chili flakes before roasting. (Love it, but my mum always complains it’s “too lively.”)
- Maple Drizzle: I added a little maple syrup once; pretty tasty! But don’t go overboard or it’s dessert territory.
- Don’t Try: Balsamic vinegar before roasting — it got weirdly sticky and burned. If you love balsamic, just drizzle after baking.
Gear I Use (But Improvise If You Have To)
I use a big rimmed baking tray — just one of those basic metal ones. If you’ve only got a glass dish, that works, but the sprouts might take a bit longer to crisp. Oh, and if you don’t have kitchen scissors, a knife will do. Honestly, once I used a bread knife because everything else was in the dishwasher (don’t recommend, but it kinda worked).
How To Store Leftovers (In Theory)
Technically, you can pop leftovers in an airtight container and stick them in the fridge; they’ll be fine for 2-3 days. They reheat nicely in a frying pan. But truthfully, in my house, there’s barely enough left to bother. If you do have leftovers, I think they taste even better on day two — just don’t tell my kids, or they’ll beat me to them.
How I Serve It (Traditions & Preferences)
I usually plop the tray right in the middle of the table and let everyone dive in — no fancy plating. Sometimes it ends up as a side to roast chicken; other times, I just eat it with bread and call it lunch. My dad likes his with a fried egg on top (a bit odd, but it works), so go wild.
Things I Wish I’d Known (My Not-So-Secret Pro Tips)
- I once tried rushing the roasting time. Nope! The sprouts were tough and the bacon chewy — not ideal. Patience actually pays off here.
- If you don’t dry the sprouts well, they go soggy. Now I practically sing at them with a tea towel.
- Oh, and don’t skip the halfway stir. Trust me, half the tray will burn before the rest is cooked otherwise.
So, Here’s What People Keep Asking Me
- Can I do this on the stovetop instead? Sure! Start with the bacon in a big skillet, toss in the sprouts, and pan fry till crispy. But, honestly, the oven’s easier because you don’t have to babysit it. (Check out this skillet method from Serious Eats if you’re curious!)
- Can I use pancetta instead of bacon? Absolutely. Actually, it’s even fancier if you do. Same method, just a little more, uh, continental flair.
- Does this freeze well? Eh, not really. The texture gets a bit sad after freezing, but if you’re not picky, go for it.
- Am I supposed to eat the weird outer leaves? I do! They get super crispy, almost like chips. If you don’t like them, just pick them off after roasting.
- What if I hate Brussels sprouts? Make this anyway. If you still hate them, at least you tried. Or, just make extra bacon (no one’s ever complained).
Oh, quick side note: if you want more ways to jazz up veggies (or you just like the idea of bacon with everything — honestly, who doesn’t?), I found this Smitten Kitchen recipe super inspiring. And if you’re curious about the science-y side of why roasting makes sprouts taste less… cabbage-y, Bon Appétit has a fun read.
If you give this a go, let me know how it turns out (or what you swap in — I’m always looking for new ideas, especially if you think you’ve cracked the code on even crispier bits).
Ingredients
- 1 lb Brussels sprouts, trimmed and halved
- 6 slices bacon, chopped
- 2 tablespoons olive oil
- 2 cloves garlic, minced
- 1/2 teaspoon salt
- 1/4 teaspoon black pepper
- 1 tablespoon balsamic vinegar
- 1/4 teaspoon red pepper flakes (optional)
Instructions
-
1In a large skillet over medium heat, cook the chopped bacon until crispy, about 5-7 minutes. Remove bacon with a slotted spoon and set aside, leaving the bacon fat in the skillet.
-
2Add olive oil to the skillet with the bacon fat. Add the Brussels sprouts, cut side down, and cook for 5 minutes without stirring until browned.
-
3Stir in the minced garlic, salt, black pepper, and red pepper flakes (if using). Continue to cook, stirring occasionally, for another 7-8 minutes until the Brussels sprouts are tender.
-
4Return the cooked bacon to the skillet and drizzle with balsamic vinegar. Toss everything together and cook for 1-2 more minutes.
-
5Serve hot as a side dish and enjoy!
CLICK FOR NUTRITION INFO
↑
Approximate Information for One Serving
Serving Size:
1 serving
Calories:
210 caloriescal
Protein:
8gg
Fat:
14gg
Saturated Fat:
0g
Trans Fat:
0g
Cholesterol:
0mg
Sodium:
0mg
Potassium:
0mg
Total Carbs:
13gg
Fiber:
0g
Sugar:
0g
Net Carbs:
0g
Vitamin A:
0
Vitamin C:
0mg
Calcium:
0mg
Iron:
0mg
Nutrition Disclaimers
Number of total servings shown is approximate. Actual number of servings will depend on your preferred portion sizes.
Nutritional values shown are general guidelines and reflect information for 1 serving using the ingredients listed, not including any optional ingredients. Actual macros may vary slightly depending on specific brands and types of ingredients used.
To determine the weight of one serving, prepare the recipe as instructed. Weigh the finished recipe, then divide the weight of the finished recipe (not including the weight of the container the food is in) by the desired number of servings. Result will be the weight of one serving.
Did you make this recipe?
Please consider Pinning it!!